Coby DP850-1G User Manual - Page 14
Creating Slideshows
 |
UPC - 716829908501
View all Coby DP850-1G manuals
Add to My Manuals
Save this manual to your list of manuals |
Page 14 highlights
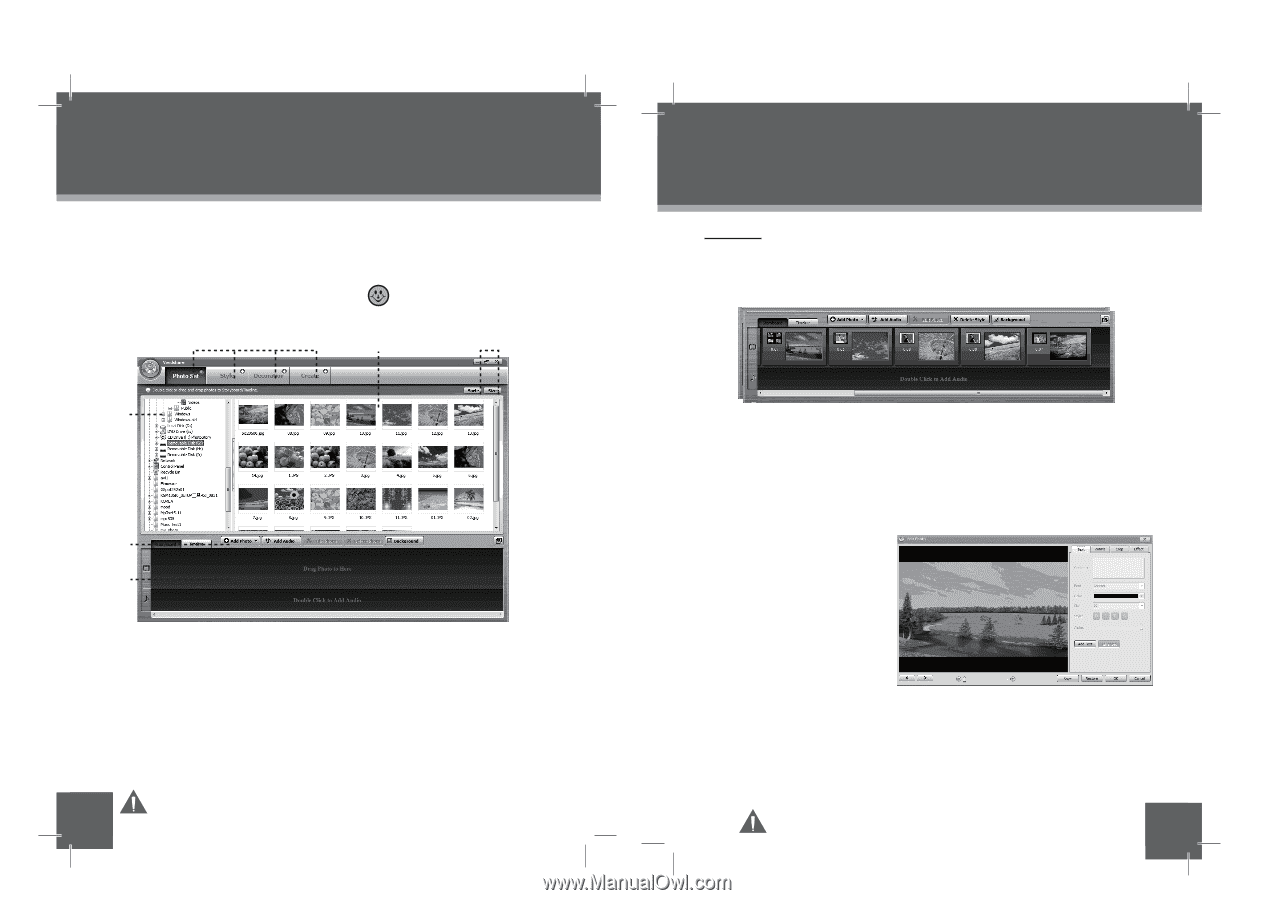
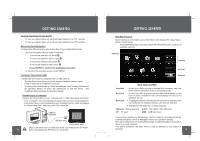
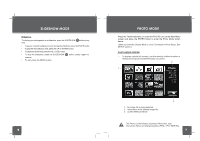
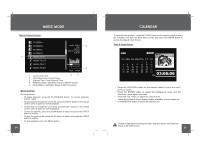
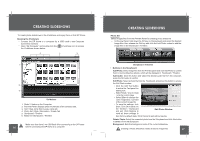
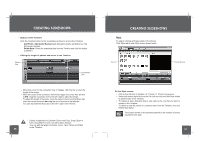
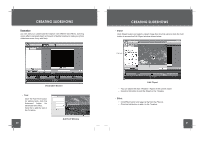
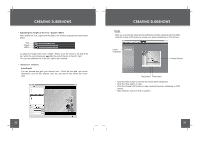
CREATING SLIDESHOWS To create photo slideshows in the Vividshare and enjoy them on this DP frame. Opening the Vividshare • Connect the DP frame to a computer by a USB cable ( see Computer Connection section). • Open "My Computer" and double-click the Vividshare icon to access the Vividshare shown below. 4 2 3 1 6 5 Vividshare 1. Disks / Folders on the Computer. 2. Preview Panel: displays photo thumbnails of the selected disk. 3. Sort / Size: sorts files by size, name etc. 4. Photo Set / Style / Decoration / Create Tab 5. Storyboard / Timeline 6. Buttons in Storyboard / Timeline Make sure that there's no USB flash drive connecting to the DP frame 26 before connecting the DP frame to a computer. CREATING SLIDESHOWS Photo Set Select images files from the Preview Panel for creating photo slideshow. • In Preview Panel, hold down the Ctrl key on the keyboard and select the desired image files, then release the Ctrl key and click the Add Photo button to add the image files in the Storyboard / Timeline. Storyboard / Timeline • Buttons in the Storyboard Add Photo: Select image files from the Preview panel and click Add Photo to confirm them to be the slideshow photos, which will be displayed in Storyboard / Timeline. Add Audio: Click this button and select the desired audio file from the computer, press the OK button to confirm. Edit Photo: Select a photo file from the Storyboard, and press this button to access the Edit Photo window. • Click the Add Text button to active the Text panel for adding text. • Select Rotate / Crop to rotate / crop the current image. • Select Effect to change the color / brightness / contrast of the current image file. • To save the settings, click Save. Click OK to save it in the Timeline / Storyboard and exit. Click Restore to reset all these settings to Edit Photo Window their factory default state. Click Cancel to exit without saving. Delete Photo: Select the unwanted photo from the Storyboard and click this button to delete it from the Storyboard. Background: Sets the background color of the current slideshow. Creating a Photo Slideshow needs at least 6 image files. 27
-
 1
1 -
2
-
3
-
4
-
5
-
6
-
7
-
8
-
 9
9 -
 10
10 -
 11
11 -
 12
12 -
 13
13 -
 14
14 -
 15
15 -
 16
16 -
 17
17 -
 18
18 -
 19
19 -
20
-
21
-
22
-
23
-
24
-
25
 |
 |