Coby DP850-1G User Manual - Page 8
Getting Started - picture frame
 |
UPC - 716829908501
View all Coby DP850-1G manuals
Add to My Manuals
Save this manual to your list of manuals |
Page 8 highlights
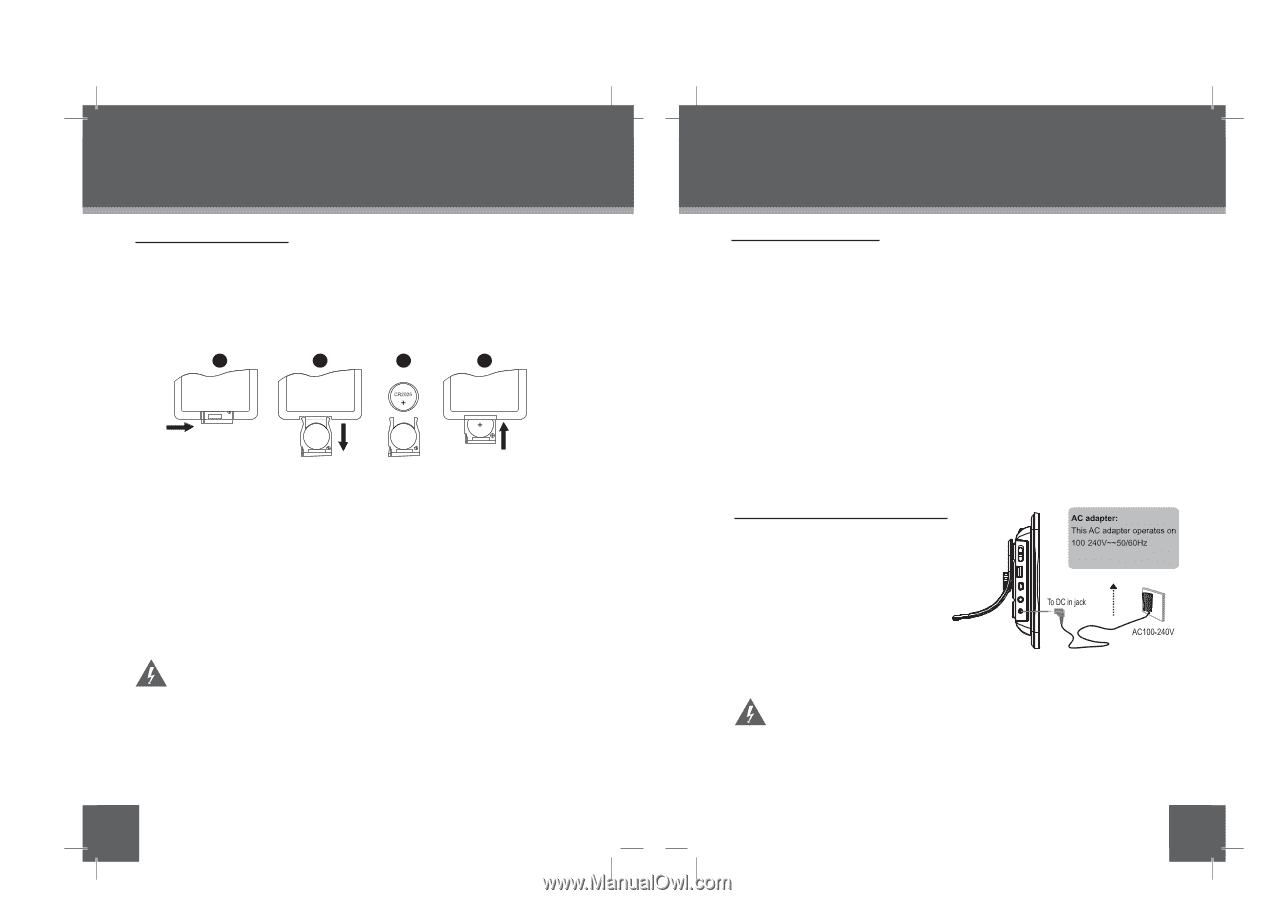
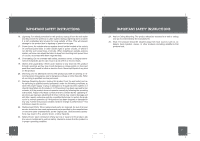
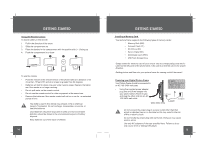
GETTING STARTED Using the Remote Control To load a battery in the remote: 1. Pull in the direction of the arrow 2. Slide the compartment out 3. Place the battery in the compartment with the positive side ( + ) facing up 4. Push the compartment in to close 1 2 3 4 To use the remote: • Point the remote at the remote sensor of the photo frame at a distance of no more than 15 feet (15″) and at an angle no greater than 60 degrees. • Batteries will last for about one year under typical usage. Replace the batteries if the remote is no longer working. • Do not spill water on the remote control. • Do not use the remote control for other equipment at the same time. • Remove the batteries if the remote control will not be in use for an extended period of time. The battery used in this device may present a fire or chemical hazard if mistreated. Do not recharge, disassemble, incinerate, or heat the batteries. Used batteries should be disposed of safely and not incinerated. Attention should be shown to the environmental aspects of battery disposal. Keep batteries out of the reach of children. 14 GETTING STARTED Installing a Memory Card Your picture frame supports the following types of memory cards: • Memory Stick (MS) • Compact Flash (CF) • XD-Picture (XD) • Secure Digital (SD) • Multi Media Card (MMC) • USB Flash Storage Drive Simply insert the memory card of your choice into its corresponding card slot located on the left panel of the photo frame. Take care to orient the card in the proper direction. Getting photos and files onto your picture frame for viewing couldn't be easier! Powering your Digital Picture Frame Your Picture Frame should be connected to an AC 100-240V wall outlet. • Using the supplied power adapter, plug one end of the adapter into your photo frame's Power In jack and plug the other end into an AC 100-240V wall outlet. DC OUT: 9V 1.5A DP850 / DP852 / DP854 Do not connect the power plug to a power outlet other than that which is indicated here or on the label as this may result in the risk of fire or electric shock. Do not handle the power plug with wet hands. Doing so may cause electric shock. Use only AC adapters of the type specified here. Failure to do so may cause a fire or damage the player. 15
-
 1
1 -
2
-
 3
3 -
 4
4 -
 5
5 -
 6
6 -
 7
7 -
 8
8 -
 9
9 -
 10
10 -
 11
11 -
 12
12 -
 13
13 -
14
-
15
-
16
-
17
-
18
-
19
-
20
-
21
-
22
-
23
-
24
-
25
 |
 |