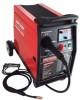
Craftsman 30084N Operation Manual - Page 20
Replacing Switch And/Or Head Tube
 |
UPC - 055249070420
View all Craftsman 30084N manuals
Add to My Manuals
Save this manual to your list of manuals |
Page 20 highlights
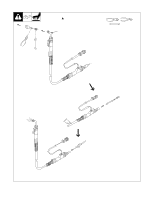
4-5. Replacing Switch And/Or Head Tube Y Disconnect gun first. 1 Remove handle locking nut. 4 Secure head tube in vice. 3 Slide handle. 2 Remove switch housing. Note: If installing new switch, push switch lead connectors onto terminal of new switch (polarity is not important). Install switch back into handle, and secure with handle locking nut. If replacing head tube, continue to end of figure. 5 Loosen jam nut. Remove from vice and turn head tube out by hand. 6 Install existing shock washer onto new head tube. Hand-tighten head tube into connector cable. 7 Place head tube in vice and tighten until nuts are tight. 8 Remove from vice. Reposition handle and install switch housing. Secure with handle locking nut. Tools Needed: 3/4 in OM-194 199 Page 17 Ref. ST-800 795-C
-
 1
1 -
2
-
3
-
4
-
5
-
6
-
7
-
8
-
9
-
10
-
11
-
12
-
13
-
14
-
 15
15 -
 16
16 -
 17
17 -
 18
18 -
 19
19 -
 20
20 -
 21
21 -
 22
22 -
 23
23 -
 24
24 -
 25
25 -
26
-
27
-
28
-
29
-
30
-
31
-
32
-
33
-
34
-
35
-
36
-
37
-
38
-
39
-
40
-
41
-
42
-
43
-
44
-
45
-
46
-
47
-
48
-
49
-
50
-
51
-
52
-
53
-
54
-
55
-
56
-
57
-
58
-
59
-
60
-
61
-
62
-
63
-
64
-
65
-
66
-
67
-
68
 |
 |
