D-Link DCS-2000 Product Manual
D-Link DCS-2000 Manual
 |
View all D-Link DCS-2000 manuals
Add to My Manuals
Save this manual to your list of manuals |
D-Link DCS-2000 manual content summary:
- D-Link DCS-2000 | Product Manual - Page 1
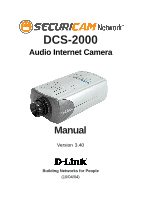
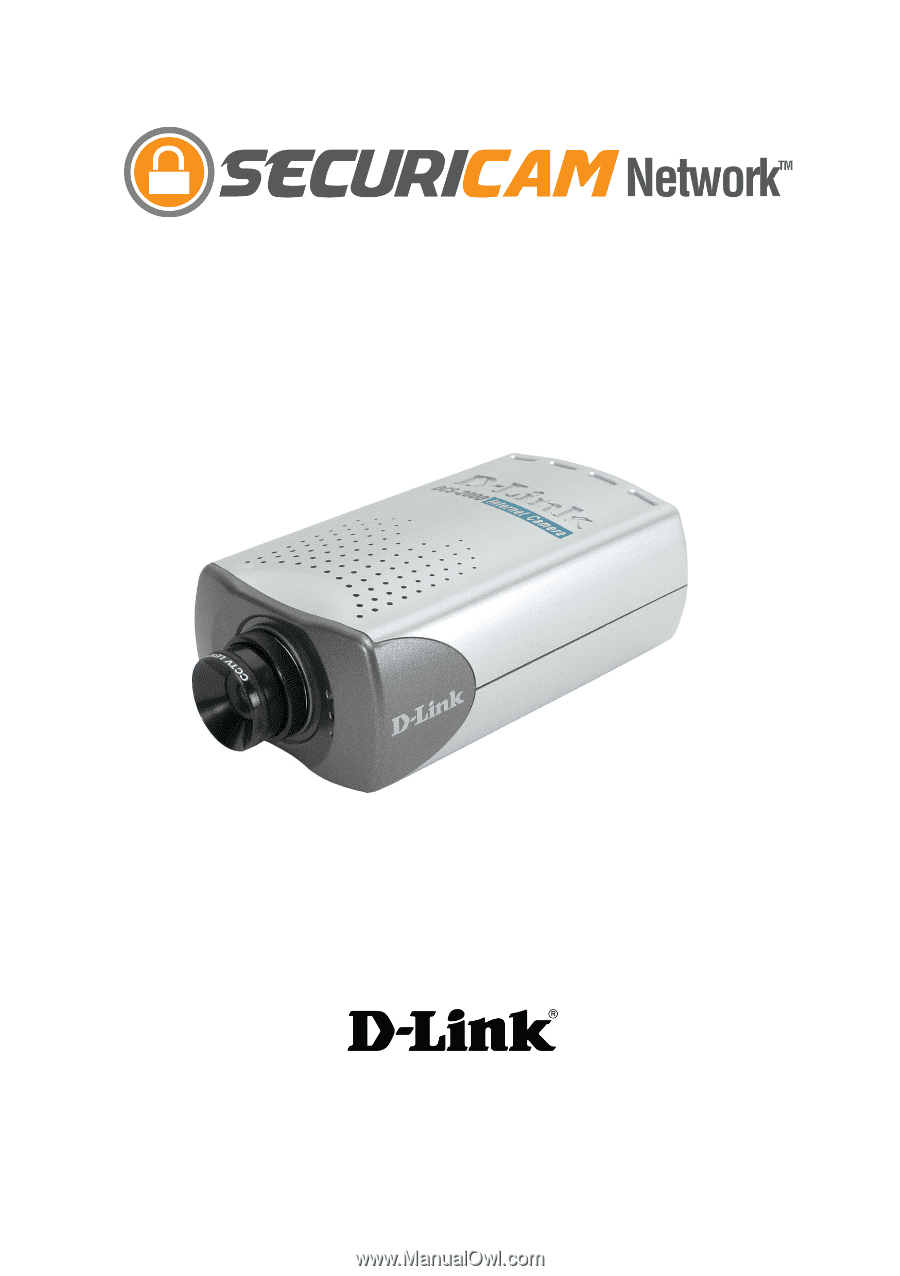
DCS-2000 Audio Internet Camera Manual Version 3.40 Building Networks for People (10/04/04) - D-Link DCS-2000 | Product Manual - Page 2
...6 Hardware Installation 8 Installation Wizard 9 Installation Wizard Screen 14 Enabling UPnP for Windows XP/Me 17 Installing IP surveillance Software 21 Testing the DCS-2000 25 Security ...26 Using and Configuring the DCS-2000 with a Router 27 Using the DCS-2000 with an Internet Browser 33 - D-Link DCS-2000 | Product Manual - Page 3
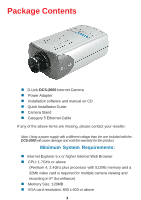
Package Contents D-Link DCS-2000 Internet Camera Power Adapter Installation software and manual on CD Quick Installation Guide Camera Stand Category 5 Ethernet Cable If any of the above items are missing, please contact your reseller. Note: Using a power supply with a different voltage than the - D-Link DCS-2000 | Product Manual - Page 4
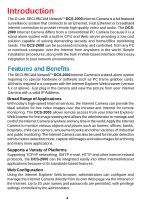
in the world. Simple installation procedures, along with the built-in Web-based interface offers easy integration to your network environments. Features and Benefits The SECURICAM NetworkTM DCS-2000 Internet Camera is a stand-alone system requiring no special hardware or software such as PC frame - D-Link DCS-2000 | Product Manual - Page 5
Surveillance and Remote Monitoring Utility The powerful IP surveillance software application assigns an administrator with a pre-defined user ID and password who can modify the Internet Camera settings from the remote site via an Intranet or the Internet. Administrators are allowed to monitor the - D-Link DCS-2000 | Product Manual - Page 6
or 100Base-TX Fast Ethernet cabling. This network port supports the NWay protocol, allowing the Internet Camera to automatically detect or negotiate the transmission speed of the network. The Ethernet cable included with the DCS-2000 Internet Camera is a Category 5 "straight through" cable. This is - D-Link DCS-2000 | Product Manual - Page 7
devices. Please refer to the appendix in this manual for detailed information. Bottom Panel Socket for stand Attachment socket for the Camera Stand Located on the bottom panel of the DCS-2000, the socket is used to connect the camera stand to the Internet Camera by attaching the screw head on the - D-Link DCS-2000 | Product Manual - Page 8
Hardware Installation Connect an Ethernet cable Connect an Ethernet cable to the network cable connector located on the DCS-2000's back panel and attach it to the network. Attach the external power supply Attach the external power supply to the DC power input connector located on the DCS-2000's back - D-Link DCS-2000 | Product Manual - Page 9
monitoring and surveillance system. The following section will show in detail the installation of the Installation Wizard and the IP surveillance software. Installing the Installation Wizard program Insert the CD that is included with the DCS-2000 Internet Camera. The DCS-2000 installation menu will - D-Link DCS-2000 | Product Manual - Page 10
Installation Wizard (continued) Click Installation Wizard Please wait while the InstallShield Wizard prepares to install. Click Next. 10 - D-Link DCS-2000 | Product Manual - Page 11
To install into a different folder, click Browse and select another folder. Click Next. Select the Program folder that Setup will add program icons to. You may type a new folder name, or select one from the existing folders list. Click Next. Please wait while the Installation Wizard is installed. 11 - D-Link DCS-2000 | Product Manual - Page 12
the assigned column. *A DHCP server is a device that supplies IP Addresses to its clients that are on the same network. IMPORTANT: A hardware reset of the Internet Camera may be required if the Installation Wizard cannot find the camera. To accomplish this reset, lightly insert a paper clip (or - D-Link DCS-2000 | Product Manual - Page 13
Internet browser to the IP Address of the DCS2000, in this example it is: http://192.168.0.10. Your DCS-2000 may have a different IP Address. You have now completed the Setup Wizard and are ready to use your camera! You can also continue to the section titled "Installing IP surveillance Software - D-Link DCS-2000 | Product Manual - Page 14
on the Installation Wizard screen by clicking on the corresponding tab: Search Click to search for any available cameras to connect to the network. Add Click to manually add a camera to the network. A window will appear, prompting you to enter the camera's IP address or domain name. A second window - D-Link DCS-2000 | Product Manual - Page 15
Installation Wizard Screen (continued) Network Settings Here users can configure the Network Settings for the camera. Enter the IP address, Subnet mask, Default router IP, Primary DNS, and Secondary DNS. Automatically, the option to reset IP address at boot is selected. If you would like to save - D-Link DCS-2000 | Product Manual - Page 16
Installation Wizard Screen (continued) Locate the Firmware to Upgrade Indicate the location of the firmware to be uploaded to the camera. Selected Package This displays the file name of the firmware selected for upload. Reset to Default - Click the Reset to Default tab to reset the camera's settings - D-Link DCS-2000 | Product Manual - Page 17
, software, and peripherals. The DCS-2000 is a UPnP enabled Internet camera. If your operating system is UPnP enabled, the device will be easier to configure. If you do not want to use the UPnP functionality, it can be disabled by unchecking the Enabled DDNS check box on the DDNS/UPnP settings page - D-Link DCS-2000 | Product Manual - Page 18
Enabling UPnP for Windows XP/Me (continued) Click Add/Remove Windows Components The following screen will appear: Select Networking Services (Communications in Windows Me Click Details Select Universal Plug and Play Click Ok 18 - D-Link DCS-2000 | Product Manual - Page 19
Enabling UPnP for Windows XP/Me (continued) Click Next Please wait while Setup configures the components. Click Finish 19 - D-Link DCS-2000 | Product Manual - Page 20
last three digits (100), represent the fourth octet of your Internet Camera's IP address (in this example, 198.168.0.100). After you click on the DCS-2000100 icon, your Internet browser will automatically be opened to the IP Address of the DCS-2000, in this example it is: http:// 192.168.0.100. Your - D-Link DCS-2000 | Product Manual - Page 21
Installing IP surveillance Software The IP surveillance software on the CD included with the DCS-2000 Internet Camera converts the DCS-2000 into a powerful, yet flexible, surveillance system for home or business, with these features: Real-time Monitoring Video Recording to hard disk High quality - D-Link DCS-2000 | Product Manual - Page 22
Installing IP surveillance Software (continued) Click Yes Please read the Software Licensing Agreement and click yes if you wish to accept the agreement. Click "No" to exit the installation. Click Next Enter your name and company information and click "Next." 22 - D-Link DCS-2000 | Product Manual - Page 23
Installing IP surveillance Software (continued) Select the destination directory. Click Next Select the program folder the software will be installed into. Click Next 23 - D-Link DCS-2000 | Product Manual - Page 24
Installing IP surveillance Software (continued) Click Next Click Finish The installation is complete. 24 - D-Link DCS-2000 | Product Manual - Page 25
Testing the DCS-2000 Internet Camera Open your Internet browser and type in the IP address of the DCS-2000. In this example the address is: http://192.168.0.100 (your DCS-2000 may have a different IP address based on what you used in the Installation Wizard program.) The window in the center of your - D-Link DCS-2000 | Product Manual - Page 26
to access the System Administration settings to allow users entry and authorize privileges for all users. The Internet Camera supports multi-level password protection/access to the Internet Camera that can be restricted to defined users who have a User Name and User Password, which is assigned - D-Link DCS-2000 | Product Manual - Page 27
as the D-Link DI-614+ Wireless Router • Ethernet based PC for system configuration SETTING UP THE DCS-2000 FOR USE BEHIND A ROUTER Installing a DCS-2000 Internet Camera on your network is an easy 4-step procedure: Assign a local IP Address to your Internet Camera View the Internet Camera Using Your - D-Link DCS-2000 | Product Manual - Page 28
probably have a different IP Address. View the Internet Camera using your Internet Explorer Web browser Run your Internet Explorer Web browser. In the address bar, type in the IP Address that was assigned to the Internet Camera by the Installation Wizard program. The DCS-2000 Home Page appears with - D-Link DCS-2000 | Product Manual - Page 29
changed if they are already in use by other devices (e.g. in a multiple camera environment). Ports that are used by the DCS-2000 Router Set-Up and Installation The following steps generally apply to any router that you have on your network. The D-Link DI-614+ is used as an example to clarify the - D-Link DCS-2000 | Product Manual - Page 30
Static IP Address will also allow you to access your camera attached to your router over the Internet Open Virtual Server Ports to Enable Remote Image Viewing The firewall security features built into the DI-614+ router prevent users from accessing the video from the DCS-2000 over the Internet. The - D-Link DCS-2000 | Product Manual - Page 31
the DCS-2000 with a NAT Router (continued) Follow these steps to configure your router's Virtual Server settings: • Click Enabled. • Enter a different name for each entry. • Enter your camera's local IP Address (e.g., 192.168.0.146 in the example in step on page 28) in the Private IP field - D-Link DCS-2000 | Product Manual - Page 32
and port number if you are using the default Web server port 80. To access from a computer on your local (home) network, simply enter the local IP Address of the Camera followed by a colon and the port number (e.g., 205.163.122.96:83). http://205.163.122.96:83 Viewing the DCS-2000 Remotely 32 - D-Link DCS-2000 | Product Manual - Page 33
have installed the IP surveillance software from the CD. This section of the manual will deal with using the Internet Camera in two parts: Using the DCS-2000 with an Internet browser and accessing the screens to control and monitor the camera. Using the IP surveillance software with the DCS-2000 - D-Link DCS-2000 | Product Manual - Page 34
DCS-2000 with an Internet browser (continued) Home Page Screen The image from the DCS-2000 should be visible from the Home page on your computer monitor. There are two buttons on the left side of the Home page: Connection Type and Configuration. Click on the Connection Type button to change settings - D-Link DCS-2000 | Product Manual - Page 35
the DCS-2000 with an Internet browser (continued) Home > Connections Screen The following options are available from the Connections settings screen: Media Option: Option for users to disable or enable audio when viewing video. Protocol Option The UDP Protocol should be chosen for the most users - D-Link DCS-2000 | Product Manual - Page 36
screen. From each tab, different elements of the DCS-2000 can be configured. The Advanced tab is the default screen in Configuration and Network is the default screen under Advanced. Any changes made to these settings will require the system to restart. Make sure every field is correct before - D-Link DCS-2000 | Product Manual - Page 37
Address at next boot Once the DCS-2000 is configured, this box should be unchecked at all times. If the box has been checked and the connection is lost, run Installation Wizard to find the camera's IP address. General IP address Subnet mask Default router - Primary DNS Secondary DNS - Necessary - D-Link DCS-2000 | Product Manual - Page 38
Using the DCS-2000 with an Internet browser (continued) Configuration > Advanced >Network Settings (continued) SMTP account name 2 - The user name for the second SMTP server. SMTP password 2 - The password used to log into the second e-mail account. (The password will appear as dots instead of - D-Link DCS-2000 | Product Manual - Page 39
FTP passive Mode - HTTP Settings Passive mode setting for the backup FTP server. HTTP Port- Can be set to other than the default port 80. When the administrator changes the HTTP port of the DCS-2000 (which has an IP Address of 192.168.0.100) from 80 to 8080, users must type "http://192.168 - D-Link DCS-2000 | Product Manual - Page 40
the DCS-2000 with an Internet browser (continued) Streaming Screen under "Advanced Network" Control channel port - Can be set to a port other than the default port 5001. A corresponding port must be opened on your firewall. Audio channel port - Can be set to a port other than the default port - D-Link DCS-2000 | Product Manual - Page 41
the DCS-2000 with an Internet browser (continued) Configuration > Advanced > DDNS & UPnP Click the DDNS & UPnP button from the Configuration screen to access DDNS & UPnP settings. Click DDNS & UPnP Dynamic DNS (DDNS) Dynamic DNS (Domain Name Service) is a method of keeping a domain name linked to - D-Link DCS-2000 | Product Manual - Page 42
Enter your password or key used to connect to the DDNS server. UPnP is short for Universal Plug and Play, which is a networking architecture that provides compatibility among networking equipment, software, and peripherals. The DCS-2000 is a UPnP enabled internet camera. If your operating system is - D-Link DCS-2000 | Product Manual - Page 43
browser (continued) Invalid settings may cause the DCS-2000 to not respond. Change the configurations only if necessary. Consult with your network administrator or your Internet Service Provider (ISP) if you do not have the necessary information. If you cannot connect to the camera, refer to page - D-Link DCS-2000 | Product Manual - Page 44
Using the DCS-2000 with an Internet browser (continued) Configuration > Advanced > Video (Continued) Color - frame rate is used with the Video quality control setting (below) to optimize bandwidth utilization and video quality. Video quality control- To fix the bandwidth utilization regardless of - D-Link DCS-2000 | Product Manual - Page 45
Using the DCS-2000 with an Internet browser (continued) Configuration > Advanced > Video Settings (continued) Mirror - Horizontally rotate the video. Check both flip and mirror if the DCS-2000 is to be installed upside down. White balance - Choose the suitable option for the best color - D-Link DCS-2000 | Product Manual - Page 46
Using the DCS-2000 with an Internet browser (continued) Recommendations for setting video for the best performance (continued): Recording settings for clear identification for each image To have the best video quality, you should set Fix quality to detailed or excellent and tune the Maximum frame - D-Link DCS-2000 | Product Manual - Page 47
is acceptable, press to store the image settings, or to recall the original settings. Configuration > Advanced > Motion Detection Click the Motion Detection button from the Configuration screen to access settings that effect how the DCS-2000 Internet Camera can serve as a security device by - D-Link DCS-2000 | Product Manual - Page 48
Using the DCS-2000 with an Internet browser (continued) Configuration > Advanced >Motion Detection (continued) Enable motion detection - Check this option to turn on the motion detection. Window Name - The text entered here will show at the top of the motion window. Sensitivity - Sets the - D-Link DCS-2000 | Product Manual - Page 49
the DCS-2000 with an Internet browser (continued) Configuration > Tools > Admin Click on the Tools tab to access 4 utility screens for controlling and administering the DCS-2000. The default screen in Tools is the Admin screen. The DCS-2000 is manufactured without any passwords by default. This - D-Link DCS-2000 | Product Manual - Page 50
DCS-2000 with an Internet browser (continued) Configuration > Tools > Admin (continued) Guest account: This option allows a user to connect to a camera with view -only privileges. User name is "demo". No password is required. This is useful for demonstrations and keeps guests separate from users - D-Link DCS-2000 | Product Manual - Page 51
the NTP server over the Internet whenever the DCS-2000 starts up. It will fail if the assigned time server cannot be reached. NTP server - Assign the IP address or domain name of the time server. Leaving the text box blank will let DCS-2000 connect to default time servers. Time zone - Used - D-Link DCS-2000 | Product Manual - Page 52
Using the DCS-2000 with an Internet browser (continued) Configuration > Tools > Applications Click on the Applications button to access the Applications settings from the Tools menu. 52 - D-Link DCS-2000 | Product Manual - Page 53
DCS-2000 with an Internet browser (continued) Configuration > Tools > Applications (Continued) Weekly schedule: Sunday through Saturday - Select the weekdays that should perform the following operations: Snapshots begin at - Set the time to start operations. Setting for the names you defined - D-Link DCS-2000 | Product Manual - Page 54
Using the DCS-2000 with an Internet browser FTP server settings in network configuration. Sequential operation Snapshot every second(s) -The DCS-2000 will send captured snapshots will upload to the external FTP server with the file name depending on the next option. It can be used to refresh - D-Link DCS-2000 | Product Manual - Page 55
will restart and require the Installation Wizard software program to locate the IP address of the DCS2000. Configuration > Status > Device Info Click on the Status tab to access Device Info and a Log of DCS-2000 system activity. The Device Info is the default screen when you click on the Status - D-Link DCS-2000 | Product Manual - Page 56
Using the DCS-2000 with an Internet browser (continued) Click Device Info The Device Info screen lists the following important settings that are currently set for the DCS-2000 • Firmware Version number • Mac Address • IP Address • Subnet Mask • Default router address • Primary DNS - D-Link DCS-2000 | Product Manual - Page 57
Using the DCS-2000 with an Internet browser (continued) Configuration > Help Click on the Help tab to access descriptions of the particular function you need help with. The help screen is organized in the order of the tabs and then each menu item under that tab. 57 - D-Link DCS-2000 | Product Manual - Page 58
internet and driving attached devices. To upload the snapshots, users can choose either email or FTP according to user's needs. Both e-mail and FTP use the network settings to access settings that affect how the DCS-2000 Internet Camera can serve . Enter in a window name. Tune the "Sensitivity" and - D-Link DCS-2000 | Product Manual - Page 59
to an FTP server, you will need to fill in the Domain name or IP address of your external FTP server such as ftp://dlink.com or ftp://123.123.123.1. (The server name and IP address will vary depending on the user.) The following user settings must be correctly configured for remote access. 59 - D-Link DCS-2000 | Product Manual - Page 60
access to a second external FTP server if your camera is behind a router protected by a firewall. For detailed information about each setting, please refer to Configuration > Advanced > Network in the section titled "Using the DCS-2000 With an Internet Browser" (page 33). Click the apply button - D-Link DCS-2000 | Product Manual - Page 61
set the application settings for the DCS-2000. Click Applications X X X X X Back Door X In this window, follow the steps below to set the application settings event. Set the delay to "take snapshots after event" to capture the direction of the moving object. 5 Check the window name (in - D-Link DCS-2000 | Product Manual - Page 62
surveillance Software Installing the IP surveillance Software Hardware System Requirements Before you begin installing this application software, the hardware system requirements must be checked first. The system minimum requirements recommended for this application are as follows: Browser: Internet - D-Link DCS-2000 | Product Manual - Page 63
Using IP surveillance Software (continued) Installing the IP surveillance software (continued) Click Next The "License Agreement" window below will appear. Please read the following license agreement carefully. Click "Yes" to accept this agreement and proceed with the installation. Click Yes 63 - D-Link DCS-2000 | Product Manual - Page 64
Using IP surveillance Software (continued) Installing the IP surveillance software (continued) Next, the "User information" window below will appear. This window will prompt you to enter the user name and company name. Enter your user name and company name and then click "Next" to continue. Click - D-Link DCS-2000 | Product Manual - Page 65
Using IP surveillance Software (continued) Installing the IP surveillance software (continued) Select the installation directory for this application software and click "Next", which is shown in the figure below. You can change the installation directory by clicking "Browse..." Click Next Select a - D-Link DCS-2000 | Product Manual - Page 66
Using IP surveillance Software (continued) Installing the IP surveillance software (continued) After checking all the setup information in the window shown below, click "Next" to start the installation of the application software. Click Next Click "Finish", in the window shown below, to finish - D-Link DCS-2000 | Product Manual - Page 67
Launcher icon reflects current state of IP surveillance. The icon in the system tray signifies that the IP surveillance Software is currently active on the system. Security for Launcher When Launcher starts, there is no need to undergo a username/password check. But when users want to click on the - D-Link DCS-2000 | Product Manual - Page 68
IP surveillance Software (continued) Launcher (continued) When Launcher is locked, the unlock window will appear, prompting for the user password in order to unlock. The input area of the dialog will be grayed (disabled) for 60 seconds after 3 consecutive failures. User Interface Below is the user - D-Link DCS-2000 | Product Manual - Page 69
Using IP surveillance Software (continued) Launcher (continued) Tools Contains many utilities. Currently only change password is implemented. The change password dialog looks like this: Autorun at Startup Users can select whether or not to autorun Launcher when Window boots up. Monitor Starts up the - D-Link DCS-2000 | Product Manual - Page 70
Using IP surveillance Software (continued) Monitor Program Features of the Monitor Program Traditional Surveillance Features: Real-time monitoring Pan and Tilt control Recording Special Features: The digital surveillance system supports not only the features listed above, but also the following - D-Link DCS-2000 | Product Manual - Page 71
Using IP surveillance Software (continued) Video Area Channel Area Layout Area Hard Disk Status Common Controls PT DI/DO and Alert Message Display Frame There are menu for camera configurations, global settings, scheduler settings and the user information of this application software. Tips - D-Link DCS-2000 | Product Manual - Page 72
IP surveillance Software control, manual recording, video printing, snapshot, and trash can to remove video from display windows. DI/DO control This tool receives the digital input signal and sends digital output signal to the remote Video Server/ Network Camera password for the administrator. 72 - D-Link DCS-2000 | Product Manual - Page 73
right to access the DCS-2000 Network Camera through this application software and change the local settings as well. But the admin password for the software is not the same as the admin password for the Internet camera. You can change the settings of each selected Internet camera from the monitor - D-Link DCS-2000 | Product Manual - Page 74
the functional configuration of each camera. If you are interested in the remote settings for each camera, you can refer to "Using the DCS-2000 with an Internet Browser," which starts on page 33. Remote Camera Webpage Settings Local Settings DCS-2000 Setup Page Camera Selections The Layout of - D-Link DCS-2000 | Product Manual - Page 75
dialog. Then the system will try to connect to the selected camera. If the connection succeeds, the camera will be inserted to the camera selection list. Specify the IP address, port, and admin password of the camera. Click Ok Once added, you will see the IP address of the camera and also the port - D-Link DCS-2000 | Product Manual - Page 76
is the default number; you can change the number of the latest installed cameras you want to keep in the registry. Clicking on one camera in the history list will insert the camera into the camera list. The historical camera list is shown below. Alert and Recording Settings Historical camera list - D-Link DCS-2000 | Product Manual - Page 77
Settings \ Alert Sound." Check this option to enable audio alert for the camera software provides options for you to define the triggering criteria for the digital input of the DCS-2000. The alert of the digital input can be defined as high-level triggered or lowlevel triggered. Recording Settings - D-Link DCS-2000 | Product Manual - Page 78
Using IP surveillance Software (continued) Monitor Program (continued) Changing the Camera Order in the List You can "drag and drop" in the grid area of the camera list to change the sequence of the connected Network Cameras, which is shown below. This will allow you to rearrange the cameras in an - D-Link DCS-2000 | Product Manual - Page 79
Using IP surveillance Software (continued) Monitor Program (continued) Global Settings After completing the connection to each remote Network Camera, we need to configure some global settings for all the cameras. These include the video database directory, the usage of the Hard disk, and options for - D-Link DCS-2000 | Product Manual - Page 80
directory The directory for storing the default and user-customized schedules for the scheduled recording of each channel. Record Diskspace Usage Settings: Cycle Recording When you turn this setting on, the video database system of this application software will overwrite the oldest data if - D-Link DCS-2000 | Product Manual - Page 81
Using IP surveillance Software (continued) Monitor Program (continued) Modulation Mode You must select the input signal format (NTSC or PAL) for displaying the original resolution of video stream from DCS-2000. NOTE: You need to select the input signal format according to the camera type or CCD - D-Link DCS-2000 | Product Manual - Page 82
Using IP surveillance Software (continued) Monitor Program (continued) Backup Settings: Using Backup Settings in the global settings window, you can backup recorded data from selected cameras to a specified location. Directory This is the directory where backup data will be saved. You can select the - D-Link DCS-2000 | Product Manual - Page 83
channel to the video area. This means that this application software supports real-time recording with and without real-time monitoring for the dedicated video channel. Blink With the motion detection mechanism set in the DCS-2000, the light of the corresponding channel will blink once the motion - D-Link DCS-2000 | Product Manual - Page 84
Using IP surveillance Software (continued) Monitor Program (continued) Selected Channel Recording 5 can drag and drop the video (in the video area) to the trashcan in the common control area of the monitor program. The following section will demonstrate the procedures for "drag and drop" - D-Link DCS-2000 | Product Manual - Page 85
Using IP surveillance Software (continued) Monitor Program (continued) Step 2: Press and hold top of a display window. In each display layout, only one window can be assigned to a camera. Also, each camera must have its own separate window when displayed. Once the video is in a display window, it - D-Link DCS-2000 | Product Manual - Page 86
Using IP surveillance Software (continued) Monitor Program (continued) Video shown Empty video box Removing video from a display window Step 1: Move the mouse cursor to the display window that contains - D-Link DCS-2000 | Product Manual - Page 87
Using IP surveillance Software (continued) Monitor Program (continued) Press and hold the left mouse button here. exchange the video between different display windows by dragging and dropping. 4 camera layout 1 camera layout 9 camera layout 6 camera layout 16 camera layout 13 camera layout 87 - D-Link DCS-2000 | Product Manual - Page 88
Using IP surveillance Software (continued) Monitor Program (continued) Double click on a display window to switch to a single channel layout. When you choose the one-channel layout . You can use these two buttons to switch the pages, as shown in the figure below. PT Use to switch between cameras. 88 - D-Link DCS-2000 | Product Manual - Page 89
Using IP surveillance Software (continued) Monitor Program (continued) To view an individual camera from the multi-camera layout, double- upper-left corner of the video area will switch to the previous selected multi-camera layout. The position that each video channel is in for every layout will be - D-Link DCS-2000 | Product Manual - Page 90
IP surveillance Software (continued) Monitor Program (continued) IP surveillance includes DI/DO (Digital Input / Digital Output) control and an alert message receiver. These features are described in detail below. DI/DO Control the camera by DO switch. PT Set digital output to LOW Set digital - D-Link DCS-2000 | Product Manual - Page 91
Using IP surveillance Software (continued) Monitor Program (continued) Alert Message If you have checked the box for "Enable Motion Detect" or "Enable Digital Input" on "Camera Configurations > Alert Settings" screen, the alert message will show in the window shown above. Once the alert, caused by - D-Link DCS-2000 | Product Manual - Page 92
the information about the installed version of IP surveillance. The information includes the software name, version, user name, and company. Miscellaneous Quit By clicking this button, IP surveillance will be closed with the latest settings saved. Minimize Minimize the Monitor program. 92 - D-Link DCS-2000 | Product Manual - Page 93
Using IP surveillance Software (continued) Monitor Program (continued) Full Screen With this function, you can alert messages can be reviewed. Configuration Menu The menu includes Camera Configuration, Global Settings, Scheduler, and About options. Common Control Functions Stop Record Printer - D-Link DCS-2000 | Product Manual - Page 94
Global Settings" for more details. Printer Click on the printer icon to print the current image to your default printer. Trashcan You can drag and drop the video channel to the Trashcan to close the video connection with the DCS-2000. Status Bar Local time Software name Current login user Login - D-Link DCS-2000 | Product Manual - Page 95
Using IP surveillance Software (continued) Scheduling The scheduler allows the user to schedule recordings from the selected video channel of the DCS-2000. Through both the graphic user interface and time period selection options, you will be able to easily regulate a schedule for each video channel - D-Link DCS-2000 | Product Manual - Page 96
Using IP surveillance Software (continued) Scheduling (continued) The scheduler will not be accessible until at least one camera has been added to the camera list. Go to the configuration menu and click on "Scheduler" to launch the Scheduler. The Layout and Functionalities Introduction The layout of - D-Link DCS-2000 | Product Manual - Page 97
video channel selection area. It provides the IP addresses and location information of the connected video channels for the user's reference. You can select a video channel in this area and create a schedule for it. Part 2 The second part is the Primary schedule settings. It consists of the day time - D-Link DCS-2000 | Product Manual - Page 98
Using IP surveillance Software (continued) Scheduling (continued) In this area you will select the video channel that you want to set a schedule for. Each video channel will display a name, IP address, and location. Please note that when you switch between video channels in this area, the changes in - D-Link DCS-2000 | Product Manual - Page 99
IP surveillance Software and End Time Date picker Hour picker Minute picker There are three controlling units in both "Begin Time" and "End Time" selectors shown selectors is the date picker. You can select day with it to set the beginning time and the ending time for the recording interval. The - D-Link DCS-2000 | Product Manual - Page 100
Using IP surveillance Software (continued) Scheduling (continued) Apply and Erase Buttons After you have selected the time period with "Begin time" and "End time" picker, you can apply the period picker, shown in the figure below, to set the periodical types of the time interval set previously. - D-Link DCS-2000 | Product Manual - Page 101
Continuous mode If you select Continuous mode in the schedule mode selector, it will record continuously during the schedule that is set up by the user. Secondary Schedule Secondary schedule is for recording outside of the primary schedule. The secondary schedule provides options to record without - D-Link DCS-2000 | Product Manual - Page 102
IP surveillance Software (continued) Scheduling (continued) There are three modes in the secondary schedule: Disable, Event mode, and Continuous mode. If event mode is selected in the secondary schedule, the camera current schedule as another file name instead of the default name. Undo Click on this - D-Link DCS-2000 | Product Manual - Page 103
Using IP surveillance Software (continued) Playback Program The playback program is a very searching range adjustment tool: User input (from full range to 1 second) Zoom in (from full range to 10 seconds) Zoom out (up to full range) Full range System control tool: Window locker System settings 103 - D-Link DCS-2000 | Product Manual - Page 104
software. The figure below shows the login dialog. For security concerns, only the admin account can log in to this program. To change the password of the admin account, please refer to the section titled "Logging In." Layout Area Selection Indicator Display Area Control Area - D-Link DCS-2000 | Product Manual - Page 105
Using IP surveillance Software (continued) Playback Program (continued) When you successfully log in to the playback system, the main database of each camera by time. You can change the video size through the display adjustment tool and the playback method through the play control tool. Under the - D-Link DCS-2000 | Product Manual - Page 106
Using IP surveillance Software (continued) Playback Program (continued) Histogram Area The histogram is an interactive control. Not only can you get the event's location in time domain and its quantity of the motion percentage, but you can also select a group of - D-Link DCS-2000 | Product Manual - Page 107
will only function under the normal display mode. Settings After the main window is shown on the screen, you must modify the settings to make it to work properly. Click on the "Settings" button, shown below, in the system control tool, and the setting dialog will appear on the screen. Lock Windows - D-Link DCS-2000 | Product Manual - Page 108
IP surveillance Software (continued) Playback Program (continued) The items in the settings windows are: Database location The most important item in the settings dialog is the database location setting. You must set the sub-directory (camera name) under the directory you set here. Modulation Mode: - D-Link DCS-2000 | Product Manual - Page 109
Using IP surveillance Software (continued) Playback Program (continued) Normal (Single Frame) Mode While in the normal (single frame) display mode, you can change the video currently displayed by: (1) Changing the database path for retrieving another one in the settings dialog of "System Control" - D-Link DCS-2000 | Product Manual - Page 110
Using IP surveillance Software ( pull bar in the same x-axis position. That means the playback system will shift to the pointed time and show video on the displaying this section, the method of how to use the tools in the control panel (shown in the main playback window) will be discussed. Selector - D-Link DCS-2000 | Product Manual - Page 111
Using IP surveillance Software (continued) Playback Program (continued) Location selector Period selector Playback method selector Alert area selector Location Selector The location selector is a control that lets you select the camera you want to see (refer to the figure above). The location name - D-Link DCS-2000 | Product Manual - Page 112
Using IP surveillance Software (continued) Playback Program (continued) Playback Method Selector in the settings dialog. The alert area selector will be changed to alert window 0 by default settings when you change the location selector to another window. Play Control For the play control, the jog - D-Link DCS-2000 | Product Manual - Page 113
IP surveillance Software (continued) Playback Program (continued) Speed Indicator Pause Play Forward Stop Play The supported "Play" button is an intelligent play user Fast Play and Slow Play The camera supports a maximum of x16 fast set will be shown in the second column of status area. 113 - D-Link DCS-2000 | Product Manual - Page 114
Using IP surveillance Software (continued) Playback Program (continued) Display Adjustment Tool When you to the original size. Due to the limitation of the display area size, the maximum zoom in ratio supported is only 2.25:1 for NTSC modulation mode and 1.875:1 for PAL modulation mode. If you want - D-Link DCS-2000 | Product Manual - Page 115
Using IP surveillance Software (continued) Playback Program (continued) Full Screen When you click on screen display, you can press the "Alt" and "Space" keys together to pop the jog dial to control the displaying video sequence. Press the same keys again to close the jog dial. You can also press - D-Link DCS-2000 | Product Manual - Page 116
Using IP surveillance Software (continued) Playback Program (continued) Zoom Out playback program. The figure below shows the three elements of the system control toolbox, i.e. "Lock Window", "Settings", "Minimize", and "Exit." Lock Window If you are need to re-enter the admin's password again. 116 - D-Link DCS-2000 | Product Manual - Page 117
Using IP surveillance Software (continued) Playback Program (continued) Settings The settings dialog will pop up when you click the "Settings" button. For more information about setting this program, please refer to the section titled "Settings." Minimize Click this button in order to minimize the - D-Link DCS-2000 | Product Manual - Page 118
that affect how the DCS-2000 Internet Camera can serve as a security device by recording only when motion is detected. Note: These settings can be configured in your Web browser and while logged into the IP surveillance Program. Click Motion Detection In this window, follow the steps below to - D-Link DCS-2000 | Product Manual - Page 119
mouse to the ending time. Schedule recording can be configured by minutes, hours, days, weeks, or months. The Secondary Schedule allows you to set a schedule outside the Primary Schedule. The Secondary Schedule provides two options to record without a specified date or time. You can select Event - D-Link DCS-2000 | Product Manual - Page 120
schedule to occur Once or Every day. Set the date, time-line, and begin and the Web configuration page of the camera. Remember the names of the windows and the order system running IP surveillance or can be used as a backup if you need to re-install the IP surveillance software program. 120 - D-Link DCS-2000 | Product Manual - Page 121
managed remotely, accessed and controlled from any PC/Notebook over an Intranet or the Internet from a Web browser. Q: What is the maximum number of users that can be allowed to access DCS-2000 simultaneously? A: The maximum number of users that can log onto the Internet Camera at the same time is - D-Link DCS-2000 | Product Manual - Page 122
the network. Then run the PING utility (follow the instructions in the Appendix - How to Ping Your IP Address.) In Windows 95/98/2000, check that the IP Address of the Internet Camera is within the same subnet as your workstation. Click Start, Setting, Control Panel, and the Network icon. Select TCP - D-Link DCS-2000 | Product Manual - Page 123
the Installation Wizard icon is clicked on more than once from the setup wizard. Q: Why does the Internet Camera work locally but not externally? A1: Might be caused from the firewall protection. Check the Internet firewall with your system administrator. The firewall may need to have some settings - D-Link DCS-2000 | Product Manual - Page 124
step-by-step procedure below to utilize the PING command but first you must disconnect Internet Camera from the network. Start a DOS window. Type ping x.x.x.x, where x.x.x.x is the IP address of the Internet Camera. The replies, as illustrated below, will provide an explanation to the problem. 124 - D-Link DCS-2000 | Product Manual - Page 125
socket. It is used to reset the system or restore the factory default settings. Sometimes resetting the DCS-2000 will return the system back to a normal state. If the system still has problems after reset, restore the factory settings and install again: RESET: 1. Lightly insert a paper clip (or - D-Link DCS-2000 | Product Manual - Page 126
I/O Connector Definition for the Internet Camera The DCS-2000 provides a general I/O terminal block with one digital input and one relay switch for device control. Pin 1 and pin 2 open from SW_OPEN at initial state) (close with SW_OPEN when set DO to ON) OUTPUT (Max. 1A, 24VDC or 0.5A, 125VAC) 126 - D-Link DCS-2000 | Product Manual - Page 127
negative from the PIR is connected to the D+ of the camera I/O port. Configuring Your Camera for External Trigger Based Recording To configure your camera to record when triggered by an external device, you must first set your SMTP or FTP settings in order to send snapshots to your email account or - D-Link DCS-2000 | Product Manual - Page 128
In this window, enter the settings for the SMTP or FTP server to which recorded snapshots will be sent. For detailed information about each setting, please refer to Configuration > Advanced > Network (page 36) in the section titled "Using the DCS-2000 With an Internet Browser." Click the apply - D-Link DCS-2000 | Product Manual - Page 129
(continued) Configuring Your Camera for External Trigger Based Recording (continued) Next, click the Applications button under the Tools tab to set the application settings for the DCS-2000. Click Applications In this window, follow the steps below to set the application settings for snapshots to be - D-Link DCS-2000 | Product Manual - Page 130
The DCS-2000 Internet Camera features an interchangeable C/CS-type lens that can be used for different applications as necessary. It supports rotational focus control so the lens can be adjusted to focus under normal and stable conditions to maximize the image quality of the Internet Camera. Fixed - D-Link DCS-2000 | Product Manual - Page 131
Replacing the Lens Since the DCS-2000 is designed with a CS- mount, the lens equipped with the Internet Camera can be replaced with any standard C or CS lens commonly used within the surveillance industry. Follow the instructions below to replace the supplied lens with any C or CS type lens. 1. - D-Link DCS-2000 | Product Manual - Page 132
system log can be accessed via Web browser using Internet Explorer 6.X and above Networking Protocol TCP/IP, HTTP, SMTP, NTP, DNS, DHCP, DDNS, FTP, and UPnP Ethernet 10BaseT or 100BaseT Fast Ethernet Video Algorithm supported Security Administrator and user group protected Password authentication 132 - D-Link DCS-2000 | Product Manual - Page 133
Specifications (continued) LED indicator Bi-color status indicator Camera specification 1/3 inch color CMOS sensor 2.5Lux/F1 x 2.2 in.) Viewing system requirement Protocol Standard Internet TCP/IP suite Operating system MicrosoftR Windows XP, 2000, ME or 98SE Browser Internet Explorer 6.x or above - D-Link DCS-2000 | Product Manual - Page 134
Support Technical Support You can find software updates and user documentation on the D-Link website. D-Link provides free technical support D-Link Technical Support over the Internet: http://support.dlink.com email:[email protected] Tech Support for customers within Canada: D-Link Technical Support - D-Link DCS-2000 | Product Manual - Page 135
Time Zone Table GMT stands for Greenwich Mean Time, which is the global time that all time zones are measured from. 135 - D-Link DCS-2000 | Product Manual - Page 136
Time Zone Table (continued) 136 - D-Link DCS-2000 | Product Manual - Page 137
conform to D-Link's then current functional specifications for the Software, as set forth in the applicable documentation, from the date of original retail purchase of the Software for a period of ninety (90) days ("Warranty Period"), provided that the Software is properly installed on approved - D-Link DCS-2000 | Product Manual - Page 138
covered in the operating manual for the product, and normal maintenance; Damage that occurs in shipment, due to act of God, failures due to power surge, and cosmetic damage; Any hardware, software, firmware or other products or services provided by anyone other than D-Link; Products that have been - D-Link DCS-2000 | Product Manual - Page 139
/D-Link Systems, Inc. All rights reserved. CE Mark Warning: This is a Class B product. In a domestic environment, this product may cause radio interference, in which case the user may be required to take adequate measures. FCC Statement: This equipment has been tested and found to comply - D-Link DCS-2000 | Product Manual - Page 140
Registration Register online your D-Link product at http://support.dlink.com/register/ 140
-
 1
1 -
 2
2 -
 3
3 -
 4
4 -
 5
5 -
 6
6 -
 7
7 -
8
-
9
-
10
-
11
-
12
-
13
-
14
-
15
-
16
-
17
-
18
-
19
-
20
-
21
-
22
-
23
-
24
-
25
-
26
-
27
-
28
-
29
-
30
-
31
-
32
-
33
-
34
-
35
-
36
-
37
-
38
-
39
-
40
-
41
-
42
-
43
-
44
-
45
-
46
-
47
-
48
-
49
-
50
-
51
-
52
-
53
-
54
-
55
-
56
-
57
-
58
-
59
-
60
-
61
-
62
-
63
-
64
-
65
-
66
-
67
-
68
-
69
-
70
-
71
-
72
-
73
-
74
-
75
-
76
-
77
-
78
-
79
-
80
-
81
-
82
-
83
-
84
-
85
-
86
-
87
-
88
-
89
-
90
-
91
-
92
-
93
-
94
-
95
-
96
-
97
-
98
-
99
-
100
-
101
-
102
-
103
-
104
-
105
-
106
-
107
-
108
-
109
-
110
-
111
-
112
-
113
-
114
-
115
-
116
-
117
-
118
-
119
-
120
-
121
-
122
-
123
-
124
-
125
-
126
-
127
-
128
-
129
-
130
-
131
-
132
-
133
-
134
-
135
-
136
-
137
-
138
-
139
-
140
 |
 |
Audio Internet Camera
Manual
Building Networks for People
Version 3.40
DCS-2000
(10/04/04)