D-Link DCS-5605 Product Manual
D-Link DCS-5605 Manual
 |
UPC - 790069334870
View all D-Link DCS-5605 manuals
Add to My Manuals
Save this manual to your list of manuals |
D-Link DCS-5605 manual content summary:
- D-Link DCS-5605 | Product Manual - Page 1
- D-Link DCS-5605 | Product Manual - Page 2
Display 68 Turn On/Off LEDs 68 Calibrate Device 68 System 69 Firmware Upgrade 70 Status 71 Device Info 71 Log 72 Help 73 Appendix 74 Frequently Asked Questions 74 How to Ping Your IP Address 77 Using & Configuring 3G Compatible Cell Phones 78 D-Link DCS-5605/DCS-5635 User Manual 1 - D-Link DCS-5605 | Product Manual - Page 3
Play from RealPlayer 79 Play from PVPlayer 84 Reset and Restore 86 Enabling UPnP™ for Windows® XP 87 Technical Specifications 91 Contacting Technical Support 93 Warranty 94 Registration 97 D-Link DCS-5605/DCS-5635 User Manual 2 - D-Link DCS-5605 | Product Manual - Page 4
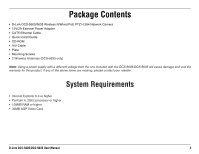
Link DCS-5605/5635 Wireless N/Wired PoE PTZ H.264 Network Camera • 12V/2A External Power Adapter • CAT5 Ethernet Cable • Quick Install Guide • CD-ROM • A/V Cable • Plate • Mounting Screws • 2 Wireless Antennas (DCS-5635 RAM or higher • 32MB AGP Video Card D-Link DCS-5605/DCS-5635 User Manual 3 - D-Link DCS-5605 | Product Manual - Page 5
it to the network. Sign up with one of the free Dynamic DNS services available on the web, to assign a name and domain to the camera (for example, mycamera.dlinkddns.com). This way, you may remotely access the camera without having to remember the IP address. D-Link DCS-5605/DCS-5635 User Manual 4 - D-Link DCS-5605 | Product Manual - Page 6
a Variety of Protocols -In addition, the DCS-5605/DCS-5635 supports a variety of platforms including FTP, SMTP, NTP, and HTTP. The camera also supports UPnP and DDNS. DDNS allows the camera to use an easier to remember naming format rather than an IP address. UPnP will allow users of Windows - D-Link DCS-5605 | Product Manual - Page 7
port can also be used to power the camera using a PoE switch (DCS-5605 only). The camera provides a terminal block with two pairs of camera back to the default settings. 23 4 5 6 7 Antenna 9 connector(DCS-5635 Only) Connects to the wireless antennas D-Link DCS-5605/DCS-5635 User Manual - D-Link DCS-5605 | Product Manual - Page 8
). The Link LED will illuminate green once a connection has been established. 3 Microphone The built-in microphone can be used capture audio from sources nearby the camera. 4 Power LED The Power LED will illuminate red when the camera is receiving power. D-Link DCS-5605/DCS-5635 User Manual 7 - D-Link DCS-5605 | Product Manual - Page 9
cable connector located on the DCS-5605/DCS-5635's back panel and attach it to the network. Step 2 - Attach the supplied power supply to the power input connector located on the DCS-5605/DCS-5635's back panel and connect the other end to your wall outlet. D-Link DCS-5605/DCS-5635 User Manual 8 - D-Link DCS-5605 | Product Manual - Page 10
Installation Wizard Step 3 - Insert the D-Link CD. When the autorun screen appears, click Installation Wizard. Step 4 - The Welcome screen will appear. Click Next to continue. D-Link DCS-5605/DCS-5635 User Manual 9 - D-Link DCS-5605 | Product Manual - Page 11
Step 5 - Click Yes to the license agreement to continue. Step 6 - If you do not want to install the wizard into the default location, click Browse and select a new folder. Click Next to continue. D-Link DCS-5605/DCS-5635 User Manual 10 - D-Link DCS-5605 | Product Manual - Page 12
. Step 8 - Now, click on ffdshow from the autorun screen. This will install the proper codecs that will allow you to playback video taken by the DCS-5605/5635. D-Link DCS-5605/DCS-5635 User Manual 11 - D-Link DCS-5605 | Product Manual - Page 13
Step 9 - Click I Agree to the license agreement to continue. Step 10 - Select your language from the drop-down menu and then click OK. D-Link DCS-5605/DCS-5635 User Manual 12 - D-Link DCS-5605 | Product Manual - Page 14
Step 11 - Click Next to continue. Step 12 - Select the installation location and then click Next. D-Link DCS-5605/DCS-5635 User Manual 13 - D-Link DCS-5605 | Product Manual - Page 15
Step 13 - Select the components you want to install and then click Next to continue. Step 14 - Select the Start Menu folder and then click Next. D-Link DCS-5605/DCS-5635 User Manual 14 - D-Link DCS-5605 | Product Manual - Page 16
Step 15 - Select the additional tasks you want to perform and then click Next to continue. Step 16 - Select the speaker setup on your computer and then click Next. D-Link DCS-5605/DCS-5635 User Manual 15 - D-Link DCS-5605 | Product Manual - Page 17
Step 17 - Click Install to continue. Step 18 - Click Finish. D-Link DCS-5605/DCS-5635 User Manual 16 - D-Link DCS-5605 | Product Manual - Page 18
Start menu. Step 20 - The main screen will appear. Your camera should be displayed in the list. If it does not, then click the Search button. If your camera does not appear, make sure the camera is connected to your computer correctly and is powered on. D-Link DCS-5605/DCS-5635 User Manual 17 - D-Link DCS-5605 | Product Manual - Page 19
. Step 22 - Click DHCP to allow your router or DHCP server assign the IP settings to the camera. If you want to manually assign the IP settings, click Static and enter the IP address, subnet mask, default gateway, and DNS servers. Click Next to continue. D-Link DCS-5605/DCS-5635 User Manual 18 - D-Link DCS-5605 | Product Manual - Page 20
camera, click Disable. Connection Mode - Select Infrastructure if you are connecting to a wireless router or access point. If you are connecting to a wireless client, select Adhoc. Network Name (SSID) - Enter the SSID or wireless network Next to continue. D-Link DCS-5605/DCS-5635 User Manual 19 - D-Link DCS-5605 | Product Manual - Page 21
Step 24 - A summary window will display your settings. Click Restart to finish the installation. Installation is complete. Please refer to page 25 for advanced features of this camera. D-Link DCS-5605/DCS-5635 User Manual 20 - D-Link DCS-5605 | Product Manual - Page 22
section. The holes will be covered but are perferated to be easily removed. Attach the plate to the camera before mounting. Turn the camera clockwise (to the right) until it stops. Read the directions on the next page to mount to a wall or the ceiling. D-Link DCS-5605/DCS-5635 User Manual 21 - D-Link DCS-5605 | Product Manual - Page 23
1. Use 3 screws to affix the metal mounting bracket to the ceiling. 2. Push the camera up onto the metal mounting bracket. D-Link DCS-5605/DCS-5635 User Manual 22 - D-Link DCS-5605 | Product Manual - Page 24
3. Rotate the base of the camera to lock it onto the bracket. 4. Install the final screw so that the camera cannot be removed without the use of a tool. D-Link DCS-5605/DCS-5635 User Manual 23 - D-Link DCS-5605 | Product Manual - Page 25
log into your router and navigate to the page that allows you to open or forward ports. Enter the listed ports and forward to the IP address of your camera. By default the HTTP Port is 80 (TCP) and the RTSP Port is 554 (TCP/UDP). D-Link DCS-5605/DCS-5635 User Manual 24 - D-Link DCS-5605 | Product Manual - Page 26
and enter the IP address of the camera (192.168.0.1). If you get a Page Cannot be Displayed error, please refer to the Troubleshooting section for assistance. Enter admin for the User Name and then enter your password. Leave the password blank by default. D-Link DCS-5605/DCS-5635 User Manual 25 - D-Link DCS-5605 | Product Manual - Page 27
the Live Video page on your computer monitor. Clicking on any part of the image will cause the camera to reposition itself so that the point will be the center of the image. Refer to the next page for an overview of all the options available on this page. D-Link DCS-5605/DCS-5635 User Manual 26 - D-Link DCS-5605 | Product Manual - Page 28
the speed at which the camera will tilt (1-10, 10 = fastest). SD Status: Displays the status of your Micro SD memory card. If you do not have a card inserted into the camera, it will display as Invalid. Language: Select your language from the drop-down menu. D-Link DCS-5605/DCS-5635 User Manual 27 - D-Link DCS-5605 | Product Manual - Page 29
can be used to communicate with others near the camera. 11 Digital Output - Click to turn on digital output. 12 Digital Zoom - This button toggles the zoom feature on and off. When zoom is active, you may left click to zoom in or right click to zoom out. D-Link DCS-5605/DCS-5635 User Manual 28 - D-Link DCS-5605 | Product Manual - Page 30
the next page. Manual Internet Click to manually configure your camera. Refer to the Setup > Network Settings section. Connection Manual Motion Click to manually configure motion detection settings. Refer to the Setup > Motion Detection section. Detection Setup: D-Link DCS-5605/DCS-5635 User Manual - D-Link DCS-5605 | Product Manual - Page 31
Internet Connection Setup Wizard Select DHCP Connection to allow a DHCP server (such as a router) to automatically assign the network settings to the camera. Select Static IP Address to manually enter the camera's network settings. Click Next to continue. D-Link DCS-5605/DCS-5635 User Manual 30 - D-Link DCS-5605 | Product Manual - Page 32
of the DDNS service. Verify Password - Enter your password again used to connect to the DDNS server. Timeout - You can setup how often the camera notifies the DDNS server of its current global IP address. By default this is 576 hours. Click Next to continue. D-Link DCS-5605/DCS-5635 User Manual 31 - D-Link DCS-5605 | Product Manual - Page 33
- Manually adjust and set the date and time of daylight savings. Offset - Select the time offset, if your location observes daylight saving time. Daylight Savings Dates - Sets the dates and time that Daylight Savings begins and ends. Click Next to continue. D-Link DCS-5605/DCS-5635 User Manual 32 - D-Link DCS-5605 | Product Manual - Page 34
Click Apply to finish. D-Link DCS-5605/DCS-5635 User Manual 33 - D-Link DCS-5605 | Product Manual - Page 35
Network Setup The Network Setup page will allow you to set the IP address, network settings, UPnP, and port information for your camera. D-Link DCS-5605/DCS-5635 User Manual 34 - D-Link DCS-5605 | Product Manual - Page 36
port is used to view the camera from the Internet. External RTSP Enter the RTSP port. The default port is 554. RTSP (Real Time Streaming Protocol) is used for viewing video from a Port: RTSP client. Clients are available for your computer or mobile phone. D-Link DCS-5605/DCS-5635 User Manual 35 - D-Link DCS-5605 | Product Manual - Page 37
client. Clients are available for your computer or mobile phone. User Authentication: Check the User Authentication box to force user to enter a user name and password. Save Settings: Click the Save Settings button to save and activate your changes. D-Link DCS-5605/DCS-5635 User Manual 36 - D-Link DCS-5605 | Product Manual - Page 38
HTTPS settings Enable HTTPS This is default enabled. HTTPS only Select this will redirect all the HTTP connection to HTTPS pages automatically. D-Link DCS-5605/DCS-5635 User Manual 37 - D-Link DCS-5605 | Product Manual - Page 39
automatically be populated with the network's settings. SSID: If you selected a network from the drop-down menu, the SSID, or name of the wireless network, will be displayed. If you are manually entering the wireless settings, enter the SSID of your network. D-Link DCS-5605/DCS-5635 User Manual 38 - D-Link DCS-5605 | Product Manual - Page 40
- WPK2-PSK Encryption - TKIP To access the network, the user must know the security passphrase used on the network and enter it in the Key field. The signal strength will be display. The value will be between 1 and 100, 100 being the best/strongest signal. D-Link DCS-5605/DCS-5635 User Manual 39 - D-Link DCS-5605 | Product Manual - Page 41
activated, the WPS LED on your camera will stop flashing, and will light up solid blue, then reboot. Note: On some routers/access points, you may need to enter the web interface to activate WPS. Consult your product's user manual for further assistance. D-Link DCS-5605/DCS-5635 User Manual 40 - D-Link DCS-5605 | Product Manual - Page 42
your DDNS host name. User Name: Enter your DDNS user name. Password/Verify: Enter your DDNS password and again to verify. Timeout: Enter the time (in hours) before the camera will disconnect from the DDNS server. Status: Displays the current status. D-Link DCS-5605/DCS-5635 User Manual 41 - D-Link DCS-5605 | Product Manual - Page 43
soften the image. Frequency: Select 50Hz or 60Hz. Flip: Vertically rotate the video 180o. Mirror: Horizontally rotate the video 180o. Recommended to select if the camera is installed upside down on the ceiling. B/W: Change the video to black and white. D-Link DCS-5605/DCS-5635 User Manual 42 - D-Link DCS-5605 | Product Manual - Page 44
is difficult for IP camera to capture the image Manual" for Shutter Mode setting. Shutter Value Select the shutter speed from list box and then the camera will then set the matching aperture value for a proper exposure. White Balance It is 'Auto' by default Link DCS-5605/DCS-5635 User Manual 43 - D-Link DCS-5605 | Product Manual - Page 45
the audio (speakers and microphone) for your camera. Profile 3 is set as the default profile for snapshots, while profile 4 is the default for a mobile phone or PDA. Video Profiles Select the FPS (Frames per Second). 30 is the maximum (best quality). D-Link DCS-5605/DCS-5635 User Manual 44 - D-Link DCS-5605 | Product Manual - Page 46
and your camera's IP is 192.160.0.30, you can view your camera's video camera. Volume: This sets the volume level of the incoming audio. Note: Higher frame size, frame rate and bit rates will give you better video quality, but they will also require more network Link DCS-5605/DCS-5635 User Manual 45 - D-Link DCS-5605 | Product Manual - Page 47
detection. This will allow the camera to serve as a security device by recording Detection: only when motion is detected. Sensitivity: Specify how much movement is required to trigger the motion detection. Refer to the next page to set up the trigger area. D-Link DCS-5605/DCS-5635 User Manual 46 - D-Link DCS-5605 | Product Manual - Page 48
continue to blink as long as motion is detected. If no additional motion is detected, it will return to its original state after eight seconds. D-Link DCS-5605/DCS-5635 User Manual 47 - D-Link DCS-5605 | Product Manual - Page 49
Motion Detection Setup Wizard To run the Motion Detection Setup Wizard, log into the camera's web-based configuration and click the Setup tab. Click the Motion Detection Setup Wizard button. Click Next to continue. D-Link DCS-5605/DCS-5635 User Manual 48 - D-Link DCS-5605 | Product Manual - Page 50
door. If there is any motion in the door way, the camera will email a user and/ or record the activity. To remove any ISP (Internet Service Provider). This could be smith or [email protected] depending on your particular ISP. Password: The password that you set Link DCS-5605/DCS-5635 User Manual 49 - D-Link DCS-5605 | Product Manual - Page 51
of the FTP server. Most FTP servers are running at the default port (21). Interval: The time interval between each snapshot. Passive Mode: Some FTP servers allow clients to use passive mode when connecting to an FTP, which uses random ports for transfers. D-Link DCS-5605/DCS-5635 User Manual 50 - D-Link DCS-5605 | Product Manual - Page 52
Once you are finished entering the requested information, click Apply to finish the wizard. D-Link DCS-5605/DCS-5635 User Manual 51 - D-Link DCS-5605 | Product Manual - Page 53
or IP address, or select a time server from the drop-down menu. Set Day and Time Manually: Select to manually enter the date and time. Copy your Computer's Time Click to synchronize the time and date with the computer you are currently logged into the camera with. settings: D-Link DCS-5605/DCS-5635 - D-Link DCS-5605 | Product Manual - Page 54
Position Set as Home: Click to set the current camera position as Home. Default Home: Click to set Home to the default camera position. Pan Speed: Change the pan speed from of seconds that the camera should remain fixed upon a specified preset position. D-Link DCS-5605/DCS-5635 User Manual 53 - D-Link DCS-5605 | Product Manual - Page 55
. Pan/Patrol Step: Select the step of camera Pan/Patrol movement between 1 and 5. Dwelling Time: This sets the duration of staying at the position. Patrol Schedule: "Patrol Schedule" allows the PTZ camera to perform the position tour by an hourly schedule. D-Link DCS-5605/DCS-5635 User Manual 54 - D-Link DCS-5605 | Product Manual - Page 56
Recording Record to SD Card Record to Samba Drive Enable Recording: Check to enable the recording function. SD Card: Select to record to an inserted Micro SD memory card. D-Link DCS-5605/DCS-5635 User Manual 55 - D-Link DCS-5605 | Product Manual - Page 57
Network Drive: Select to use Samba. Samba Auth: Select the type of authentication from the drop-down menu. User Name: Enter your Samba user name. Password/Confirm: Enter your Samba password and again to confirm it. Server: Enter the URL or IP the camera stops Link DCS-5605/DCS-5635 User Manual 56 - D-Link DCS-5605 | Product Manual - Page 58
Snapshot D-Link DCS-5605/DCS-5635 User Manual 57 - D-Link DCS-5605 | Product Manual - Page 59
that will receive all the captured images. Port: This is the port that your email SMTP service is running on. Default is 25. TLS/SSL: These two protocols (SSL is succeeded by TLS) are cryptographic protocols that provide secure communication on a network. D-Link DCS-5605/DCS-5635 User Manual 58 - D-Link DCS-5605 | Product Manual - Page 60
of the FTP server. Most FTP servers are running at the default port (21). Interval: The time interval between each snapshots. Passive Mode: Some FTP servers allow clients to use passive mode when connecting to an FTP, which uses random ports for transfers. D-Link DCS-5605/DCS-5635 User Manual 59 - D-Link DCS-5605 | Product Manual - Page 61
on the video folder and choose the video file you would like to view. Refresh: Reloads the file and folder information from the SD card. D-Link DCS-5605/DCS-5635 User Manual 60 - D-Link DCS-5605 | Product Manual - Page 62
a high-light area. Night Mode: Select if your camera is in a low-light area and you need to improve the video quality. Schedule Mode: Select to set a specific time range to enable Day mode. The camera will switch to Night mode when outside this time range. D-Link DCS-5605/DCS-5635 User Manual 61 - D-Link DCS-5605 | Product Manual - Page 63
alarm devices as IR-Sensors and alarm relays to the PTZ IP camera. External I/O Port I/O Connector Definition for the Camera The DCS-5605/DCS-5635 provides a general I/O terminal block with one digital input DO to ON) OUTPUT (Max. 1A, 24VDC or 0.5A, 125VAC) D-Link DCS-5605/DCS-5635 User Manual 62 - D-Link DCS-5605 | Product Manual - Page 64
wiring configuration camera to record when triggered by an external device, you must first set your SMTP or FTP settings in order to send snapshots to your email account or FTP server, or video to your Samba network drive or an inserted Micro SD memory card. D-Link DCS-5605/DCS-5635 User Manual - D-Link DCS-5605 | Product Manual - Page 65
Under Record to, select either SD Card or Samba Network Drive. If you select Samba, entered the required camera will record 4 seconds before the trigger and then 4 seconds after the event has ended. Step 6 - Click Save Settings. Skip to page 65 to continue. D-Link DCS-5605/DCS-5635 User Manual - D-Link DCS-5605 | Product Manual - Page 66
to your email, go to the Setup > Snapshot section. If you want to record video to your Samba network drive or an inserted Micro SD memory card, refer to the previous page. Step 1 - Check the Enable on the individual fields. Step 5 - Click Save Settings. D-Link DCS-5605/DCS-5635 User Manual 65 - D-Link DCS-5605 | Product Manual - Page 67
Detection: When a motion is detected, the camera will trigger traditional alarming devices that connect to the system. D/I Signal 1: When triggering the digital input 1 device, the camera will trigger traditional alarming devices that connect to the system. D-Link DCS-5605/DCS-5635 User Manual 66 - D-Link DCS-5605 | Product Manual - Page 68
Enter a user name and then a password for that user. Click the Add button to add the user account. User List: All accounts (except for the admin account) will be listed. To remove the user account, select from the drop-down menu and click the Delete button. D-Link DCS-5605/DCS-5635 User Manual 67 - D-Link DCS-5605 | Product Manual - Page 69
the camera. This is useful to hide the camera or give the illusion the camera is turned off. Calibrate the Device: Click the Calibrate the Device button to reset the home position to the default setting if the camera was moved by hand or an external force. D-Link DCS-5605/DCS-5635 User Manual 68 - D-Link DCS-5605 | Product Manual - Page 70
Load Configuration button to apply the settings to the camera. Restore to Factory Defaults: Click the Restore Factory Defaults button to set the camera back to the factory default settings. Reboot Device: Click the Reboot Device button to restart the camera. D-Link DCS-5605/DCS-5635 User Manual 69 - D-Link DCS-5605 | Product Manual - Page 71
from the D-Link Support page to your local hard drive. Locate the file on your local hard drive by clicking the Browse button. Then, open the file and click the Upload button to start the firmware upgrade. Do NOT power the camera off during this process. D-Link DCS-5605/DCS-5635 User Manual 70 - D-Link DCS-5605 | Product Manual - Page 72
Status Device Info This page displays all the details information about your device and network connection. D-Link DCS-5605/DCS-5635 User Manual 71 - D-Link DCS-5605 | Product Manual - Page 73
Log This page displays the log information of your camera. You can save the log to a .txt file to your hard drive by clicking the Download button. D-Link DCS-5605/DCS-5635 User Manual 72 - D-Link DCS-5605 | Product Manual - Page 74
Help D-Link DCS-5605/DCS-5635 User Manual 73 - D-Link DCS-5605 | Product Manual - Page 75
Internet Camera uses Category 5 UTP cable allowing 10 Base-T and 100 Base-T networking. 7. Can the Internet Camera be setup as a PC-cam on a computer? No, the DCS-5635 Internet Camera is used only on a wireless 802.11n/g, Ethernet, or Fast Ethernet network. D-Link DCS-5605/DCS-5635 User Manual 74 - D-Link DCS-5605 | Product Manual - Page 76
Camera is not conflicting with any Web server you may have running on your network. The default router setting might be a possible reason. Check that the configuration of the router settings allow the Internet Camera to be accessed outside your local LAN. D-Link DCS-5605/DCS-5635 User Manual - D-Link DCS-5605 | Product Manual - Page 77
IP address. Turn off DHCP from the Network Settings in Windows® and configure the computer with a valid IP address, or connect the camera occur. How can I solve the problem? The video images might be noisy if the Internet Camera is used in a very low light Link DCS-5605/DCS-5635 User Manual 76 - D-Link DCS-5605 | Product Manual - Page 78
the PING command but first you must disconnect the Camera from the network. Click on Start > Run and type in CMD Type ping x.x.x.x, where x.x.x.x is the IP address of the Camera. The replies, as illustrated below, will help diagnose any connection problems. D-Link DCS-5605/DCS-5635 User Manual 77 - D-Link DCS-5605 | Product Manual - Page 79
Using & Configuring 3G Compatible Cell Phones To enable mobile device video streaming, you will need to configure profile 4 for mobile viewing (see below). D-Link DCS-5605/DCS-5635 User Manual 78 - D-Link DCS-5605 | Product Manual - Page 80
Play from RealPlayer The following steps are based on a Nokia 6630 cell phone. Step 1 - Press the Menu button and select Media. Step 2 - Select Open. Step 3 - Select RealPlayer. D-Link DCS-5605/DCS-5635 User Manual 79 - D-Link DCS-5605 | Product Manual - Page 81
Step 4 - Select Open. Step 5 - When RealPlayer opens, press Options. D-Link DCS-5605/DCS-5635 User Manual 80 - D-Link DCS-5605 | Product Manual - Page 82
Step 6 - Select Download. Step 7 - Select Video Clips. Note: 71.34.50.5 is the camera's IP address in this sample. Step 8 - Press Options. D-Link DCS-5605/DCS-5635 User Manual 81 - D-Link DCS-5605 | Product Manual - Page 83
Step 9 - Select Navigation Options. Step 10 - Select Go to web address. Step 11 - Input your rtsp address. D-Link DCS-5605/DCS-5635 User Manual 82 - D-Link DCS-5605 | Product Manual - Page 84
Step 12 - Press Yes, and allow Connection and Loading of the streaming video. Step 13 - Enjoy streaming video on your cellphone. D-Link DCS-5605/DCS-5635 User Manual 83 - D-Link DCS-5605 | Product Manual - Page 85
Play from PVPlayer The following steps are based on a Nokia 6630 cell phone. Step 1 - Press the Menu button and select PVPlayer. Step 2 - Select Open. Step 3 - Press the Options button. D-Link DCS-5605/DCS-5635 User Manual 84 - D-Link DCS-5605 | Product Manual - Page 86
Step 4 - Select Open. Step 5 - Input your rtsp address. Note: 71.34.50.5 is the camera's IP address in this sample. Step 6 - Enjoy streaming video on your cellphone. D-Link DCS-5605/DCS-5635 User Manual 85 - D-Link DCS-5605 | Product Manual - Page 87
of the LED blinking and a factory restore has been completed. Restoring the factory defaults will result in the loss of any previous settings and will require running the Installation Wizard to return the DCS-5605/DCS-5635 to a normal state. Reset Button D-Link DCS-5605/DCS-5635 User Manual 86 - D-Link DCS-5605 | Product Manual - Page 88
Play, which is a networking architecture that provides compatibility among networking equipment, software, and peripherals. The DCS-5605/DCS-5635 is a UPnP™ enabled Camera. If your operating system > Control Panel. Step 2 - Click Add or Remove Programs D-Link DCS-5605/DCS-5635 User Manual 87 - D-Link DCS-5605 | Product Manual - Page 89
Step 3 - Click Add/Remove Windows Components. Step 4 - The following screen will appear. Click Add/Remove Windows Components, highlight Networking Services, and then click Details. Step 5 - Check the Universal Plug and Play box and then click OK. D-Link DCS-5605/DCS-5635 User Manual 88 - D-Link DCS-5605 | Product Manual - Page 90
Step 6 - Click Next to continue. Step 7 - Please wait while Setup configures the components. Step 8 - Click Finish. D-Link DCS-5605/DCS-5635 User Manual 89 - D-Link DCS-5605 | Product Manual - Page 91
, 198.168.0.146). Step 11 - After you click on the DCS-5605/DCS-5635-146 icon, your Internet browser will automatically be opened to the IP address of the camera, in this example it is: http://192.168.0.146. Your camera may have a different IP Address. D-Link DCS-5605/DCS-5635 User Manual 90 - D-Link DCS-5605 | Product Manual - Page 92
* • IEEE 802.11n: From MCS0 to MCS15 • IEEE 802.11g: 54, 48, 36, 24, 18, 12, 9, 6 Mbps • IEEE 802.11b: 11, 5.5,2, 1 Mbps • Auto-select or Manual specified POWER • 12VDC/2A POWER CONSUMPTION • 100-240VAC, 50/60Hz, 0.4A D-Link DCS-5605/DCS-5635 User Manual 91 - D-Link DCS-5605 | Product Manual - Page 93
W x H) • 140.3 x 136.1 x 140.1 mm WEIGHT • DCS-5605: 810g • DCS-5635: 855g OPERATING TEMPERATURE • 0° to 40° (32° to 104°) STORAGE TEMPERATURE • -20° to 70° (-4° to 158°) OPERATING HUMIDITY • 20%-80% RH non-condensing CERTIFICATIONS • FCC • IC • CE • C-Tick D-Link DCS-5605/DCS-5635 User Manual 92 - D-Link DCS-5605 | Product Manual - Page 94
questions and answers to technical issues. For customers within the United States: Phone Support: (877) 354-6555 Internet Support: http://support.dlink.com For customers within Canada: Phone Support: (877) 354-6560 Internet Support: http://support.dlink.ca D-Link DCS-5605/DCS-5635 User Manual 93 - D-Link DCS-5605 | Product Manual - Page 95
the actual purchase price paid. Any repair or replacement will be rendered by D-Link at an Authorized D-Link Service Office. The Warranty provided hereunder for Hardware and Software portions of D-Link's products will not be applied Link as outlined below: D-Link DCS-5605/DCS-5635 User Manual 94 - D-Link DCS-5605 | Product Manual - Page 96
, DAMAGES FOR LOSS OF GOODWILL, LOSS OF REVENUE OR PROFIT, WORK STOPPAGE, COMPUTER FAILURE OR MALFUNCTION, FAILURE OF OTHER EQUIPMENT OR COMPUTER PROGRAMS TO WHICH D-LINK'S PRODUCT IS CONNECTED WITH, LOSS OF INFORMATION OR DATA CONTAINED IN, STORED ON, D-Link DCS-5605/DCS-5635 User Manual 95 - D-Link DCS-5605 | Product Manual - Page 97
LINK FOR WARRANTY SERVICE) RESULTING FROM THE USE OF THE PRODUCT, RELATING TO WARRANTY SERVICE, OR ARISING OUT OF ANY BREACH OF THIS LIMITED WARRANTY, EVEN IF D-LINK LINK UNDER THIS WARRANTY IS LIMITED TO THE PURCHASE PRICE the instructions, may Link office. D-Link DCS-5605/DCS-5635 User Manual 96 - D-Link DCS-5605 | Product Manual - Page 98
Registration Product registration is entirely voluntary and failure to complete or return this form will not diminish your warranty rights. Version 1.1 November 26, 2010 D-Link DCS-5605/DCS-5635 User Manual 97
-
 1
1 -
 2
2 -
 3
3 -
 4
4 -
 5
5 -
 6
6 -
 7
7 -
8
-
9
-
10
-
11
-
12
-
13
-
14
-
15
-
16
-
17
-
18
-
19
-
20
-
21
-
22
-
23
-
24
-
25
-
26
-
27
-
28
-
29
-
30
-
31
-
32
-
33
-
34
-
35
-
36
-
37
-
38
-
39
-
40
-
41
-
42
-
43
-
44
-
45
-
46
-
47
-
48
-
49
-
50
-
51
-
52
-
53
-
54
-
55
-
56
-
57
-
58
-
59
-
60
-
61
-
62
-
63
-
64
-
65
-
66
-
67
-
68
-
69
-
70
-
71
-
72
-
73
-
74
-
75
-
76
-
77
-
78
-
79
-
80
-
81
-
82
-
83
-
84
-
85
-
86
-
87
-
88
-
89
-
90
-
91
-
92
-
93
-
94
-
95
-
96
-
97
-
98
 |
 |