Dell Latitude ATG D620 User Guide - Page 58
Wireless Local Area Network WLAN Card - replacement keys
 |
View all Dell Latitude ATG D620 manuals
Add to My Manuals
Save this manual to your list of manuals |
Page 58 highlights
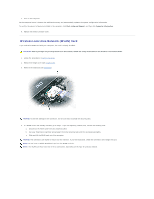
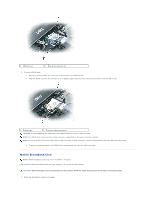
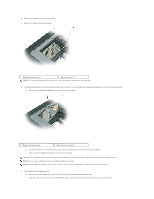
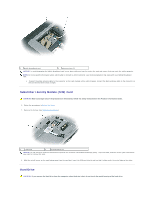
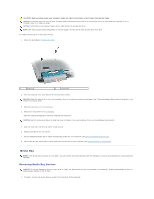
7. Turn on the computer. As the computer boots, it detects the additional memory and automatically updates the system configuration information. To confirm the amount of memory installed in the computer, click Start®Help and Support, and then click Computer Information. 8. Replace the memory module cover. Wireless Local Area Network (WLAN) Card If you ordered a WLAN card with your computer, the card is already installed. CAUTION: Before you begin any of the procedures in this section, follow the safety instructions in the Product Information Guide. 1. Follow the procedures in Before You Begin. 2. Remove the hinge cover (see Hinge Cover). 3. Remove the keyboard (see Keyboard). NOTICE: To prevent damage to the connector, do not use tools to spread the securing clips. 4. If a WLAN card is not already installed, go to step 5. If you are replacing a WLAN card, remove the existing card: a. Disconnect the WLAN card from any attached cables. b. Use your fingertips to carefully spread apart the metal securing tabs until the card pops up slightly. c. Slide and lift the WLAN card out of its connector. NOTICE: The connectors are keyed to ensure correct insertion. If you feel resistance, check the connectors and realign the card. NOTE: Do not insert a Mobile Broadband card into the WLAN card slot. NOTE: The WLAN card may have two or three connectors, depending on the type of card you ordered.
-
 1
1 -
2
-
3
-
4
-
5
-
6
-
7
-
8
-
9
-
10
-
11
-
12
-
13
-
14
-
15
-
16
-
17
-
18
-
19
-
20
-
21
-
22
-
23
-
24
-
25
-
26
-
27
-
28
-
29
-
30
-
31
-
32
-
33
-
34
-
35
-
36
-
37
-
38
-
39
-
40
-
41
-
42
-
43
-
44
-
45
-
46
-
47
-
48
-
49
-
50
-
51
-
52
-
 53
53 -
 54
54 -
 55
55 -
 56
56 -
 57
57 -
 58
58 -
 59
59 -
 60
60 -
 61
61 -
 62
62 -
 63
63 -
64
-
65
-
66
-
67
-
68
-
69
-
70
-
71
-
72
-
73
-
74
-
75
-
76
-
77
-
78
-
79
-
80
-
81
-
82
-
83
-
84
-
85
-
86
-
87
-
88
-
89
-
90
-
91
-
92
-
93
-
94
-
95
-
96
-
97
-
98
-
99
-
100
-
101
-
102
 |
 |
