Dell Mobile Venue Pro User's Guide - Page 78
On-screen camera controls, To capture pictures, After a picture is captured
 |
View all Dell Mobile Venue Pro manuals
Add to My Manuals
Save this manual to your list of manuals |
Page 78 highlights
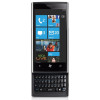
On-screen camera controls 12 3 4 1 Touch to select from the following flash modes: Auto flash is enabled. Flash is disabled. Flash is enabled. 2 Touch to zoom out. 3 Touch to zoom in. 4 Touch to switch between the camera mode and camcorder mode. To capture pictures 1 Ensure that the camera mode is enabled as indicated. 2 Focus on the object in the viewfinder screen. If necessary, touch + or - to zoom in or zoom out the viewfinder. 3 To start the auto-focus mode, half-press and hold the camera button. 4 Press the camera button all the way down and release to capture the picture. NOTE: To achieve optimal focus such as for taking a close shot, halfpress and hold the camera button to use the auto-focus mode. Then without releasing the camera button press it again to take a picture. To manage captured pictures 1 After a picture is captured, it stays on the screen. Flick the picture to view the other pictures captured most recently. If you restart the camera which opens with the viewfinder, flick the viewfinder to view the captured pictures. 2 Touch or flick the sequential dots up, or touch and hold a desired picture to view the application bar menu, where you can perform the following tasks: 78 Applications
-
 1
1 -
2
-
3
-
4
-
5
-
6
-
7
-
8
-
9
-
10
-
11
-
12
-
13
-
14
-
15
-
16
-
17
-
18
-
19
-
20
-
21
-
22
-
23
-
24
-
25
-
26
-
27
-
28
-
29
-
30
-
31
-
32
-
33
-
34
-
35
-
36
-
37
-
38
-
39
-
40
-
41
-
42
-
43
-
44
-
45
-
46
-
47
-
48
-
49
-
50
-
51
-
52
-
53
-
54
-
55
-
56
-
57
-
58
-
59
-
60
-
61
-
62
-
63
-
64
-
65
-
66
-
67
-
68
-
69
-
70
-
71
-
72
-
 73
73 -
 74
74 -
 75
75 -
 76
76 -
 77
77 -
 78
78 -
 79
79 -
 80
80 -
 81
81 -
 82
82 -
 83
83 -
84
-
85
-
86
-
87
-
88
-
89
-
90
-
91
-
92
-
93
-
94
-
95
-
96
-
97
-
98
-
99
-
100
-
101
-
102
-
103
-
104
-
105
-
106
-
107
 |
 |
