Dell PowerConnect 7024 Getting Started Guide - Page 230
levels, see the user documentation., To setup a user account
 |
View all Dell PowerConnect 7024 manuals
Add to My Manuals
Save this manual to your list of manuals |
Page 230 highlights
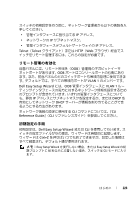
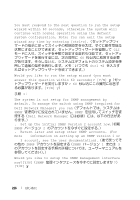
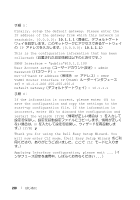
手順 2: Now we need to setup your initial privilege (Level 15) user account. This account is used to login to the CLI and Web interface. You may setup other accounts and change privilege levels later. For more information on setting up user accounts and changing privilege levels, see the user documentation 15 CLI と Web To setup a user account Please enter the user name root]:admin Please enter the user password Please reenter the user password 手順 3: Next, IP addresses are setup on the OOB (Out-Of-Band) Interface and/or the VLAN 1 routing interface OOB VLAN 1 IP You can use these IP addresses to access the CLI, Web interface, or SNMP interface of the switch IP CLI、Web SNMP 228 はじめに
-
 1
1 -
2
-
3
-
4
-
5
-
6
-
7
-
8
-
9
-
10
-
11
-
12
-
13
-
14
-
15
-
16
-
17
-
18
-
19
-
20
-
21
-
22
-
23
-
24
-
25
-
26
-
27
-
28
-
29
-
30
-
31
-
32
-
33
-
34
-
35
-
36
-
37
-
38
-
39
-
40
-
41
-
42
-
43
-
44
-
45
-
46
-
47
-
48
-
49
-
50
-
51
-
52
-
53
-
54
-
55
-
56
-
57
-
58
-
59
-
60
-
61
-
62
-
63
-
64
-
65
-
66
-
67
-
68
-
69
-
70
-
71
-
72
-
73
-
74
-
75
-
76
-
77
-
78
-
79
-
80
-
81
-
82
-
83
-
84
-
85
-
86
-
87
-
88
-
89
-
90
-
91
-
92
-
93
-
94
-
95
-
96
-
97
-
98
-
99
-
100
-
101
-
102
-
103
-
104
-
105
-
106
-
107
-
108
-
109
-
110
-
111
-
112
-
113
-
114
-
115
-
116
-
117
-
118
-
119
-
120
-
121
-
122
-
123
-
124
-
125
-
126
-
127
-
128
-
129
-
130
-
131
-
132
-
133
-
134
-
135
-
136
-
137
-
138
-
139
-
140
-
141
-
142
-
143
-
144
-
145
-
146
-
147
-
148
-
149
-
150
-
151
-
152
-
153
-
154
-
155
-
156
-
157
-
158
-
159
-
160
-
161
-
162
-
163
-
164
-
165
-
166
-
167
-
168
-
169
-
170
-
171
-
172
-
173
-
174
-
175
-
176
-
177
-
178
-
179
-
180
-
181
-
182
-
183
-
184
-
185
-
186
-
187
-
188
-
189
-
190
-
191
-
192
-
193
-
194
-
195
-
196
-
197
-
198
-
199
-
200
-
201
-
202
-
203
-
204
-
205
-
206
-
207
-
208
-
209
-
210
-
211
-
212
-
213
-
214
-
215
-
216
-
217
-
218
-
219
-
220
-
221
-
222
-
223
-
224
-
 225
225 -
 226
226 -
 227
227 -
 228
228 -
 229
229 -
 230
230 -
 231
231 -
 232
232 -
 233
233 -
 234
234 -
 235
235 -
236
-
237
-
238
-
239
-
240
-
241
-
242
-
243
-
244
-
245
-
246
-
247
-
248
-
249
-
250
-
251
-
252
-
253
-
254
-
255
-
256
-
257
-
258
-
259
-
260
-
261
-
262
-
263
-
264
-
265
-
266
-
267
-
268
-
269
-
270
-
271
-
272
-
273
-
274
-
275
-
276
-
277
-
278
-
279
-
280
-
281
-
282
-
283
-
284
-
285
-
286
-
287
-
288
-
289
-
290
-
291
-
292
-
293
-
294
-
295
-
296
-
297
-
298
-
299
-
300
-
301
-
302
-
303
-
304
-
305
-
306
-
307
-
308
-
309
-
310
-
311
-
312
-
313
-
314
-
315
-
316
-
317
-
318
-
319
-
320
-
321
-
322
-
323
-
324
-
325
-
326
-
327
-
328
-
329
-
330
-
331
-
332
-
333
-
334
-
335
-
336
-
337
-
338
-
339
-
340
-
341
-
342
-
343
-
344
-
345
-
346
-
347
-
348
-
349
-
350
-
351
-
352
-
353
-
354
-
355
-
356
-
357
-
358
-
359
-
360
-
361
-
362
-
363
-
364
-
365
-
366
-
367
-
368
-
369
-
370
-
371
-
372
-
373
-
374
-
375
-
376
-
377
-
378
-
379
-
380
-
381
-
382
-
383
-
384
-
385
-
386
-
387
-
388
-
389
-
390
-
391
-
392
-
393
-
394
-
395
-
396
-
397
-
398
-
399
-
400
-
401
-
402
 |
 |

228
はじめに
手順
2
:
Now we need to setup your initial privilege (Level 15)
user account. This account is used to login to the CLI
and Web interface. You may setup other accounts and
change privilege levels later. For more information on
setting up user accounts and changing privilege
levels, see the user documentation.
(ここで初期権限(レベ
ル
15
)のユーザーアカウントを設定する必要があります。このアカウ
ントは、
CLI
と
Web
インタフェースへのログインに使用します。後
で別のアカウントを設定して権限レベルを変更することも可能です。
ユーザーアカウントの設定と権限レベルの変更の詳細については、ユー
ザーマニュアルを参照してください。)
To setup a user account:
(ユーザーアカウントを設定するには、
以下の項目を入力します。)
Please enter the user name.
(ユーザー名を入力します。)
[root]:
admin
Please enter the user password:
(ユーザーパスワードを入力
します。)
********
Please reenter the user password:
(ユーザーパスワードを再
入力します。)
********
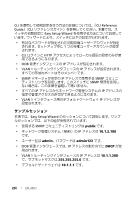
手順
3
:
Next, IP addresses are setup on the OOB (Out-Of-Band)
Interface and/or the VLAN 1 routing interface.
(次に、
OOB
(帯域外)インタフェースおよび
/
または
VLAN 1
ルーティン
グインタフェースに
IP
アドレスを設定します。)
You can use these IP addresses to access the CLI, Web
interface, or SNMP interface of the switch.
(これらの
IP
アドレスを使用して、スイッチの
CLI
、
Web
インタフェース、ま
たは
SNMP
インタフェースにアクセスできます。)