Dell PowerConnect W-IAP3WN Dell Instant 6.2.0.0-3.2.0.0 User Guide - Page 59
Network-based, Allow any to all destinations, Edit Rule, New Rule, Reauth interval, Accounting
 |
View all Dell PowerConnect W-IAP3WN manuals
Add to My Manuals
Save this manual to your list of manuals |
Page 59 highlights
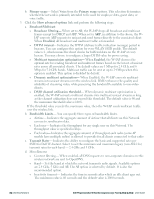
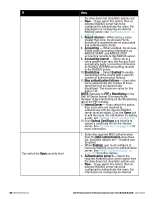
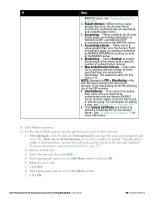
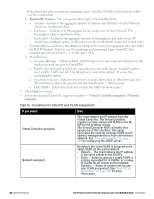
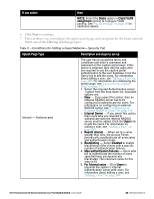
If then, RADIUS server, see "Authentication" on page 111. 3. Reauth interval- When set to a value greater than zero, the Access Points periodically reauthenticate all associated and authenticated clients. 4. Accounting - When enabled, the Access Points posts accounting information as RADIUS START and RADIUS STOP accounting records to the RADIUS server. 5. Accounting interval - When set to a value greater than zero, the Access Point periodically posts accounting information as RADIUS INTERIM accounting records to the RADIUS server. 6. Blacklisting- Select Enabled to enable blacklisting of the clients with a specific number of authentication failures. 7. Max authentication failures- Users who fail to authenticate the number of times specified here are dynamically blacklisted. The maximum value for this entry is 10. NOTE: Navigate to PEF > Blacklisting in the Dell W-Series Instant UI to specify the duration of the blacklisting on the Blacklisting tab of the PEF window. 8. InternalServer- If you select this option, then users who are required to authenticate with the internal RADIUS server must be added. Click the Users link to add the users. For information on adding a user, see"Adding a User" on page 269. 9. Click Upload Certificate and browse to upload a certificate file for the internal server. See "Certificates" on page 138 for more information. 10. Click Next to continue. 11. Use the Access Rules page to specify optional access rules for this network. n Network-based- Set the slider to Network-based if you want the same rules to apply to all users. The Allow any to all destinations access rule is enabled by default. This rule allows traffic to all destinations. Instant Firewall treats packets based on the first rule matched. For more information, see "Instant Firewall" on page 155. To edit the default rule: a. Select the rule and then click Edit. b. Select appropriate options in the Edit Rule window and click OK. To define an access rule: a. Click New. b. Select appropriate options in the New Rule window. c. Click OK. Dell PowerConnect W-Series Instant Access Point 6.2.0.0-3.2.0.0 | User Guide 59 | Wireless Network
-
 1
1 -
2
-
3
-
4
-
5
-
6
-
7
-
8
-
9
-
10
-
11
-
12
-
13
-
14
-
15
-
16
-
17
-
18
-
19
-
20
-
21
-
22
-
23
-
24
-
25
-
26
-
27
-
28
-
29
-
30
-
31
-
32
-
33
-
34
-
35
-
36
-
37
-
38
-
39
-
40
-
41
-
42
-
43
-
44
-
45
-
46
-
47
-
48
-
49
-
50
-
51
-
52
-
53
-
 54
54 -
 55
55 -
 56
56 -
 57
57 -
 58
58 -
 59
59 -
 60
60 -
 61
61 -
 62
62 -
 63
63 -
 64
64 -
65
-
66
-
67
-
68
-
69
-
70
-
71
-
72
-
73
-
74
-
75
-
76
-
77
-
78
-
79
-
80
-
81
-
82
-
83
-
84
-
85
-
86
-
87
-
88
-
89
-
90
-
91
-
92
-
93
-
94
-
95
-
96
-
97
-
98
-
99
-
100
-
101
-
102
-
103
-
104
-
105
-
106
-
107
-
108
-
109
-
110
-
111
-
112
-
113
-
114
-
115
-
116
-
117
-
118
-
119
-
120
-
121
-
122
-
123
-
124
-
125
-
126
-
127
-
128
-
129
-
130
-
131
-
132
-
133
-
134
-
135
-
136
-
137
-
138
-
139
-
140
-
141
-
142
-
143
-
144
-
145
-
146
-
147
-
148
-
149
-
150
-
151
-
152
-
153
-
154
-
155
-
156
-
157
-
158
-
159
-
160
-
161
-
162
-
163
-
164
-
165
-
166
-
167
-
168
-
169
-
170
-
171
-
172
-
173
-
174
-
175
-
176
-
177
-
178
-
179
-
180
-
181
-
182
-
183
-
184
-
185
-
186
-
187
-
188
-
189
-
190
-
191
-
192
-
193
-
194
-
195
-
196
-
197
-
198
-
199
-
200
-
201
-
202
-
203
-
204
-
205
-
206
-
207
-
208
-
209
-
210
-
211
-
212
-
213
-
214
-
215
-
216
-
217
-
218
-
219
-
220
-
221
-
222
-
223
-
224
-
225
-
226
-
227
-
228
-
229
-
230
-
231
-
232
-
233
-
234
-
235
-
236
-
237
-
238
-
239
-
240
-
241
-
242
-
243
-
244
-
245
-
246
-
247
-
248
-
249
-
250
-
251
-
252
-
253
-
254
-
255
-
256
-
257
-
258
-
259
-
260
-
261
-
262
-
263
-
264
-
265
-
266
-
267
-
268
-
269
-
270
-
271
-
272
-
273
-
274
-
275
-
276
-
277
-
278
-
279
-
280
-
281
-
282
-
283
-
284
-
285
-
286
-
287
-
288
-
289
-
290
-
291
-
292
-
293
-
294
-
295
-
296
 |
 |