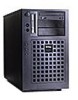
Dell PowerEdge 2400 Rack Installation Guide
Dell PowerEdge 2400 Manual
 |
View all Dell PowerEdge 2400 manuals
Add to My Manuals
Save this manual to your list of manuals |
Dell PowerEdge 2400 manual content summary:
- Dell PowerEdge 2400 | Rack Installation Guide - Page 1
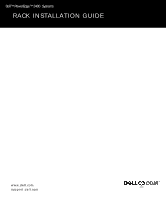
Dell™ PowerEdge™ 2400 Systems RACK INSTALLATION GUIDE www.dell.com support.dell.com - Dell PowerEdge 2400 | Rack Installation Guide - Page 2
of your computer system. NOTICE: A NOTICE indicates either potential damage to hardware or loss of data and tells you how to avoid the problem. CAUTION: of Dell Computer Corporation is strictly forbidden. Trademarks used in this text: Dell, the DELL E COM logo, and PowerEdge are trademarks of Dell - Dell PowerEdge 2400 | Rack Installation Guide - Page 3
Instructions Use the following safety guidelines to ensure your own personal safety and to help protect your server, storage system, or appliance from potential damage. Notes, Notices, Cautions, and Warnings Throughout this guide caution and warnings while servicing this system: CAUTION: There is - Dell PowerEdge 2400 | Rack Installation Guide - Page 4
sources. Also, do not block cooling vents. • Do not spill food or liquids on your system components, and never operate the product in a wet environment. If the computer gets wet, see the appropriate chapter in your troubleshooting guide or contact a Dell-authorized service provider. • Do not push - Dell PowerEdge 2400 | Rack Installation Guide - Page 5
power, use a surge suppressor, line conditioner, or uninterruptible power supply (UPS). • Position system cables and power cables carefully; route system cables and the power 140 degrees Fahrenheit). Do not attempt to open or service batteries; replace batteries only with batteries designated for the - Dell PowerEdge 2400 | Rack Installation Guide - Page 6
service your computer or storage system equipment and trained to deal with products capable of producing hazardous energy levels. • When connecting or disconnecting power to hot-pluggable power supplies, if offered with your Dell product, observe the following guidelines: - Install the power supply - Dell PowerEdge 2400 | Rack Installation Guide - Page 7
• System rack kits are intended to be installed in a Dell rack by trained service tech- nicians. If you install the kit in any other rack, be sure that the rack meets the specifications of a Dell rack. • Do not move large racks by yourself. Due to the height and weight of the rack, Dell recommends a - Dell PowerEdge 2400 | Rack Installation Guide - Page 8
service the computer system yourself, except as explained in this guide and elsewhere in Dell documentation. Always follow installation and service instructions closely. NOTICE: To help avoid possible damage to the system your computer and devices from their power sources. Also, disconnect any - Dell PowerEdge 2400 | Rack Installation Guide - Page 9
Discharge" in the safety instructions at the front of this guide. Ergonomic Computing Habits screen is at eye level or slightly lower when you sit in front of the monitor. • Adjust the tilt of the monitor, its contrast and brightness settings, and the lighting around you (such as overhead lights - Dell PowerEdge 2400 | Rack Installation Guide - Page 10
provides good lower back support. • Keep your the floor and your thighs level. • When sitting, make sure the weight of your legs is on your feet and not on the front of stop typing, try to do things that use both hands. 1 Monitor screen at or below eye level 2 Wrists relaxed and flat 3 Arms at - Dell PowerEdge 2400 | Rack Installation Guide - Page 11
-U or 42-U Rack 1-3 Installing the Slide Assemblies in the Rack 1-7 Installing the PowerEdge System in the Rack 1-11 Installing the Rack Adapters 1-11 Installing the Computer 1-14 Installing the Cable-Management Arm 1-16 Replacing the Rack Doors 1-17 Figure 1-1. Rack Kit Contents 1-2 Figure - Dell PowerEdge 2400 | Rack Installation Guide - Page 12
xii - Dell PowerEdge 2400 | Rack Installation Guide - Page 13
Dell™ PowerEdge™ 2400 Systems Rack Installation Guide This installation guide provides instructions for trained service technicians installing one or more Dell PowerEdge 2400 computer systems in a Dell rack. One rack kit is required for each PowerEdge system to be installed in the rack. The rack kit - Dell PowerEdge 2400 | Rack Installation Guide - Page 14
x 0.5-inch screws (1) 8-32 x 0.313inch screws (4) *2 screws may be installed shoulder screws (3) * If you purchased a Dell rack with your PowerEdge system, some of the hardware may be preinstalled in the rack. Figure 1-1. Rack Kit Contents 1-2 Dell PowerEdge 2400 Systems Rack Installation Guide - Dell PowerEdge 2400 | Rack Installation Guide - Page 15
weight of the doors, never attempt to remove the doors by yourself. 1. Open the latch on the front door. If you have a 24-U (1 U=1.75-inches) rack cabinet, unlock and twist the handle clockwise and open the door (see Figure 1-2). support.dell.com Dell PowerEdge 2400 Systems Rack Installation Guide - Dell PowerEdge 2400 | Rack Installation Guide - Page 16
Latch on the 24-U Rack Door If you have a 42-U rack cabinet, slide the latch's push-button cover up as far as it will go, press the push button, rotate the handle clockwise until the latch releases, and then pull the door open (see Figure 1-3). 1-4 Dell PowerEdge 2400 Systems Rack Installation Guide - Dell PowerEdge 2400 | Rack Installation Guide - Page 17
push-button cover push button handle Figure 1-3. Opening the Latch on the 42-U Rack Door 2. Remove the front door of the rack. If you rack. Store the doors in an area where they will not fall over while you install the kit. support.dell.com Dell PowerEdge 2400 Systems Rack Installation Guide 1-5 - Dell PowerEdge 2400 | Rack Installation Guide - Page 18
Figure 1-4. Removing the 42-U Rack Doors hinge release lever 1-6 Dell PowerEdge 2400 Systems Rack Installation Guide - Dell PowerEdge 2400 | Rack Installation Guide - Page 19
skip this section. You must allow 6 U (10.5 inches) of vertical space for each PowerEdge 2400 system you install in the rack. NOTE: The rails of the rack are marked by small indentations in 1-U increments (see Figure 1-6). support.dell.com Dell PowerEdge 2400 Systems Rack Installation Guide 1-7 - Dell PowerEdge 2400 | Rack Installation Guide - Page 20
for the slide brackets as shown on the template. After determining where to install the PowerEdge system, mark the rack's front and back vertical rails with a felt-tip marker or masking tape where the system's lower edge will be located. 1-8 Dell PowerEdge 2400 Systems Rack Installation Guide - Dell PowerEdge 2400 | Rack Installation Guide - Page 21
on the slide assembly until the mounting tabs lock into the back side of the rack. 8. Repeat steps 5 through 7 for the other side of the rack. Ensure that the rails are mounted at the same position on each side of the rack. support.dell.com Dell PowerEdge 2400 Systems Rack Installation Guide 1-9 - Dell PowerEdge 2400 | Rack Installation Guide - Page 22
push button slide-assembly mounting-bracket flange slide assemblies (2) front of rack Figure 1-8. Installing the Slide Assemblies mounting tabs 1-10 Dell PowerEdge 2400 Systems Rack Installation Guide - Dell PowerEdge 2400 | Rack Installation Guide - Page 23
a small flat-blade screwdriver to remove the plastic screw from each of the four rubber feet on the bottom of the chassis (see Figure 1-10). support.dell.com Dell PowerEdge 2400 Systems Rack Installation Guide 1-11 - Dell PowerEdge 2400 | Rack Installation Guide - Page 24
covers. See Chapter 7, "Checking Inside the Computer", in the computer's Installation and Troubleshooting Guide for instructions on removing the bezel and computer covers. 6. Remove the two screws at the of the computer, and lift it away. 1-12 Dell PowerEdge 2400 Systems Rack Installation Guide - Dell PowerEdge 2400 | Rack Installation Guide - Page 25
the top cover with the top cover assembly supplied in the rack kit. Use the two screws Troubleshooting Guide for instructions on replacing the computer covers and front bezel. 10. Install the shoulder screws (see Figure 1-12). support.dell.com Dell PowerEdge 2400 Systems Rack Installation Guide - Dell PowerEdge 2400 | Rack Installation Guide - Page 26
size and weight of the computer, never attempt to install the computer in the slide assemblies by yourself. 2. Lift the computer into position. Place one hand on the front-bottom side of the computer and the other hand on the back-bottom side of the computer. 1-14 Dell PowerEdge 2400 Systems Rack - Dell PowerEdge 2400 | Rack Installation Guide - Page 27
top and the bottom of the computer with the back rail slots on the slide assemblies. WARNING: Make sure that the server shoulder screws are securely engaged in the slots. 4. Figure 1-13. Installing the Computer in the Rack support.dell.com Dell PowerEdge 2400 Systems Rack Installation Guide 1-15 - Dell PowerEdge 2400 | Rack Installation Guide - Page 28
in relation to the computer-that is, parallel to the ground. vertical rail 8-32 x 0.313-inch screws (2) bracket 10-32 x 0.5-inch screw cable-management arm Velcro strip back of computer Figure 1-14. Installing the Cable-Management Arm 1-16 Dell PowerEdge 2400 Systems Rack Installation Guide - Dell PowerEdge 2400 | Rack Installation Guide - Page 29
rotating the handle counterclockwise until it stops, push in the handle until it locks in position, and then slide the cover down over the push button (see Figure 1-3). 5. Repeat steps 1 through 4 to install the back door. support.dell.com Dell PowerEdge 2400 Systems Rack Installation Guide 1-17 - Dell PowerEdge 2400 | Rack Installation Guide - Page 30
with the hinge insert in the rack as shown in Figure 1-5. 2. Slide the hinge pins into the hinge insert in the rack until the hinges lock into position. 3. Repeat steps 1 and 2 to install the back door. 1-18 Dell PowerEdge 2400 Systems Rack Installation Guide - Dell PowerEdge 2400 | Rack Installation Guide - Page 31
installing in rack, 1-11, 1-14 weight, 1-11 D doors removing, 1-3 replacing, 1-17 E electrostatic discharge. See ESD ESD, ix I installing cable management arm, 1-16 computer, 1-11, , 1-2 list of, 1-1 rack kit installation slide assemblies, 1-7 removing doors, 1-3 support.dell.com Index 1 - Dell PowerEdge 2400 | Rack Installation Guide - Page 32
S safety instructions for preventing ESD, ix health considerations, ix slide assemblies installing, 1-7 W warnings, iii 2 Dell PowerEdge 2400 Systems Rack Installation Guide
-
 1
1 -
 2
2 -
 3
3 -
 4
4 -
 5
5 -
 6
6 -
 7
7 -
8
-
9
-
10
-
11
-
12
-
13
-
14
-
15
-
16
-
17
-
18
-
19
-
20
-
21
-
22
-
23
-
24
-
25
-
26
-
27
-
28
-
29
-
30
-
31
-
32
 |
 |

www.dell.com
support.dell.com
Dell™ PowerEdge™ 2400
Systems
RACK INSTALLATION GUIDE