Dell PowerEdge 2400 Rack Installation Guide - Page 21
Determining Where to Install the Slide Assemblies, pushbutton clicks out.
 |
View all Dell PowerEdge 2400 manuals
Add to My Manuals
Save this manual to your list of manuals |
Page 21 highlights
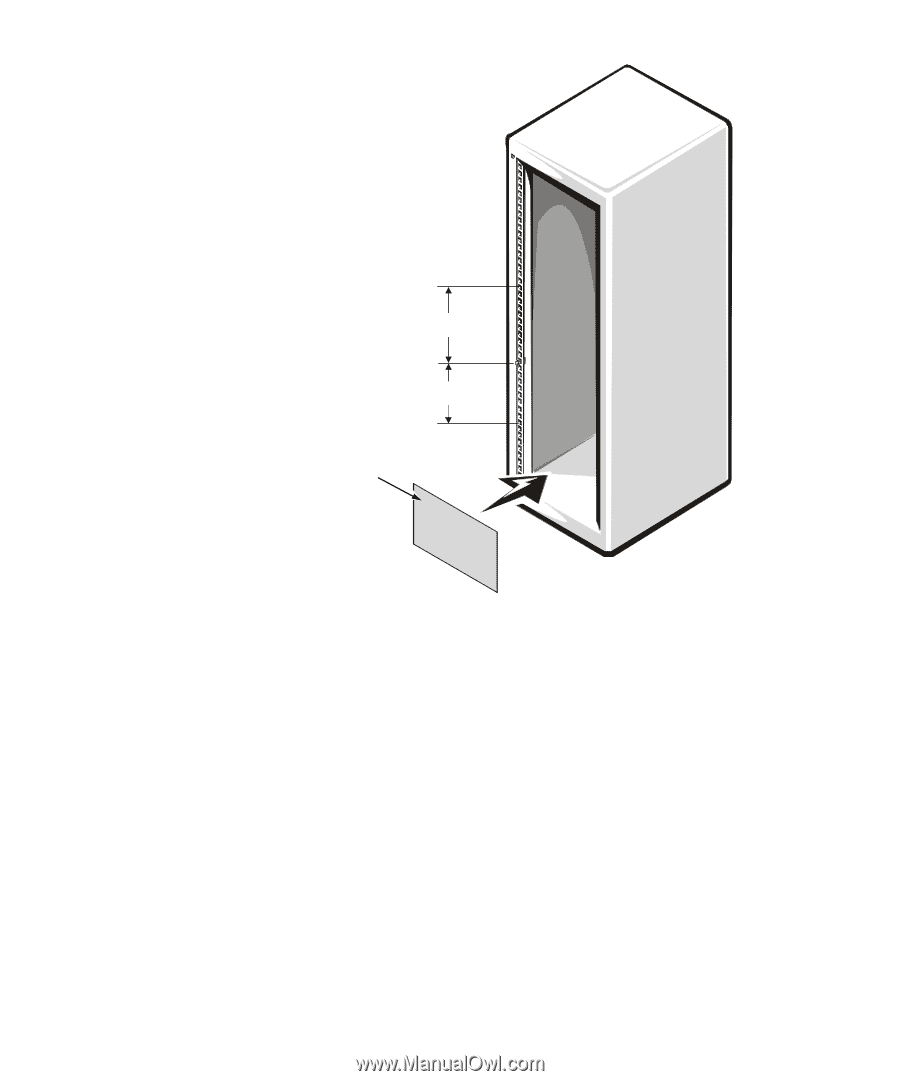
6U (10.5 inches) between slide assemblies (drawing is not to scale) 10.5 inches 10.5 inches template Figure 1-7. Determining Where to Install the Slide Assemblies 5. Align the mounting tab on the front of the slide-assembly mounting bracket with the notches in the rack (see Figure 1-8). 6. Push until the mounting tabs are secure in the notches on the rack and the pushbutton clicks out. 7. Push back on the slide assembly until the mounting tabs lock into the back side of the rack. 8. Repeat steps 5 through 7 for the other side of the rack. Ensure that the rails are mounted at the same position on each side of the rack. support.dell.com Dell PowerEdge 2400 Systems Rack Installation Guide 1-9
-
 1
1 -
2
-
3
-
4
-
5
-
6
-
7
-
8
-
9
-
10
-
11
-
12
-
13
-
14
-
15
-
 16
16 -
 17
17 -
 18
18 -
 19
19 -
 20
20 -
 21
21 -
 22
22 -
 23
23 -
 24
24 -
 25
25 -
 26
26 -
27
-
28
-
29
-
30
-
31
-
32
 |
 |
support.dell.com
Dell PowerEdge 2400 Systems Rack Installation Guide
1-9
Figure 1-7.
Determining Where to Install the Slide Assemblies
5.
Align the mounting tab on the front of the slide-assembly mounting bracket with
the notches in the rack (see Figure 1-8).
6.
Push until the mounting tabs are secure in the notches on the rack and the
pushbutton clicks out.
7.
Push back on the slide assembly until the mounting tabs lock into the back side of
the rack.
8.
Repeat steps 5 through 7 for the other side of the rack.
Ensure that the rails are mounted at the same position on each side of the rack.
10.5 inches
10.5 inches
6U (10.5 inches) between
slide assemblies (drawing
is not to scale)
template