Dell PowerEdge 2400 Rack Installation Guide - Page 25
Removing the Computer's Top Cover, Installation and, Troubleshooting Guide
 |
View all Dell PowerEdge 2400 manuals
Add to My Manuals
Save this manual to your list of manuals |
Page 25 highlights
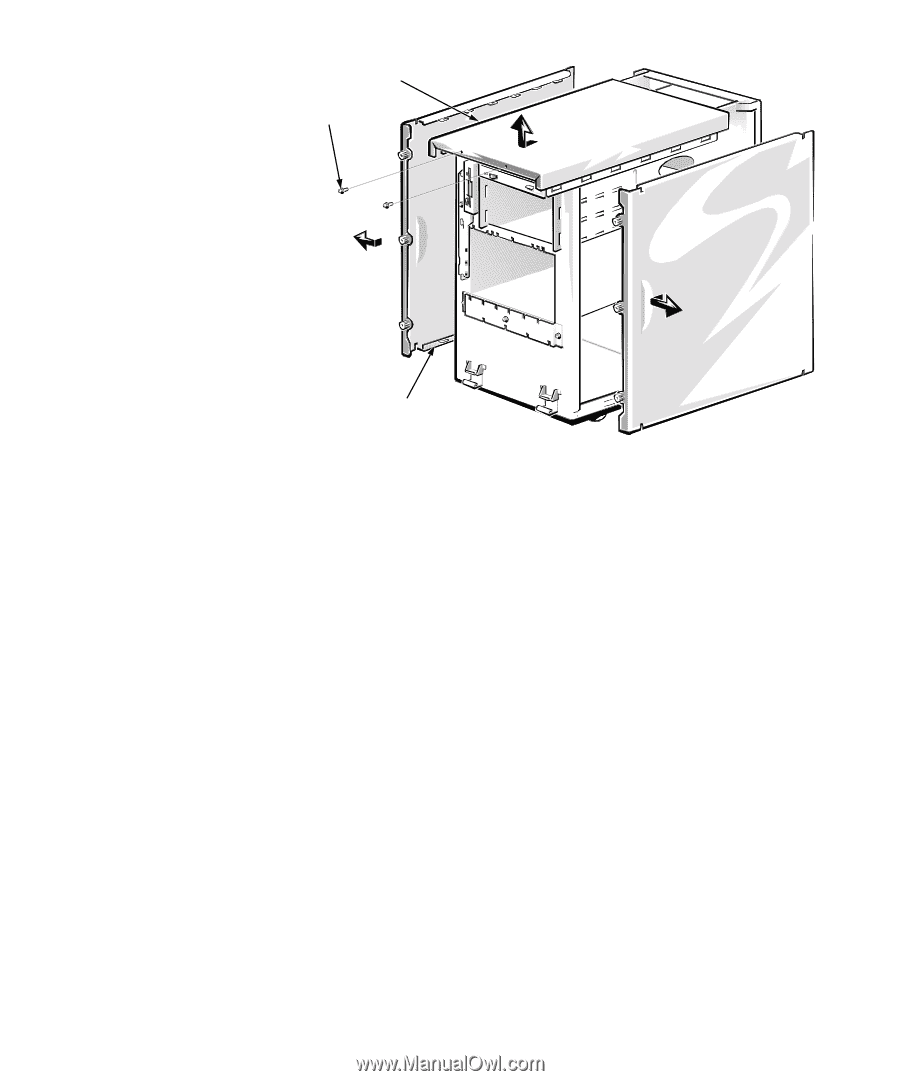
top cover screws (2) side covers (2) Figure 1-11. Removing the Computer's Top Cover 8. Replace the top cover with the top cover assembly supplied in the rack kit. Use the two screws that you removed in step 6 to secure the top cover provided with the kit. 9. Install the computer's side covers and front bezel. When installing the side covers, install the cover with the system label on the right side of the computer. See Chapter 7, "Checking Inside the Computer", in the Installation and Troubleshooting Guide for instructions on replacing the computer covers and front bezel. 10. Install the shoulder screws (see Figure 1-12). support.dell.com Dell PowerEdge 2400 Systems Rack Installation Guide 1-13
-
 1
1 -
2
-
3
-
4
-
5
-
6
-
7
-
8
-
9
-
10
-
11
-
12
-
13
-
14
-
15
-
16
-
17
-
18
-
19
-
 20
20 -
 21
21 -
 22
22 -
 23
23 -
 24
24 -
 25
25 -
 26
26 -
 27
27 -
 28
28 -
 29
29 -
 30
30 -
31
-
32
 |
 |
support.dell.com
Dell PowerEdge 2400 Systems Rack Installation Guide
1-13
Figure 1-11.
Removing the Computer’s Top Cover
8.
Replace the top cover with the top cover assembly supplied in the rack kit.
Use the two screws that you removed in step 6 to secure the top cover provided
with the kit.
9.
Install the computer
’
s side covers and front bezel.
When installing the side covers, install the cover with the system label on the
right side of the computer.
See Chapter 7,
“
Checking Inside the Computer
”
, in the
Installation and
Troubleshooting Guide
for instructions on replacing the computer covers and
front bezel.
10. Install the shoulder screws (see Figure 1-12).
screws (2)
top cover
side covers (2)