Denon AVR-2500 Operating Instructions - Page 22
Operation, Functions, Initialization, Microprocessor
 |
View all Denon AVR-2500 manuals
Add to My Manuals
Save this manual to your list of manuals |
Page 22 highlights
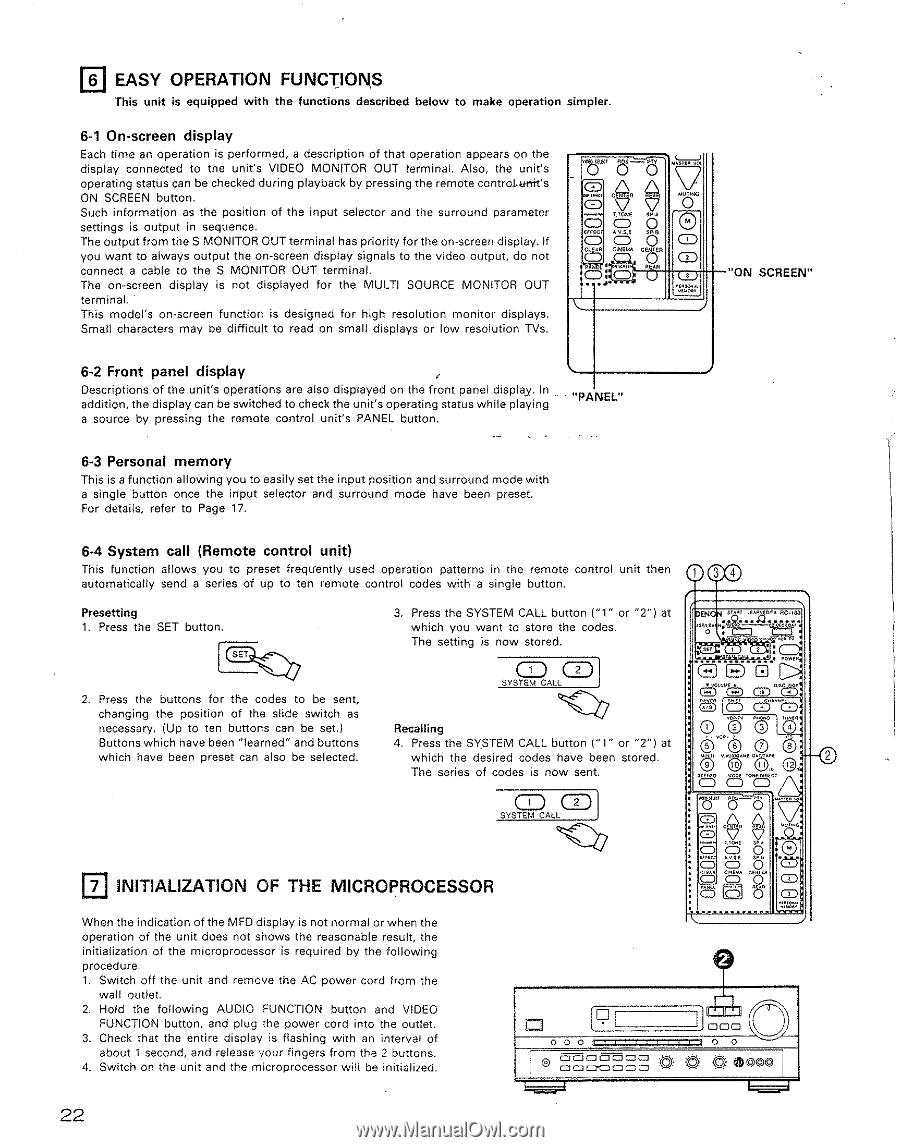
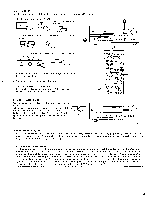
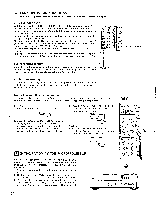
p EASY OPERATION FUNCTIONS This unit is equipped with the functions described below to make operation simpler. 6-1 On-screen display Each time an operation is performed, a description of that operation appears on the display connected to the unit's VIDEO MONITOR OUT terminal. Also, the unit's operating status can be checked during playback by pressing the remote controtunit's ON SCREEN button. Such information as the position of the input selector and the surround parameter settings is output in sequence. The output from the S MONITOR OUT terminal has priority for the on-screen display. If you want to always output the on-screen display signals to the video output, do not connect a cable to the S MONITOR OUT terminal. The on-screen display is not displayed for the MULTI SOURCE MONITOR OUT terminal. This model's on-screen function is designed for high resolution monitor displays. Small characters may be difficult to read on small displays or low resolution TVs. z a,c,ci,.„ 6 C O T.TONE OS Effect .NG O CLEAR GINE. CENTER • A AA (±) '4= "ON SCREEN" 6-2 Front panel display Descriptions of the unit's operations are also displayed on the front panel display. In _ addition, the display can be switched to check the unit's operating status while playing a source by pressing the remote control unit's PANEL button, "PANEL" 6-3 Personal memory This is a function allowing you to easily set the input position and surround mode with a single button once the input selector and surround mode have been preset. For details, refer to Page 17. 6-4 System call (Remote control unit) This function allows you to preset frequently used operation patterns in the remote control unit then automatically send a series of up to ten remote control codes with a single button. Presetting 1. Press the SET button. SET 3. Press the SYSTEM CALL button ("1" or "2") at which you want to store the codes. The setting is now stored. 2. Press the buttons for the codes to be sent, changing the position of the slide switch as necessary. (Up to ten buttons can be set.) Buttons which have been "learned" and buttons which have been preset can also be selected. SYSTEM CALL Recalling 4. Press the SYSTEM CALL button ("1" or "2") at which the desired codes have been stored. The series of codes is now sent. CD CD SYSTEM CALL 3 4 's\ EN $11117 ICR P t0/01 vcA Ifift) O ( f5rAhlt i , 0 ^1 O 70.0.0 5 _ 754110 • El INITIALIZATION OF THE MICROPROCESSOR When the indication of the MFD display is not normal or when the operation of the unit does not shows the reasonable result, the initialization of the microprocessor is required by the following procedure. 1. Switch off the unit and remove the AC power cord from the wall outlet. 2. Hold the following AUDIO FUNCTION button and VIDEO FUNCTION button, and plug the power cord into the outlet. 3. Check that the entire display is flashing with an interval of about 1 second, and release your fingers from the 2 buttons. 4. Switch on the unit and the microprocessor will be initialized. O O O MOE:JOG:1=M 0 M O00 000 1O O • • 0 Goo@ 22
-
 1
1 -
2
-
3
-
4
-
5
-
6
-
7
-
8
-
9
-
10
-
11
-
12
-
13
-
14
-
15
-
16
-
 17
17 -
 18
18 -
 19
19 -
 20
20 -
 21
21 -
 22
22 -
 23
23 -
 24
24
 |
 |