EMC CX300 Initialization Guide - Page 11
Enable PPP LCP extensions, PPP: Windows NT, Windows 95 - software
 |
View all EMC CX300 manuals
Add to My Manuals
Save this manual to your list of manuals |
Page 11 highlights
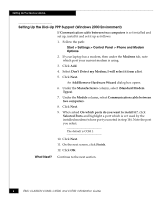
Setting Up the Service Laptop What Next? 7. Clear the check box Use another port if busy. 8. Click the Server tab. 9. Set the Dial-up server type to be PPP: Windows NT, Windows 95 Plus, Internet. 10. In the Network Protocols dialog box, select TCP/IP. 11. Click TCP/IP Settings... and do the following in the PPP TCP/IP Settings dialog box: a. Select the Server assigned IP address option. The SP will provide the address for the service laptop. b. Select the Server assigned name server addresses check box. c. Select the Use IP header compression check box. d. Click OK to exit the TCP/IP Settings... dialog box. 12. Set Enable software compression to on. 13. Set Enable PPP LCP extensions to on. 14. Click the Security tab. 15. Set Accept any authentication including clear text to on. 16. Click OK to exit the Security dialog box. 17. Click Close to exit the Dial-up Networking dialog box and save your settings. 18. To verify the Domain name, do the following: a. Double-click My Computer, then double-click Dial-Up Networking. b. Double-click Network. c. In the Network dialog box, click the Identification tab. d. The Domain field should be Workgroup. If it is not, click the Change button and select Workgroup. e. Click the Workgroup radio button, then click OK. f. In the Network dialog box, click OK. The service laptop is ready to initialize a storage processor. Refer to Initializing the Storage System on page 12. EMC CLARiiON CX300, CX500, and CX700 Initialization Guide 11
-
 1
1 -
2
-
3
-
4
-
5
-
 6
6 -
 7
7 -
 8
8 -
 9
9 -
 10
10 -
 11
11 -
 12
12 -
 13
13 -
 14
14 -
 15
15 -
 16
16 -
17
-
18
-
19
-
20
-
21
-
22
-
23
-
24
-
25
-
26
-
27
-
28
-
29
-
30
-
31
-
32
-
33
-
34
-
35
-
36
 |
 |
