Epson 2070 User Manual
Epson 2070 - LQ B/W Dot-matrix Printer Manual
 |
UPC - 010343812277
View all Epson 2070 manuals
Add to My Manuals
Save this manual to your list of manuals |
Epson 2070 manual content summary:
- Epson 2070 | User Manual - Page 1
EPSON® 24-Pin Dot Matrix Printer LQ-2070 All rights reserved. No part of this publication may be reproduced, stored in a retrieval system, or transmitted in any form or by any means, electronic, mechanical, photocopying, recording, or otherwise, without the prior written permission of Seiko Epson - Epson 2070 | User Manual - Page 2
- Epson 2070 | User Manual - Page 3
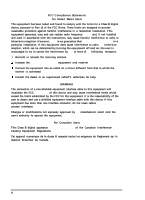
comply with the limits for a Class B digital device, pursuant to Part 15 of the FCC Rules. These limits are designed to provide reasonable frequency energy and, if not installed and used in accordance with the instructions, may cause harmful interference to radio or television reception. However, - Epson 2070 | User Manual - Page 4
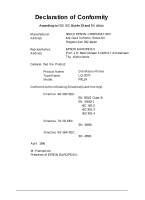
, Suwa-shi, Nagano-ken 392 Japan Representative: Address: EPSON EUROPE B.V. Prof. J. H. Bavincklaan 5 1183 AT Amstelveen The Netherlands Declares that the Product: Product Name: Type Name: Model: Dot Matrix Printer LQ-2070 P911A Conforms to the following Directive(s) and Norm(s): Directive - Epson 2070 | User Manual - Page 5
EPSON's ink jet printers conform to Energy Star standards. Note: The Energy Star emblem does not represent EPA endorsement of any product or service. computer, printer, and monitor each day when you are done using them. Use the print preview option in your software to catch errors before you print a - Epson 2070 | User Manual - Page 6
service Product literature on current and new products You can purchase ribbons, supplies, parts, printed manuals, and accessories for your EPSON products from EPSON Accessories at (800) 873-7766 (U.S. sales only). In Canada, call (800) BUY-EPSON for sales locations. If you purchased your printer - Epson 2070 | User Manual - Page 7
for the latest drivers and FAQs (Frequently Asked Questions) and the EPSON Chat area. To get in touch with EPSON around the world, EPSON Contacts includes Contact Information for local EPSON subsidiaries. EPSON Bulletin Board Service You can call the EPSON Bulletin Board Service (BBS) at (310 - Epson 2070 | User Manual - Page 8
(UK) Limited shall not be liable against any damages or problems arising from the use of any options or consumable products other than those designated as Original EPSON Products or EPSON Approved Products by EPSON (UK) Limited. Safety information warning: This appliance must be earthed. Refer to - Epson 2070 | User Manual - Page 9
devices plugged into the wall outlet does not exceed 15 amperes. Except as specifically explained in this guide, do not attempt to service the printer yourself. Unplug the printer and refer servicing to qualified service personnel under the following conditions: If the power cord or plug is damaged - Epson 2070 | User Manual - Page 10
. . . . . 1-2 1-4 Installing the Ribbon Cartridge 1-5 Plugging in the Printer 1-10 Running the Self Test 1-11 Connecting the Printer to Your Computer 1-14 Installing the Printer Driver 1-15 For Microsoft Windows Users 1-15 For DOS program users 1-21 DOS printer utilities 1-21 ix - Epson 2070 | User Manual - Page 11
Loading single sheets with the paper guide 2-4 Loading single sheets from the front sheets 2-31 Switching to continuous paper 2-32 Printing on Special Paper 2-32 Adjusting the paper thickness Selecting an instruction sheet language 3-7 Changing the default settings 3-7 Printer functions 3-9 - Epson 2070 | User Manual - Page 12
5-2 Replacing the Ribbon 5-3 Transporting the Printer 5-4 Chapter 6 Troubleshooting Power Supply 6-2 Power is not being supplied 6-2 Printing 6-3 The printer does not print 6-3 The print is faint or uneven 6-5 Dots are missing in printed characters or graphics 6-5 Printed characters are not - Epson 2070 | User Manual - Page 13
, Command Summary, and Character Tab/es Printer Specifications Printing Paper PParipnetrabaleliganrmeaent. . . . . . . . . . . . . . . . . . . . . . . . . . . . . . . . . . . . . . . . . . . . . . . . . . . . . Mechanical Electrical Environmental Safety - Epson 2070 | User Manual - Page 14
Introduction Your new EPSON® 24-pin dot matrix printer offers high performance with a wide range of features in a compact design. You will find the same high-quality printing and ease of operation you have come to expect from EPSON printers, including: High speed draft mode printing of up to 300 - Epson 2070 | User Manual - Page 15
Options The following options are available for your printer: Cut-sheet feeder (High capacity, C80673*; Second bin, sizes. Pull tractor unit (C80032*), provides easy paper handling, which is useful for printing on multipart forms. You can also use this tractor as a front push tractor. Roll paper holder - Epson 2070 | User Manual - Page 16
. Chapter 6 contains troubleshooting tips. If the printer does not operate properly or the printed results are not what you expect, see this chapter for a list of problems and solutions. The appendix lists the printer's specifications, commands, and character tables. At the end of the manual you'll - Epson 2070 | User Manual - Page 17
Warnings, Cautions, and Notes This guide uses the following conventions: Warnings must be followed to avoid bodily injury. Cautions must be observed to avoid damage to your equipment. Notes contain important information and useful tips on the operation of your printer. 4 Introduction - Epson 2070 | User Manual - Page 18
Choosing a Place for the Printer 1-2 Unpacking the Printer 1-4 Installing the Ribbon Cartridge 1-5 Plugging in the Printer 1-10 Running the Self Test 1-11 Connecting the Printer to Your Computer 1-14 Installing the Printer Driver 1-15 For Microsoft Windows Users 1-15 For DOS program users - Epson 2070 | User Manual - Page 19
This chapter explains how to set up the printer and install the printer driver software. Choosing a Place for the Printer When selecting a place to set up your printer, be sure to follow these guidelines: Place the printer on a flat, stable surface, close enough to the computer for the interface - Epson 2070 | User Manual - Page 20
stand, follow these guidelines: Use a stand that supports at least 26 kg (57.8 lbs). Never use a stand that tilts the printer at an angle of more than 15 degrees from horizontal. If you install a cut-sheet feeder, the stand must keep your printer level. If you plan to load continuous paper through - Epson 2070 | User Manual - Page 21
In addition to this guide, your printer box should include an EPSON printer driver disk, Notice Sheet, and the following items: Note: Depending on your printer model, the power cord may be permanently attached to the printer. You must remove all protective materials packed around and inside your - Epson 2070 | User Manual - Page 22
for use at another voltage. If the label on the back of the printer does not show the correct voltage for your country, contact your dealer. Installing the Ribbon Cartridge before installing the ribbon cartridge, make sure that the power cord is not plugged into an electrical outlet. 1. Lift the - Epson 2070 | User Manual - Page 23
the paper tension unit). Warning Never move the printhead while the printer is turned on; this can damage the printer. Also, the print head may become hot during use. Always let it cool before you touch it. 3. Remove the ribbon cartridge from its packaging. Then remove the plastic separator from the - Epson 2070 | User Manual - Page 24
fits over the small peg on each side of the printer. 5. Lay the cartridge flat and press gently until it clicks into place on both ends. 6. Lift the ribbon guide and insert it firmly over the metal pins behind the print head. Press down on the guide until it clicks into place. Make sure the - Epson 2070 | User Manual - Page 25
7. Slide the print head from side to side to make sure it moves smoothly. 8. Replace the printer cover by first inserting the front tabs into the slots near the front of the printer; then lower it until it locks into place. 1-8 Setting Up the Printer - Epson 2070 | User Manual - Page 26
insert the paper separator one side at a time. You need not separate the paper guide and the paper separator, in case you need to ship the printer. 10. Attach the paper guide by sliding the slots on the bottom of the paper guide over the pegs behind the paper tension unit. Setting Up the - Epson 2070 | User Manual - Page 27
11. Lift the paper path guide, and rest it against the paper guide. Note: Always close the printer cover before printing. The printer stops printing when the cover is open. Plugging in the Printer 1. Make sure the printer is turned off. 2. Check the label on the back of the printer to make sure the - Epson 2070 | User Manual - Page 28
paper, loaded from the top. See Chapter 2 for more information on paper handling. The printer prints the self test in the currently selected font. 1. Make sure the printer is turned off and the paper path guide is open. 2. Move the paper release lever to the single-sheet position. 3. For a letter - Epson 2070 | User Manual - Page 29
mark. Then adjust the right edge guide to match the width of your paper. Caution: Run the self test using paper at least 360 mm (14 inches) wide; otherwise, the print head prints directly on the platen. 5. Lift the paper path guide, and rest it against the paper guide. 1-12 Setting Up the Printer - Epson 2070 | User Manual - Page 30
resistance. Make sure you adjust the edge guides to match the width of your paper. After a few seconds, the printer feeds the paper to the loading position and begins printing the self test. Note: Always close the printer cover before printing. The printer stops printing when the cover is open. If - Epson 2070 | User Manual - Page 31
a connector that will work with your computer on the other end. See your computer's reference guide for the required connector type. Follow these steps to connect the printer to your computer: 1. Make sure both the printer and computer are turned off. 2. Plug the cable connector securely into the - Epson 2070 | User Manual - Page 32
to install the printer driver for Windows 3.1: 1. Make sure Windows is running. 2. Insert the EPSON driver disk into drive A (or B, depending on your computer). 3. From the File menu, choose Run. 4. Type A: SETUP (or B: SETUP); then click OK. 5. Select LQ-2070 ESC/P 2 as the Printer Model and click - Epson 2070 | User Manual - Page 33
see the New Hardware Found screen, pleasefollow the procedure under "Installing the driver while running Window TE 95" on page 1-18 instead. 5. Make sure your printer model name is displayed on the screen. Then click the Driver from disk provided by hardware manufacturer button. Do not select any of - Epson 2070 | User Manual - Page 34
You see the Install From Disk screen. 7. Insert the Windows printer driver disk in a disk drive. 8. If you inserted if the page printed correctly. If it did not print correctly, choose NO and follow the directions on the screen. To access the driver, see "Checking the printer driver settings," page - Epson 2070 | User Manual - Page 35
these steps to install the printer driver for Windows 95. 1. In the Desktop window, double-click the My Computer icon. 2. Double-click the Printers folder. 3. Double-click the Add Printer icon. 4. Click the Next button. 5. Select the Local printer or Network printer radio button. 6. Click the Next - Epson 2070 | User Manual - Page 36
, you should make sure that the driver settings match your document requirements. While many Windows applications override the printer settings made with the driver, some do not. Be sure to check the following: Resolution The printing resolution in dots per inch (dpi). Paper size The size - Epson 2070 | User Manual - Page 37
95 users Follow these steps to select the appropriate settings: 1. In the Desktop window, click the Start button. 2. Select Settings; then click Printers. 3. Right-click on your printer icon. 4. Open the Printer menu, and choose Properties. 5. Click on the Paper tab, and select the paper size - Epson 2070 | User Manual - Page 38
For DOS program users Most DOS software programs include drivers for EPSON ESC/P2 printers. Also, DOS programs require you to select from a list of printers to install the printer driver. If the LQ-2070 is not included in the list, contact your software manufacturer to see if there is an updated - Epson 2070 | User Manual - Page 39
lever 2-2 Using Single Sheets 2-4 Loading single sheets with the paper guide 2-4 Loading single sheets from the front 2-7 Using Continuous Paper 2-9 30 Switching to single sheets 2-31 Switching to continuous paper 2-32 Printing on Special Paper Adjusting the paper thickness lever . . . - Epson 2070 | User Manual - Page 40
to: Set the paper release lever Load single sheets Load continuous paper with the rear tractor or the optional tractor(s) Switch between paper-feed methods Print on special paper. Setting the paper release lever Before you load paper, you must to set the paper release lever for the type of paper - Epson 2070 | User Manual - Page 41
from the top, the paper actually enters the printer from the rear, even when using the paper guide. The push/pull tractor combination is recommended for For detailed information about printing on single sheets, see the next section. For detailed information about printing on continuous paper and - Epson 2070 | User Manual - Page 42
Using Single Sheets You can print on single sheets of paper from 101 to 420 mm (4.0 to 16.5 inches) wide. You can load single sheets from either the top or front of the printer. Loading single sheets with the paper guide 1. Move the paper release lever to the single-sheet position. Make sure the - Epson 2070 | User Manual - Page 43
3. Slide the left edge guide until it stops next to the arrow on the paper guide. Then adjust the right edge guide to match the width of your paper. 4. Lift the paper path guide and rest it against the paper guide. Paper Handling 2-5 - Epson 2070 | User Manual - Page 44
paper firmly between the edge guides until it meets resistance. After a few seconds, the printer advances the paper to the loading position. You are now ready to print. Caution: Do not use the knob on the right side of the printer except to clear paper jams when the printer is turned of. Otherwise - Epson 2070 | User Manual - Page 45
the paper release lever to the single-sheet position. Make sure the paper path guide rests against the paper guide. 2. Open the front paper guide. 3. Turn on the printer. 4. Position the left edge guide as shown below. (Printing starts at the arrow mark.) See the Appendix for more information on the - Epson 2070 | User Manual - Page 46
the paper to the loading position. You are now ready to print. 2 Caution: Do not use the knob on the right side of the printer except to clear paper jams when the printer i s turned off. Otherwise, you may damage the printer or cause it to lose the top-of-form position. If the platen - Epson 2070 | User Manual - Page 47
the optional tractor unit" on page 2-13. You can print on continuous paper that is 101 to 406 mm (4 push tractor to load ordinary continuous paper and multi-part forms but not labels. To load labels, see paper path so the paper feeds smoothly into the printer. Also, make sure the ejected paper does - Epson 2070 | User Manual - Page 48
Follow the steps below to load paper with the rear push tractor: 1. Make sure the printer is turned off. 2. Remove the printer cover and paper guide. 3. Make sure the paper release lever is set to the rear push tractor position. 2 4. Release the sprockets by pushing the sprocket locks forward. 2 2- - Epson 2070 | User Manual - Page 49
paper using the scale on the printer as shown below. (Printing starts at the "0" mark. See the Appendix for more information on the left margin position.) Then slide the right sprocket to match the width of your paper, but do not lock it. Also, move the paper support - Epson 2070 | User Manual - Page 50
open. You can also advance the paper to the loading position by pressing the Load/Eject button. As you print, make sure the paper advances behind the printer guide as shown below. Make sure the paper path guide rests against the paper guide. 2. Caution: Do not use the knob on the right side of the - Epson 2070 | User Manual - Page 51
Loading paper with the optional tractor unit The printer's paper handling system allows you to load continuous paper through the front or bottom in addition to the rear, you align your paper supply with the paper loaded in the tractor so the paper feeds smoothly into the printer. Paper Handling 2-13 - Epson 2070 | User Manual - Page 52
the optional pull tractor unit. You can use the optional pull tractor unit as a front push tractor. Follow the instructions below to install it. 1. Make sure the printer is turned off. 2. Open the front paper guide and remove it by grasping the fins on both sides and pulling it straight out of the - Epson 2070 | User Manual - Page 53
position If you want to use the tractor in another position, follow the directions below to remove it. Then see the appropriate section for installation instructions. 1. Make sure the printer is turned off. 2. Remove any paper that is in the feed path. Paper Handling 2-15 - Epson 2070 | User Manual - Page 54
3. Open the front paper guide and remove it by grasping both sides and pulling it straight out of the printer. 2- 4. Press the tractor's lock tabs, tilt it up, and lift it out of the printer. 2- 2-16 Paper Handling - Epson 2070 | User Manual - Page 55
the front paper guide. lnstalling the tractor in the pull posifion Before you load continuous paper using the pull tractor position, you must first purchase the optional pull tractor. 1. Make sure the printer is turned off. 2. Lift the printer cover and paper guide up and off the printer. Paper Hand - Epson 2070 | User Manual - Page 56
tabs on both ends of the clear plastic paper-tension unit, raise the front of the unit, and lift it off the printer. 2-: 4. Place the tractor's tabs into the printer's mounting slots, then press the tractor back until it locks into place. 2-1 Note: Check the paper thickness lever position to ensure - Epson 2070 | User Manual - Page 57
the directions below to remove it. Then see the appropriate section for installation instructions. 1. Make sure the printer is turned off. 2. Remove any paper that is in the feed path. 3. Remove the printer cover and paper guide. 4. Hold down the tractor's lock tabs, tilt it forward, and lift it off - Epson 2070 | User Manual - Page 58
installed. Remove it and install it again. Warning: Never move the print head while the print is turned on; this can damage the printer. Also, the print head may become hot during use. Always let it cool before you touch it. 7. Replace the printer cover and paper guide. 2-20 Paper Handling - Epson 2070 | User Manual - Page 59
glueing, use the rear push tractor. This type of form cannot be fed through the front push tractor. 1. Make sure the printer is turned off. 2. Remove the front paper guide. 3. Make sure the tractor is in the front mounting slot and the paper release lever is set to the front push tractor - Epson 2070 | User Manual - Page 60
4. Release the sprockets by pushing the sprocket locks up and away from you. 2 5. Position the left sprocket as shown below. (Printing starts at the arrow mark.) See the Appendix for more information on the left margin position. 2-22 Paper Handling - Epson 2070 | User Manual - Page 61
the right sprocket to match the width of your paper, but do not lock it. Move the paper support midway between the two sprocket units. 7. Make sure your paper has a clean, straight edge. Then then lock it in place. 10. Attach the front paper guide over the paper as shown below. Paper Handling 2-23 - Epson 2070 | User Manual - Page 62
. You can also advance the paper to the loading position by pressing the Load/Eject button. As you print, make sure the paper advances behind the printer guide as shown below. Also, make sure the paper path guide rests against the paper guide. Caution: Do not use the knob on the right side of the - Epson 2070 | User Manual - Page 63
1. Make sure the printer is turned off. 2. Remove the printer cover and paper guide. 3. Make sure the tractor is in the pull tractor position and the paper release lever is set to the pull tractor position. 4. Release the sprockets by pulling the sprocket locks toward you. Paper Handling 2-25 - Epson 2070 | User Manual - Page 64
tractor as a guide. (Printing starts at the "0" mark. See the Appendix for more information on the left margin position.) Then slide the right sprocket to match the width of your paper, but do not lock it. Move the paper support printer cover and paper guide. 2-26 Paper Handling - Epson 2070 | User Manual - Page 65
. You can also advance the paper to the loading position by pressing the Load/Eject button. As you print, make sure the paper advances behind the printer guide as shown below. Also, make sure the paper path guide rests against the paper guide. caution: Do not use the knob on the right side of the - Epson 2070 | User Manual - Page 66
To load paper in the tractors, follow these steps: 1. Make sure the tractors are in the front or rear push/pull tractor position. Also, make sure the paper release lever is set to either the front push or rear push tractor position. 2. Load paper in the front or rear push tractor as described in the - Epson 2070 | User Manual - Page 67
turned off. Otherwise, you may damage the printer or cause it to lose the top-of-form position. Note: Always close the printer cover before printing. The printer stops printing when the cover is open. As you print, make sure the paper advances behind the printer guide as shown below. Also, make sure - Epson 2070 | User Manual - Page 68
3. 2. Tear off the paper. 3. Press the Load/Eject button to feed the continuous paper backward out of the printer and into the standby position. Caution: Make sure you tear off your printed document before pressing the Load/Eject button. Reverse feeding several pages at a time may cause a paper jam - Epson 2070 | User Manual - Page 69
, press the Tear Off/Bin button to advance the paper to the tear-off position. 2. Tear off the printed pages. Caution: Always tear off paper before back-feeding paper through the printer; back-feeding too many sheets can cause a paper jam. Never back-feed labels. Labels can easily come off their - Epson 2070 | User Manual - Page 70
on Special Paper In addition to single sheets and continuous paper, your printer can print on a wide variety of other paper types, such as envelopes, labels, postcards, roll paper, and multipart forms. before printing on special types of paper, you need to change the paper thickness setting. Caution - Epson 2070 | User Manual - Page 71
Adjusting the paper thickness /ever Set the paper thickness lever to match the thickness of your paper according to the table below. Paper type Paper thickness lever position Thin paper Ordinary paper (single sheets or continuous) 0 or 1 0 Multipart forms (carbonless) 2 sheets (original + 1 - Epson 2070 | User Manual - Page 72
Multipart forms Your printer can print on both single-sheet and continuous multipart forms. You can load single-sheet multipart forms in both the front and top paper slots. You can load continuous multipart forms from the front, rear, and bottom. Note: Use only carbonless multi part forms. You can - Epson 2070 | User Manual - Page 73
them only under normal operating conditions. Do not leave labels loaded in the printer between jobs; they curl around the platen and may jam when you resume printing. To remove labels from the paper path after you finish printing, first tear off the labels at a point before the paper slot. Then use - Epson 2070 | User Manual - Page 74
feed an envelope by pushing the wide edge into the printer until it meets resistance. Caution: Use envelopes only under normal operating conditions, Printing on the edge of an envelope can damage the print head. Make sure the printing stays entirely within the printable area of the envelopes. See - Epson 2070 | User Manual - Page 75
Control Panel 3-2 Lights 3-2 Buttons 3-4 Other control panel features 3-6 Using the Default Setting Mode 3-7 Selecting an instruction sheet language 3-7 Changing the default settings 3-7 Printer functions 3-9 Using Quiet Mode 3-13 Using Micro Adjust 3-13 Using the Tear-Off Function 3-15 - Epson 2070 | User Manual - Page 76
paper or paper is jammed. Pause (orange) On when the printer is not ready to print data, paper is out or jammed, the cover is open, or you press the Pause button to pause printing. The Pause light flashes when the Micro Adjust function is enabled or the print head is too hot. 3-2 Using the - Epson 2070 | User Manual - Page 77
Note: Both lights are off when continuous paper is not in the tear-off position. You can print postcards in Card mode. Font (three lights, green) The font selection status is displayed by three font (green) On when you select condensed printing from the control panel. Using the Printer 3-3 - Epson 2070 | User Manual - Page 78
Buttons Operate Press this button to turn the printer on or off. Pause Press this button to temporarily stop printing and to resume printing. To enable the Micro Adjust function, hold down this button for at least 3 seconds when the printer is in standby mode. Press it again to disable this function - Epson 2070 | User Manual - Page 79
font selected in the Default Setting mode. Condensed Press this button to print condensed characters. Press it again to return to normal character printing. Note: The typestyle samples on the control panel are meant as guides only; actual printed results may differ slightly. Using the Printer 3-5 - Epson 2070 | User Manual - Page 80
data dump. All the input data are printed as hexadecimal numbers and corresponding characters. See the note at the beginning of Chapter 6. Starts the Bi-d adjustment. See "Using Bid Adjustment" in this chapter. Activates the Quiet mode. See "Using Quiet Mode" in this chapter. 3-6 Using the Printer - Epson 2070 | User Manual - Page 81
or printer driver, you may sometimes need to change a default setting from the printer's control panel through the Default Setting mode. To enter the Default Setting mode and change settings, hold down the Condensed button while turning on the printer. The printer prints an instruction sheet - Epson 2070 | User Manual - Page 82
printer. The following table lists the functions you can change and their available settings. Each function is described after the table. Function Character table International character set for Italic table Font l Page length for front tractor Page length for rear tractor High speed draft Print ESC - Epson 2070 | User Manual - Page 83
functions. Character table Your printer has 11 standard character tables as well as tables for 20 other countries. See the Appendix for character samples. International character set for Italic table You can change 8 characters in the Italic character table to suit your printing needs. Since these - Epson 2070 | User Manual - Page 84
You can select auto print direction, unidirectional printing, or bidirectional printing. Printing is normally bidirectional; however, unidirectional printing allows for precise vertical printing alignment. Software When you select ESC/P 2, the printer operates in the EPSON ESC/P 2 mode. When you - Epson 2070 | User Manual - Page 85
page. When the printer again receives data, it automatically reverses the paper to the top-of-form position and starts printing, so you can use all of the next sheet. When auto tear-off is disabled (off), you must perform the tear-off function manually by pressing the Tear Off/Bin button. See - Epson 2070 | User Manual - Page 86
(LF) code or ESC J (n/180-inch line feed) code is accompanied by a carriage return (CR) code and the printer moves the next print position to the left (Beep) The printer beeps when some errors occur. See "Troubleshooting" in Chapter 6 for more information. If you do not want the printer to beep, turn - Epson 2070 | User Manual - Page 87
information on adjusting the tear-off position. The loading position is the position of the paper after it has been automatically loaded by the printer. If your printing appears too high or low on the page, you can change the loading position with the Micro Adjust feature as follows: 1. Make sure - Epson 2070 | User Manual - Page 88
. 5. For continuous paper, mark a point 6.5 mm above the perforation and position the mark on the paper so it aligns with the top of the plastic ribbon guide. This gives you an 8.5 mm top margin. 6.5 mm 8.5 mm 3-14 Using the - Epson 2070 | User Manual - Page 89
tear-off feature to advance continuous paper on the push tractor to the tear-off edge of the printer. You can then easily tear off printed sheets. When you resume printing, the printer automatically feeds paper back to the loading position so you can save paper that would normally be lost between - Epson 2070 | User Manual - Page 90
page length for continuous paper is selected correctly in the Default Setting mode. Be sure you turn off the printer to exit from the Default Setting mode, and then turn it on again. 1. Print on continuous paper loaded on the front or rear push tractor (as described in Chapter 2). When you finish - Epson 2070 | User Manual - Page 91
using the Micro Adjust feature. See "Using Micro Adjust," earlier in this chapter. 3. When you resume printing, the printer feeds the paper back to the loading position and begins printing. (You can also manually feed the paper back to the loading position by pressing the Tear Off/Bin button.) Using - Epson 2070 | User Manual - Page 92
not properly aligned. To correct this problem, use the printer's Bi-d Adjustment mode as follows: 1. Make sure continuous paper is loaded in the printer. 2. Hold down the Pause button while you turn on the printer. The instructions for adjusting Bi-d alignment are printed, along with the first set - Epson 2070 | User Manual - Page 93
Chapter 4 Using Printer Options Cut-Sheet Feeders 4-2 Installing the high capacity cut-sheet feeder 4-2 Loading paper with the high capacity cut-sheet feeder 4-9 Interface Cards 4-12 Installing an interface card 4-12 The C82305$ and C823OfM serial interface cards 4-14 Using Printer Options 4-1 - Epson 2070 | User Manual - Page 94
printer. Printer model High capacity (Bin 1) Second bin (Bin 2) LQ-2070 C80673* C80674* The asterisk (*) is a substitute for the last digit, which varies by country Contact your local EPSON dealer for the part , assemble it by following the instructions in the manual that comes with it. Note: - Epson 2070 | User Manual - Page 95
. Note: Store the paper guide, optional pull tractor, and paper tension unit in a safe place; you will need to reinstall them if you remove the cut-sheet feeder. 4. Gently move the print head to the ribbon installation position. Warining: Never move the printhead while the printer is turned on; this - Epson 2070 | User Manual - Page 96
the high capacity cut-sheet feeder as follows: 1. Turn off the printer. 2. Push down the center support. Slide the left paper guide so it is aligned with the arrow mark on the back of the center support. 3. Next, slide the right paper guide to match the width of your paper. Slide the paper stacker - Epson 2070 | User Manual - Page 97
it up. Caution: Do not use labels in the cut-sheetfeeder. 6. Insert the paper along the left paper guide. The printable side of the paper should face the back of the printer. 7. Adjust the position of the right paper guide so that it matches your paper's width. Make sure the position of the - Epson 2070 | User Manual - Page 98
sheets using the top paper guide or the front paper slot. The cut-sheet feeder loads paper when you send data to the printer (as long as the to create a double bin cut-sheet feeder. See the cut-sheet feeder manuals for more information. You cannot use the second bin cut-sheet feeder without the - Epson 2070 | User Manual - Page 99
. 2. Move the paper release lever to the push tractor position. 3. Move the paper selection lever to the continuous paper position. Note: When you print several pages of continuous paper, guide the paper over the center support and out the back of the printer as it prints. Using Printer Options 4-7 - Epson 2070 | User Manual - Page 100
paper to the tear-off position. 2. Tear off the printed pages. 3. Press the Load/Eject button. The printer feeds the paper backward to the standby position. The push tractor but is no longer in the paper path. 4. Move the printer's paper release lever to the single-sheet position. 5. Move the cut- - Epson 2070 | User Manual - Page 101
be used in a front push/pull combination. See Chapter 2 for instructions. Note: You cannot remove the rear push tractor. Roll Paper Holder The optional roll paper holder (#8310) allows you to use your printer with 8.5-inch roll paper like that used with telex machines. before you - Epson 2070 | User Manual - Page 102
shown below. Fit the two holes in the base onto the two positioning pegs on the bottom of the printer. Caution: Be careful to avoid dropping the roll paper holder when lifting the printer. Only the printer3 weight holds it in place. 3. Cut the leading edge of the roll paper straight across - Epson 2070 | User Manual - Page 103
5. Bring the leading edge of the paper up over the rear push tractor and insert it into the paper path until you feel resistance. rear paper path 6. Install the paper guide and the printer cover. 7. Turn on the printer. The roll paper loads automatically. Using Printer Options 4-11 - Epson 2070 | User Manual - Page 104
Interface Cards You can use optional interface cards to supplement your printer's built-in parallel interface. The EPSON interface cards below are compatible with your printer. (Not all interfaces are available worldwide.) Model number Card type C82305* / C82306* Serial interface C82307* / - Epson 2070 | User Manual - Page 105
the screws securing the shield plate to the back of the printer and remove the plate. 3. Slide the interface card along the fully insert the connector at the back of the interface card into the printer's internal socket. Then re-insert the screws and tighten them. To remove the interface card, reverse - Epson 2070 | User Manual - Page 106
and communications protocol, see your interface card manual. Selecting a baud rate You can select manual. Handshake timing When the unused area for data in the input buffer drops to 256 bytes, the printer the unused area increases to 512 bytes, the printer outputs an X-ON code or sets the DTR flag - Epson 2070 | User Manual - Page 107
Chapter 5 Maintenance and Transportation Cleaning the Printer 5-2 Replacing the Ribbon 5-3 Transporting the Printer 5-4 Maintenance and Transportation 5-1 - Epson 2070 | User Manual - Page 108
operating at its best, you should clean it thoroughly several times a year. Follow these steps: 1. Make sure the printer is turned off. Then remove any paper as well as the paper guide. Also remove the optional tractor and cut-sheet feeders, if installed. 2. Use a soft brush to carefully brush away - Epson 2070 | User Manual - Page 109
worn ribbons in the cartridge. Genuine EPSON ribbons are designed to work properly with your EPSON printer; their high quality ensures proper operation and a long life for the print head and other printer parts. Using any other ribbon may damage your printer. Printer model LQ-2070 Ribbon cartridge - Epson 2070 | User Manual - Page 110
-tension unit. Attach the protective locking clips to the paper-tension unit, and then replace the paper-tension unit. 7. Replace the transportation screw. 8. Repack the printer, ribbon cartridge, paper guide, and power cord in the original packing materials and place them in the - Epson 2070 | User Manual - Page 111
Chapter 6 Troubleshooting Power Supply 6-2 Power is not being supplied 6-2 Printing 6-3 The printer does not print 6-3 The print is faint or uneven 6-5 Dots are missing in printed characters or graphics . . . . . 6-5 Printed characters are not what you expect 6-6 The print position is not what - Epson 2070 | User Manual - Page 112
service person for assistance. Note: If you are an experienced user or a programmer, you can print a hexadecimal dump to isolate communication problems between the printer and computer. To print a hex dump, turn off the printer determine whether the outlet is operating properly. 6-2 Troubleshooting - Epson 2070 | User Manual - Page 113
cable. Make sure the cable meets both the printer and computer specifications. The Pause and Paper Out lights are flashing and the printer beeps three times. The printer may be out of paper. Load paper in the printer. The Pause light is on and nothing is printed. Press the Pause button to turn off - Epson 2070 | User Manual - Page 114
all the control panel lights flash. Turn off the printer and let the print head cool. Then, check for a paper jam, a ribbon jam, or other problems. Try to print again. If the printer still does not print correctly, contact your dealer. The printer beeps several times. An error has occurred. Turn off - Epson 2070 | User Manual - Page 115
. The print head may be damaged. Stop printing and contact your dealer to have the print head replaced. Dots are missing in random positions. Either there is too much slack in the ribbon or the ribbon has come loose. Reinstall the ribbon cartridge as described in Chapter 1. Troubleshooting 6-5 - Epson 2070 | User Manual - Page 116
or characters you sent with your software did not print. Check that the software is correctly configured for your printer. For instructions, see "Setting Up Your Printer Driver" in Chapter 1. The font selected on the control panel does not print. Your software may be overriding your control panel - Epson 2070 | User Manual - Page 117
and pull out the paper. Make sure the edge guides are set correctly. Insert a new sheet straight into the paper guide. Be sure you're using the right type of paper. See the paper specifications in the Appendix. Make sure that the printer cover is closed. Make sure the paper release lever and paper - Epson 2070 | User Manual - Page 118
or the paper jams. Make sure the paper guide is in the upright position, and the paper release within 1 meter (3 feet) of the printer. Make sure the printer cover is closed. Make sure the tractor is within the specified ranges. See the paper specifications in the Appendix. The pull tractor and push - Epson 2070 | User Manual - Page 119
Chapter 3. When you switch between single sheets and continuous paper, the printer beeps several times and the Pause light comes on. You may have the lever position. Options See this section if you have problems with optional equipment. The paper does not feed properly with fhe Troubleshooting 6-9 - Epson 2070 | User Manual - Page 120
Paper may be jammed near the print head. Look for a paper jam and remove it. Make sure the edge guide positions on the paper guide of the cut sheet feeder are correct. Position the edge guides at the diamond-shaped guide marks. There may be only one sheet left in the bin. Add more paper. Two or - Epson 2070 | User Manual - Page 121
One page of your document has printed on two pages. Check that the page-length setting and lines-per-page setting in your software are correct. Also see "Changing remove any slack along the width of the paper. Remove any slack lengthwise by rotating the knob of the pull tractor. Troubleshooting 6-12 - Epson 2070 | User Manual - Page 122
, Command Summary, and Character Tables Printer Specifications A-2 Printing A-2 Paper A-4 Paper alignment A-7 Printable area A-8 Mechanical A-9 Electrical A-10 Environmental A-11 Safety approvals A-11 CE marking A-12 Interface specifications A-12 Using Commands A-17 Sending - Epson 2070 | User Manual - Page 123
Printer Specifications Printing Printing method: Printing speed: 24-pin impact dot matrix Quality Character pet inch Characters/second High speed paper thickness lever position or an overheated print head may affect the printing speed. A-2 Specifications, Command Summary, and Character Tables - Epson 2070 | User Manual - Page 124
Buffer: Character tables: Character sets: Bit map fonts: Scalable fonts: Barcode fonts Maximum printed characters per colum 136 163 204 233 272 Bidirectional logic-seeking for text and graphics set 10 bit map fonts 4 scalable fonts 8 fonts Specifications, Command Summary, and Character Tables A-3 - Epson 2070 | User Manual - Page 125
mm (9.5 x 4.1 inches) Thickness: 0.16 to 0.52 mm (0.0063 to 0.020 inch) Weight: 45 to 91 g/m2 (12 to 24 lb) 'Use under normal operating conditions. A-4 Specifications, Command Summary, and Character Tables - Epson 2070 | User Manual - Page 126
(14 to 22 lb) Weight (one sheet of multipart): 40 to 58 g/m2 (12 to 15 lb) Jointing: Point glue or paper staple (both sides) Specifications, Command Summary, and Character Tables A - 5 - Epson 2070 | User Manual - Page 127
g/m2 (17 lb) rear entry only 216 mm (8.5 inches) 0.07 to 0.09 mm (0.0028 to 0.0035 inch) 52.3 to 82 g/m2 (14 to 22 lb) A-6 Specifications, Command Summary, and Character Tables - Epson 2070 | User Manual - Page 128
Paper alignment Front paper alignment Printing starts at the arrow mark. The unprintable area is to the left of the arrow mark. Rear paper alignment Printing starts at "0" on the scale. The unprintable area is to the left of the "0". Specifications, Command Summary, and Character Tables A-7 - Epson 2070 | User Manual - Page 129
perforation are 4.2 mm (0.17 inch). B The minimum left and right margins are 13 mm (0.51 inch). The maximum printable width is 345.2 mm (13.5 inches). A-8 Specifications, Command Summa y, and Character Tables - Epson 2070 | User Manual - Page 130
203.2 mm (8 inches). Mechanical Paper-feed methods: Ribbon life: Total print amount: Print head life: Friction feed (front and rear) Push tractor million characters (LQ 10 cpi, at 48 dots / character) 6 million lines (except print head) 200 million strokes/wire Specifications, Command Summary, - Epson 2070 | User Manual - Page 131
: Rated frequency range: Input frequency range: Rated current: AC 220 to 240 V AC 198 to 264 V 50 to 60 Hz 49.5 to 60.5 Hz 0.5 A* A-10 Specifications, Command Summary, and Character Tables - Epson 2070 | User Manual - Page 132
max. (storage) *1: without condensation *2: when printing multipart papers. envelopes, postcards. or labels Safety approvals 120 V model: Safety standards: EMI: UL1950 with D3 CSA C22.2 No. 950 with D3 FCC part 15 subpart B class B CSA Cl08.8 Specifications, Command Summary, and Character Tables - Epson 2070 | User Manual - Page 133
: EMC Directive 89/336/EEC: Non-Automatic Weighting Instruments Directive 90/384/EEC: EN60950 EN55022 class B EN50082-1 IEC80l -2 IEC801-3 IEC801-4 EN45501 Interface specifications The printer provides a bidirectional, 8-bit, parallel interface and Type-B optional interface slot as standard. A-22 - Epson 2070 | User Manual - Page 134
29 O u t This signal's high level means that the printer ready to accept data. 12 PE 28 O u t This signal's high level means that the printer is out of paper. 13 SLCT 28 O u t Always at high level when the printer in powered on. Specifications, Command Summa y, and Character Tables A-13 - Epson 2070 | User Manual - Page 135
shows the direction of signal flow from the printer's point of view. Parallel interface (reverse channel) Transmission mode: IEEE-1284 nibble mode Adaptable connector: 57-30360 (Amphenol) or equivalent Synchronization: Refer to the IEEE-1284 specification Handshaking: Refer to the IEEE-1284 - Epson 2070 | User Manual - Page 136
GND In/Out* Description 1 HostClk 19 In Host clock signal 2 DATA1 20 In Parallel input data to the printer. bit 0:LSB 3 DATA2 21 In bit 1 4 DATA3 22 In bit 2 5 DATA4 23 In bit 3 -0,4 channel transfer data bit 0 or 4. Specifications, Command Summary, and Character Tables A-15 - Epson 2070 | User Manual - Page 137
Chassis - - Chassis GND. 16,33 GND 19-30 - - Signal GND. 15,34 NC - - Not connected. * In/Out shows the direction of signal flow from the printer's point of view A-16 Specifications, Command Summary, and Character Tables - Epson 2070 | User Manual - Page 138
and 0 to turn it off. ESC K n1 n2 is a command with two parameters. ESC D nn is a command with a variable number of parameters. For further information about using printer commands, see the comprehensive ESC/P Reference Manual published by EPSON. Specifications, Command Summa y, and Character Tables - Epson 2070 | User Manual - Page 139
Dec. 64 85 25 Hex. 40 55 19 Description Initialize Printer Turn Unidirectional Mode On/Off Conn=tr"o1l"PapSeerleLcotabdinin1g/oEf jCecStFing n="2" Select bin 2 of CSF n="R" Eject a sheet Paper feeding ASCII CR FF LF ESC 0 ESC 2 ESC 3 n ESC + n Dec. 13 12 10 48 50 51 43 H e x . Description 0D - Epson 2070 | User Manual - Page 140
Top margin in defined units n = n1 + n2 x 256 n: Bottom margin in defined units Set Page Length in Defined Units ESC (C 2 0 n1 n2 n = n1 +n2 x 256 n: Number of defined units Set Page Length in Lines n = Bottom Margin for Continuous Paper Specifications, Command Summary, and Character Tables A-19 - Epson 2070 | User Manual - Page 141
margin in defined units Set Relative Vertical Print Position ESC (v 2 0 n1 n2 n = n1 + n2 x 256 n: Moves current print position in defined units Set Horizontal Tabs Up to 32 tabs entered in ascending order; terminated by 0 Tab Horizontally A-20 Specifications, Command Summary, and Character Tables - Epson 2070 | User Manual - Page 142
script 5: OCR-B 7: Orator 8: Orator-S 9: Script C 10: Roman T 11: Sans Serif H Select Font by Pitch and Point ESC X m n1 n2 m: Set pitch to 360/m cpi m = 0 : No change in pitch m = 1 : Select proportional n = 0,21,42 (for other typefaces) Specifications, Command Summary, and Character Tables A-21 - Epson 2070 | User Manual - Page 143
ASCII ESC P ESC M ESC g ESC p 1/0 ESC x n ESC 4 ESC 5 ESC E ESC F ESC! n Dec. 80 77 103 112 120 Hex. 50 4D 67 70 78 52 34 53 35 0: 10 cpi 16: double-strike 1: 12 cpi 32: double-width 2: prop. 64: italic 4: cond. 128: underline 8: bold A-22 Specifications, Command Summary, and Character Tables - Epson 2070 | User Manual - Page 144
DC2 so ESC W 1/0 DC4 ESC-1/0 ESC w 1/0 ESC G ESC H ESC S 0 ESC S 1 ESC T Dec. 15 18 14 87 20 45 119 71 72 83 83 84 ESC q n 113 ESC ( - nn 40 45 Hex, OF 12 0E 57 14 2D 77 47 48 53 53 54 71 28 2D Description Select Condensed Printing Cancel Condensed Printing Select Double-Width Printing (one - Epson 2070 | User Manual - Page 145
each column; super/subscripts require only 2 bytes per column Select User-Defined Set n = 0: Normal set 1: User-defined set Print Data as Characters ESC (^ n1 n2 data n=n1+n2x256 n: amount of data data: print n bytes of data as characters A-24 Specifications, Command Summary, and Character Tables - Epson 2070 | User Manual - Page 146
assigned by ESC (t n = 0,1,2,3,"1","2", or "3" n = 2: Remaps downloaded characters from O-127 to 128-255 Enable Printing of Upper Control Codes With graphics character tables this command enables the printing of codes 128-159 Enable Upper Control Codes Cancels ESC 6 Specifications, Command Summary - Epson 2070 | User Manual - Page 147
(t nn Dec. Hex. 40116 2874 Description Assign Character Table ESC (t 3 0 d1 d2 d3 Assign Character Table set by d2 and d3 to d1 d1 = 1C 0 Code MJK* 20 0 Bulgaria* 25 0 Estonia* 23 0 Roman 8 *Available in certain areas. A-26 Specifications, Command Summary, and Character Tables - Epson 2070 | User Manual - Page 148
(draft) and 1/180 inch (LQ and proportional) Define Unit ESC (U 10 n Define positioning unit Dot density for vertical in 3600/v DPI h = 10,20: Dot density for horizontal in 3600/h DPI m: Number of vertical dots Total dots = n1 + n2 x 256 Select Graphics Mode ESC (G10n n = 1, or 49 Specifications - Epson 2070 | User Manual - Page 149
Description Select Bit Image ESC * m n1 n2 data n = n1 + n2 x 256 n: Total columns Total data = (n1 + n2 x 256) x t Horizontal m density (dpi) Vertical density (dpi) Pins Adjacent dot printing t 0 60 3 40 360 180 24 disable 3 A-28 Specifications, Command Summary, and Character Tables - Epson 2070 | User Manual - Page 150
Select Barcode Printing ESC (B n1 n2 k m s v1 v2 c data n = (n1 + (256 x n2)) k: Select Barcode k=0: E A N - 1 3 1: EAN-8 2: Interleaved 2 of 5 3: U P C - A 4: U P C - E 5: Code39 6: Code 128 7: POSTNET m: Module width (180 dpi) m = 2: 2 dots 3: 3 dots 4: 4 dots 5: 5 dots s: Space adjustment - Epson 2070 | User Manual - Page 151
printer Bit 2 = Position of flag character (for EAN-13 and UPC-A only) 0: Center 1: Under Bits 3-7 = Not used Barcode data corresponds to the barcode symbology. The data number of each barcode type is constant. The barcode is not printed =1 A-30 Specifications, Command Summary, and Character Tables - Epson 2070 | User Manual - Page 152
image data, neither barcode nor raster bit image is printed. A barcode is not printed when part of the barcode extends beyond the right margin. When barcode string. The barcode print start position is always 40/360 inch above the baseline. Specifications, Command Summary, and Character Tables A-31 - Epson 2070 | User Manual - Page 153
Character Tables International Character Sets Country USA France Germany UK Denmark Sweden Italy Spain ASCII code hex 23 24 40 5B 5C 5D 6E 60 7B 7C 7D 7E Graphics Character Tub/es PC 437 (United States) A-32 - Epson 2070 | User Manual - Page 154
A-33 - Epson 2070 | User Manual - Page 155
A-34 - Epson 2070 | User Manual - Page 156
A-35 - Epson 2070 | User Manual - Page 157
A-36 - Epson 2070 | User Manual - Page 158
A-37 - Epson 2070 | User Manual - Page 159
A-38 - Epson 2070 | User Manual - Page 160
A-39 - Epson 2070 | User Manual - Page 161
followed by a line-feed (LF) code. bidirectional printing Printing in which the print head prints in both directions. This increases the speed of printing. buffer The portion of the printer's memory used to store data before printing it. character table A collection of letters, numbers, and - Epson 2070 | User Manual - Page 162
formed by a pattern (matrix) of individual dots. draft One of two print modes available on your printer. Draft uses a minimum number of dots per character for high-speed printing. See also letter quality. driver See printer driver. ESC/P Abbreviation for Epson Standard Code for Printers. This is the - Epson 2070 | User Manual - Page 163
The black roller that provides a backing for the paper during printing. printable area The area of a page on which the printer can print. It is smaller than the physical size of the page due to margins. printer driver A software program that sends commands for using the functions of a particular - Epson 2070 | User Manual - Page 164
position on the paper that the printer recognizes as the first printable line. This is the default top-margin position. unidirectional printing Printing in which the print head prints in one direction only. Unidirectional printing is useful for printing graphics because it allows precise vertical - Epson 2070 | User Manual - Page 165
setting mode, 3-7-12 instruction sheet language, 3-7 DOS. See Software Double bin cut-sheet feeder, 4-6-7 Draft, 3-5 Drivers. See Printer drivers E Edge guides, 1-12-13,2-5 front, 2-7 Eject. See Load/Eject button Envelopes, 2-36, 4-8 EPSON Calibration, 1-22 EPSON Remote!, 1-22 ESC/P 2,1, A-18-30 - Epson 2070 | User Manual - Page 166
positions Feeding problems, 6-7-11 FF button. See LF/FF button Font button, 3-5 lights, 3-3 Front edge guide, 2-7 Front paper guide, 2-7,2-14,2- Location for printer, 1-2-3 M Microsoft Windows, See Windows Micro Adjust button, 3-4 Micro Adjust feature, 3-13-15 Moving the printer, 5-2 Multipart - Epson 2070 | User Manual - Page 167
in, 1-10 Power supply problems, 6-2-3, Print head warning, 1-6 Print quality problems, 6-3-6 Printer drivers DOS programs, 1-21 installing, 1-15-18 settings, 1-19-20 Printer functions table, 3-8-9 Printer stand, 1-3 Printer utilites, 1-21-22 Problem solving, 6-1-11 Protective materials, saving - Epson 2070 | User Manual - Page 168
U Unidirectional printing, 3-10 Unpacking the printer, 1-4 Utilities EPSON Calibration, 1-22 EPSON Remote!, 1-22 V Voltage, caution, 1-5,1-10 W Weight, A-10 Windows, 1-15-20 installing printer driver, 1-15-18 IN-4 Index
-
 1
1 -
 2
2 -
 3
3 -
 4
4 -
 5
5 -
 6
6 -
 7
7 -
8
-
9
-
10
-
11
-
12
-
13
-
14
-
15
-
16
-
17
-
18
-
19
-
20
-
21
-
22
-
23
-
24
-
25
-
26
-
27
-
28
-
29
-
30
-
31
-
32
-
33
-
34
-
35
-
36
-
37
-
38
-
39
-
40
-
41
-
42
-
43
-
44
-
45
-
46
-
47
-
48
-
49
-
50
-
51
-
52
-
53
-
54
-
55
-
56
-
57
-
58
-
59
-
60
-
61
-
62
-
63
-
64
-
65
-
66
-
67
-
68
-
69
-
70
-
71
-
72
-
73
-
74
-
75
-
76
-
77
-
78
-
79
-
80
-
81
-
82
-
83
-
84
-
85
-
86
-
87
-
88
-
89
-
90
-
91
-
92
-
93
-
94
-
95
-
96
-
97
-
98
-
99
-
100
-
101
-
102
-
103
-
104
-
105
-
106
-
107
-
108
-
109
-
110
-
111
-
112
-
113
-
114
-
115
-
116
-
117
-
118
-
119
-
120
-
121
-
122
-
123
-
124
-
125
-
126
-
127
-
128
-
129
-
130
-
131
-
132
-
133
-
134
-
135
-
136
-
137
-
138
-
139
-
140
-
141
-
142
-
143
-
144
-
145
-
146
-
147
-
148
-
149
-
150
-
151
-
152
-
153
-
154
-
155
-
156
-
157
-
158
-
159
-
160
-
161
-
162
-
163
-
164
-
165
-
166
-
167
-
168
 |
 |

EPSON
®
24-Pin Dot Matrix Printer
LQ-2070
All rights reserved. No part of this publication may be reproduced, stored in a retrieval
system, or transmitted in any form or by any means, electronic, mechanical, photocopying,
recording, or otherwise, without the prior written permission of Seiko Epson Corporation.
No patent liability is assumed with respect to the use of the information contained herein.
Neither is any liability assumed for damages resulting from the use of the information
contained herein.
Neither Seiko Epson Corporation nor its affiliates shall be liable to the purchaser of this
product or third parties for damages, losses, costs, or expenses incurred by purchaser or
third parties as a result of: accident, misuse, or abuse of this product or unauthorized
modifications, repairs, or alterations to this product.
Seiko Epson Corporation and its affiliates shall not be liable against any damages or
problems arising from the use of any options or any consumable products other than those
designated as Original EPSON Products or EPSON Approved Products by Seiko Epson
Corporation.
EPSON and EPSON ESC/P are registered trademarks and EPSON ESC /P 2 is a trademark
of Seiko Epson Corporation.
EPSON Connection
SM
is a service mark of Epson America, Inc.
General Notice: Other product names used herein are for identification
purposes
only and may be
trademarks of their respective companies.
Copyright © 1995 by Seiko Epson Corporation, Nagano, Japan.
User’s Guide