Epson BrightLink 695Wi DuoLink Setup Guide
Epson BrightLink 695Wi Manual
 |
View all Epson BrightLink 695Wi manuals
Add to My Manuals
Save this manual to your list of manuals |
Epson BrightLink 695Wi manual content summary:
- Epson BrightLink 695Wi | DuoLink Setup Guide - Page 1
DuoLink Setup Guide - Epson BrightLink 695Wi | DuoLink Setup Guide - Page 2
- Epson BrightLink 695Wi | DuoLink Setup Guide - Page 3
the Projector's Brightness Level 20 Matching the Image Colors ...23 Adjusting RGBCMY ...24 Pen Calibration...27 Calibrating Automatically ...27 Calibrating Manually ...30 Calibrating for Finger Touch Interactivity 33 Enabling DuoLink in Easy Interactive Tools 39 Easy Interactive Tools Modes ...40 - Epson BrightLink 695Wi | DuoLink Setup Guide - Page 4
- Epson BrightLink 695Wi | DuoLink Setup Guide - Page 5
the specific items shown may not be identical to the ones on your product, the steps are the same unless stated otherwise. Note: The BrightLink 685Wi and BrightLink 685Wi+ projectors do not support finger touch. If you are installing these models, please ignore any touch-specific instructions. 5 - Epson BrightLink 695Wi | DuoLink Setup Guide - Page 6
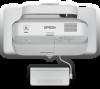
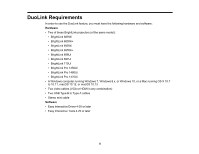
hardware and software: Hardware • Two of these BrightLink projectors (of the same model): • BrightLink 685Wi • BrightLink 685Wi+ • BrightLink 695Wi • BrightLink 695Wi+ • BrightLink 696Ui • BrightLink 697Ui • BrightLink 710Ui • BrightLink Pro 1450Ui • BrightLink Pro 1460Ui • BrightLink Pro 1470Ui - Epson BrightLink 695Wi | DuoLink Setup Guide - Page 7
Projector Positioning Guidelines Make sure you follow these guidelines when installing your BrightLink projectors for DuoLink. • Determine the maximum available height and width for the image. Using this information, determine the placement of the left-hand projector. 7 - Epson BrightLink 695Wi | DuoLink Setup Guide - Page 8
the projectors, do not measure from the center of the mounting plate; use the center line mark on the projector mount plate. This lines up with the center of the projector lens and the center of the unadjusted image. • Make sure you install the projectors so that the edges of the projected images - Epson BrightLink 695Wi | DuoLink Setup Guide - Page 9
on the projector mount. • After physically aligning the projectors as closely as possible, use the Geometry Correction settings to align the projected images before calibrating the pens and finger touch interactivity, if available. For detailed instructions, see your product's User's Guide. 9 - Epson BrightLink 695Wi | DuoLink Setup Guide - Page 10
have installed Easy Interactive Tools (4.20 or later) and the Easy Interactive Driver (4.00 or later). If a software CD is not available, you can download them from the Epson support site. 1. Connect a USB Type-B cable between the computer and each projector. Note: See your projector's User's Guide - Epson BrightLink 695Wi | DuoLink Setup Guide - Page 11
2. Connect a VGA or HDMI video cable to the video output ports on your computer and the corresponding ports on your projector. 3. Connect one end of a stereo mini cable to the SYNC Out port on one projector and connect the other end to the SYNC In port on the other projector. 11 - Epson BrightLink 695Wi | DuoLink Setup Guide - Page 12
them both. Note: This is a general description of the tasks involved in configuring your computer display. See your computer or operating system manual for details. Some video cards may not support certain display configurations. 1. Set your computer's video settings to extend the desktop. 12 - Epson BrightLink 695Wi | DuoLink Setup Guide - Page 13
2. Make sure the output resolution of the computer is set to the native resolution of the projectors. 3. Position the displays so that they correspond to the position of the projectors. The computer display should be the farthest to the right. 4. Select the projector on the left as the primary - Epson BrightLink 695Wi | DuoLink Setup Guide - Page 14
Configuring Projector Settings for Multiple Projectors Follow the instructions in these sections to set up multiple projectors for use Projector Control Matching Images for Multiple Projectors Pen Calibration Calibrating for Finger Touch Interactivity Enabling Multi-Projection You must enable the - Epson BrightLink 695Wi | DuoLink Setup Guide - Page 15
7. Select the Multi-Projection menu and press Enter. 8. Set the Multi-Projection setting to On. 9. Press Menu or Esc to exit the menus. 10. Hover near or tap on the board or the projected image with the interactive pen or your finger. 11. If the icon is displayed on the projected screen, select it, - Epson BrightLink 695Wi | DuoLink Setup Guide - Page 16
and press Enter. 3. Select the Multi-Projection setting and press Enter. 4. Select Projector ID and press Enter. 5. Press the arrow buttons on the remote control to select the identification number you want to use for the projector. Then press Enter. Repeat these steps for all the other projectors - Epson BrightLink 695Wi | DuoLink Setup Guide - Page 17
have set it to control. 1. Turn on the projector you want the remote control to operate with exclusively. 2. Make sure you know the projector's ID setting. Note: If you have forgotten the projector's ID, aim the remote control at the projector and press the ID button to temporarily display the - Epson BrightLink 695Wi | DuoLink Setup Guide - Page 18
in the same Color Mode. In most cases, use the Presentation color mode for DuoLink installations. To change the Color Mode setting, press the Menu button and select the Extended > set to Dynamic. 1. Press the Menu button on the remote or control panel, select the Extended menu, and press Enter. 18 - Epson BrightLink 695Wi | DuoLink Setup Guide - Page 19
2. Select the Multi-Projection setting and press Enter. 3. Select the Color Uniformity setting and press Enter. 4. Select On as the Color Uniformity setting and press Enter, then press Esc. 5. Select Adjustment Level and press Enter. 6. Select an adjustment level and press Esc. 7. Select Start - Epson BrightLink 695Wi | DuoLink Setup Guide - Page 20
all the projectors and display the same image. 2. Press the Menu button. 3. Select the ECO menu and press Enter. 4. Do one of the following: • Select Power Consumption > Normal and press Esc. 20 - Epson BrightLink 695Wi | DuoLink Setup Guide - Page 21
models, select Brightness Settings > Light Source Mode > Normal and press Esc. Note: If you have set Multi-Projection to On, you cannot change the Power Consumption or Light Source Mode setting. 5. Select the Extended menu and press Enter. 6. Select the Multi-Projection setting and press Enter. 21 - Epson BrightLink 695Wi | DuoLink Setup Guide - Page 22
7. Do one of the following: • Select the Brightness Level setting and press Enter. • For laser models, select Brightness Settings > Brightness Level and press Enter. 8. Select a brightness level and press Enter. 9. Press Esc to return to the previous screen. Parent topic: Matching Images for - Epson BrightLink 695Wi | DuoLink Setup Guide - Page 23
Matching the Image Colors You can match the display color of multiple projectors that will project next to one another. 1. Press the Menu button. 2. Select the Extended menu and press Enter. 3. Select the Multi-Projection setting and press Enter. 4. Select the Color Matching setting and press Enter. - Epson BrightLink 695Wi | DuoLink Setup Guide - Page 24
You see this screen: 5. Press the left or right arrow buttons to select a value for the Adjustment Level setting. Note: There are several adjustment levels and you can adjust each level individually. 6. Press the left or right arrow buttons to adjust the color tone for the Red, Green, and Blue - Epson BrightLink 695Wi | DuoLink Setup Guide - Page 25
2. Select the Extended menu and press Enter. 3. Select the Multi-Projection setting and press Enter. 25 - Epson BrightLink 695Wi | DuoLink Setup Guide - Page 26
4. Select the RGBCMY setting and press Enter. Note: The RBGCMY setting may only be available when displaying a computer signal. 5. Select the color you want to adjust and press Enter. You see this screen: • To adjust the overall hue of the color, adjust the Hue setting. • To adjust the overall - Epson BrightLink 695Wi | DuoLink Setup Guide - Page 27
need the pens or a computer for Auto Calibration. Make sure the other projector is turned off during calibration. Make sure you have aligned the screens before starting calibration. Note: You can start Auto Calibration by pressing the User button on the remote control or by pressing the Menu button - Epson BrightLink 695Wi | DuoLink Setup Guide - Page 28
1. Press the Menu button, select the Extended menu, and press Enter. 2. Select the Easy Interactive Function setting and press Enter. 28 - Epson BrightLink 695Wi | DuoLink Setup Guide - Page 29
Enter. You see this screen: 4. Adjust the image focus, if necessary. 5. Press Enter to select Yes. A pattern appears then disappears, and the system is calibrated. If you see a message that calibration failed, you need to calibrate manually. The cursor location and pen position should match after - Epson BrightLink 695Wi | DuoLink Setup Guide - Page 30
If the cursor location and pen position do not match after auto calibration, you can calibrate manually. Make sure you have aligned the screens before starting calibration. 1. Press the Menu button, select the Extended menu, and press Enter. 2. Select the Easy Interactive Function setting and - Epson BrightLink 695Wi | DuoLink Setup Guide - Page 31
3. Select Manual Calibration and press Enter. You see this screen: 4. Adjust the image focus, if necessary. 5. Press Enter to select Yes. A flashing green circle appears in the upper left corner of your projected image. 6. Touch the center of the circle with the tip of the pen. 31 - Epson BrightLink 695Wi | DuoLink Setup Guide - Page 32
The circle disappears, and you see another circle below the first one. Note: For the most accurate calibration, be sure to touch the center of the circle. Note: Make sure you are not blocking the signal between the pen and the interactive receiver (next to the projection window on the projector). 32 - Epson BrightLink 695Wi | DuoLink Setup Guide - Page 33
projector while performing touch calibration. Make sure you have calibrated the pens, installed the Touch Unit, performed angle adjustment, and turned on the Touch Unit before calibrating for finger touch interactivity. Note: The BrightLink 685Wi and BrightLink 685Wi+ do not support finger touch. 33 - Epson BrightLink 695Wi | DuoLink Setup Guide - Page 34
1. Press the Menu button, select the Extended menu, and press Enter. 2. Select the Easy Interactive Function setting and press Enter. 34 - Epson BrightLink 695Wi | DuoLink Setup Guide - Page 35
3. Select Touch Unit Setup and press Enter. 4. Select Touch Calibration and press Enter. Note: If the Touch Calibration setting is disabled, make sure the Power setting is set to On. 35 - Epson BrightLink 695Wi | DuoLink Setup Guide - Page 36
the image focus, if necessary. 6. Press Enter to select Yes. A flashing green circle appears in the upper left corner of your projected image. 7. Touch and hold the center of the circle with your finger until the circle disappears and another circle appears, then release it. The circle disappears - Epson BrightLink 695Wi | DuoLink Setup Guide - Page 37
circle appears at the top of a new column. Note: If you make a mistake, press the Esc button on the remote control to go back to the previous circle. To restart the calibration process, press and hold the Esc button for 2 seconds. 9. If the cursor location and your finger position do not match - Epson BrightLink 695Wi | DuoLink Setup Guide - Page 38
Parent topic: Configuring Projector Settings for Multiple Projectors 38 - Epson BrightLink 695Wi | DuoLink Setup Guide - Page 39
for use with Duolink. Check the following on your computer before enabling DuoLink in Easy Interactive Tools: • You have installed Easy Interactive Tools and the Easy Interactive Driver • The resolution for the primary display and the secondary display are the same • The primary display and the - Epson BrightLink 695Wi | DuoLink Setup Guide - Page 40
Easy Interactive Tools Modes You can use DuoLink with Easy Interactive Tools in the following modes. Note: If you see two toolbars, you are not in PC Interactive mode. Switch to PC Interactive mode to use Easy Interactive Tools. Note: When you save the screen using Easy Interactive Tools, both - Epson BrightLink 695Wi | DuoLink Setup Guide - Page 41
whiteboard window to display the computer desktop and whiteboard simultaneously. Note: For more information on Easy Interactive Tools, see the Easy Interactive Tools 4.20 Operation Guide on the Epson support site. 41 - Epson BrightLink 695Wi | DuoLink Setup Guide - Page 42
Seiko Epson Corporation's operating and maintenance instructions. Seiko Epson Corporation shall not be liable for any damages or problems EPSON® is a registered trademark and EPSON Exceed Your Vision is a registered logomark of Seiko Epson Corporation. BrightLink® is a registered trademark of Epson - Epson BrightLink 695Wi | DuoLink Setup Guide - Page 43
product names used herein are for identification purposes only and may be trademarks of their respective owners. Epson disclaims any and all rights in those marks. Parent topic: Copyright Notice Copyright Attribution © 2017 Epson America, Inc. 11/17 CPD-54292R2 Parent topic: Copyright Notice 43
-
 1
1 -
 2
2 -
 3
3 -
 4
4 -
 5
5 -
 6
6 -
 7
7 -
8
-
9
-
10
-
11
-
12
-
13
-
14
-
15
-
16
-
17
-
18
-
19
-
20
-
21
-
22
-
23
-
24
-
25
-
26
-
27
-
28
-
29
-
30
-
31
-
32
-
33
-
34
-
35
-
36
-
37
-
38
-
39
-
40
-
41
-
42
-
43
 |
 |

DuoLink Setup Guide