Epson BrightLink Pro 1450Ui Installation Guide - Control Pad and Touch Unit - Page 42
Remove the front cover, Attach the Control Pad
 |
View all Epson BrightLink Pro 1450Ui manuals
Add to My Manuals
Save this manual to your list of manuals |
Page 42 highlights
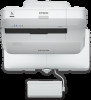
English If you are using the Touch Unit, make sure that you do not install the Control Pad or Pen Stand in the shaded areas of the following figure. The Touch Unit will not operate correctly if anything is obstructing the infrared signal. 4.0 in. (100 mm) 0.8 in. (20 mm) A Remove the front cover 4.0 in. (100 mm) B Attach the Control Pad Attach the Control Pad with commercially available M4 × 20 mm screws (×4). Warning ❏ Make sure the screws are not angled. ❏ Make sure the Control Pad is firmly attached. ❏ Do not attach the Control Pad with double-side tape or magnets. 41
-
 1
1 -
2
-
3
-
4
-
5
-
6
-
7
-
8
-
9
-
10
-
11
-
12
-
13
-
14
-
15
-
16
-
17
-
18
-
19
-
20
-
21
-
22
-
23
-
24
-
25
-
26
-
27
-
28
-
29
-
30
-
31
-
32
-
33
-
34
-
35
-
36
-
 37
37 -
 38
38 -
 39
39 -
 40
40 -
 41
41 -
 42
42 -
 43
43 -
 44
44 -
 45
45 -
 46
46 -
 47
47 -
48
-
49
-
50
-
51
-
52
-
53
-
54
-
55
-
56
-
57
-
58
-
59
-
60
-
61
-
62
-
63
-
64
-
65
-
66
-
67
-
68
-
69
-
70
-
71
-
72
-
73
-
74
-
75
-
76
-
77
-
78
-
79
-
80
-
81
-
82
-
83
-
84
-
85
-
86
-
87
-
88
-
89
-
90
 |
 |

41
English
If you are using the Touch Unit, make sure that you do not install the Control Pad or Pen Stand in the shaded
areas of the following figure. The Touch Unit will not operate correctly if anything is obstructing the infrared
signal.
A
Remove the front cover
B
Attach the Control Pad
Attach the Control Pad with commercially available M4 × 20 mm screws (×4).
0.8 in. (20 mm)
4.0 in. (100 mm)
4.0 in. (100 mm)
❏
Make sure the screws are not angled.
❏
Make sure the Control Pad is firmly attached.
❏
Do not attach the Control Pad with double-side tape or magnets.
Warning