Epson BrightLink Pro 1450Ui Installation Guide - Control Pad and Touch Unit - Page 6
Package Contents, Specifications, Installing the Touch Unit, Installing the Control Pad BrightLink
 |
View all Epson BrightLink Pro 1450Ui manuals
Add to My Manuals
Save this manual to your list of manuals |
Page 6 highlights
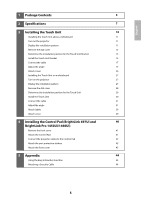
English 1 Package Contents 6 2 Specifications 7 3 Installing the Touch Unit 10 Installing the Touch Unit above a whiteboard 11 Turn on the projector 11 Display the installation pattern 11 Remove the dial cover 12 Determine the installation position for the Touch Unit Bracket 13 Install the Touch Unit Bracket 14 Connect the cable 17 Adjust the angle 17 Attach cover 26 Installing the Touch Unit on a whiteboard 27 Turn on the projector 27 Display the installation pattern 27 Remove the dial cover 28 Determine the installation position for the Touch Unit 29 Install the Touch Unit 30 Connect the cable 31 Adjust the angle 31 Attach labels 39 Attach cover 39 4 Installing the Control Pad (BrightLink 697Ui and 40 BrightLink Pro 1450Ui/1460Ui) Remove the front cover 41 Attach the Control Pad 41 Connect the projector cables to the Control Pad 42 Attach the port protection stickers 42 Attach the front cover 43 5 Appendix 44 Using the Easy Interactive Function 44 Attaching a Security Cable 44 5
-
 1
1 -
 2
2 -
 3
3 -
 4
4 -
 5
5 -
 6
6 -
 7
7 -
 8
8 -
 9
9 -
 10
10 -
 11
11 -
 12
12 -
13
-
14
-
15
-
16
-
17
-
18
-
19
-
20
-
21
-
22
-
23
-
24
-
25
-
26
-
27
-
28
-
29
-
30
-
31
-
32
-
33
-
34
-
35
-
36
-
37
-
38
-
39
-
40
-
41
-
42
-
43
-
44
-
45
-
46
-
47
-
48
-
49
-
50
-
51
-
52
-
53
-
54
-
55
-
56
-
57
-
58
-
59
-
60
-
61
-
62
-
63
-
64
-
65
-
66
-
67
-
68
-
69
-
70
-
71
-
72
-
73
-
74
-
75
-
76
-
77
-
78
-
79
-
80
-
81
-
82
-
83
-
84
-
85
-
86
-
87
-
88
-
89
-
90
 |
 |
