Epson LQ 670 Product Information Guide - Page 15
Tear Off/Bin, Tear Off, While using the default-setting mode or the utility - printer manual
 |
View all Epson LQ 670 manuals
Add to My Manuals
Save this manual to your list of manuals |
Page 15 highlights
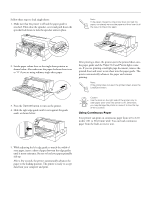
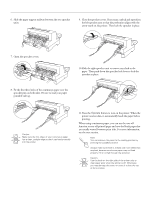
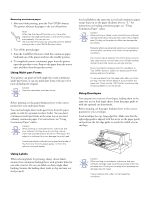
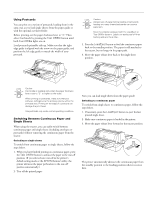
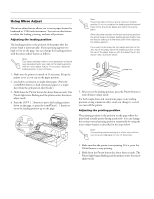
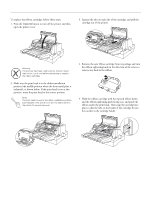
EPSON LQ-670 Using the tear-off function After you have finished printing, you can use the tear-off function to advance continuous paper on the tractor to the tear-off edge of the printer. You can then easily tear off printed sheets. When you resume printing, the printer automatically feeds paper back to the loading position so you can save paper that would normally be lost between documents. You can use the tear-off function in two ways: by pressing the Tear Off/Bin button on the control panel, or by using the control panel's default-setting mode or the EPSON Remote! utility to select auto tear-off. If the perforation between pages is not aligned with the tearoff edge, you can adjust the tear-off position using the microadjust feature as described later. Caution: Never use the tear-off function to feed labels backwards; they may come off their backing and jam the printer. Using the Tear Off/Bin button When using the tractor, you can use the Tear Off/Bin button to advance continuous paper to the tear-off position by following the steps below: 1. Make sure printing has finished. Then press the Tear Off/ Bin button until the two lights on the control panel start flashing. The printer advances the paper to the tear-off edge. 2. Tear off all printed pages. If the perforation is not aligned with the tear-off edge, adjust the tear-off position using the micro-adjust feature. See "Adjusting the tear-off position" later. 3. When you resume printing, the printer feeds the paper back to the top-of-form position and begins printing. (You can also manually feed the paper back to the top-of-form position by pressing the Tear Off/Bin button.) Using auto tear-off mode When you turn on the auto tear-off function in the printer's default-setting mode or the EPSON Remote! utility, the printer advances continuous paper to the tear-off position when you finish printing. The printer advances paper to the tear-off position only when it receives a full page of data or a form-feed command and then receives no more data for three seconds. While using the default-setting mode or the utility, make sure the page length is set correctly for your continuous paper. If you make these settings in the default-setting mode, be sure to turn off the printer then turn it on again to apply your settings. The steps below describe how to use auto tear-off. 1. When you finish printing on continuous paper, the printer advances the perforation of the final printed page to the tearoff position. 2. Tear off all printed pages. (If the perforation is not aligned with the tear-off edge, you can adjust the tear-off position using the micro-adjust feature. See "Adjusting the tear-off position" later.) 3. When you resume printing, the printer automatically feeds the paper back to the top-of-form position and begins printing. (You can also manually feed the paper back to the top-of-form position by pressing the Tear Off/Bin button.) You can leave auto tear-off mode on even when you are using single sheets because the mode is disabled when you move the paper release lever to the single-sheet position. 3/97 EPSON LQ-0670 - 15
-
 1
1 -
2
-
3
-
4
-
5
-
6
-
7
-
8
-
9
-
 10
10 -
 11
11 -
 12
12 -
 13
13 -
 14
14 -
 15
15 -
 16
16 -
 17
17 -
 18
18 -
 19
19 -
 20
20 -
21
-
22
 |
 |
