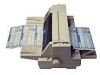
Epson LQ 670 Product Information Guide - Page 16
Using Multi-part Forms, Using Labels, Using Envelopes, Tear Off/Bin, Load/Eject - remote utility
 |
View all Epson LQ 670 manuals
Add to My Manuals
Save this manual to your list of manuals |
Page 16 highlights
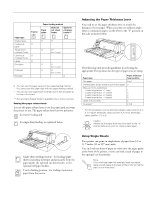
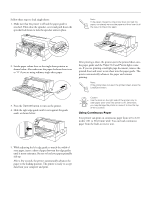
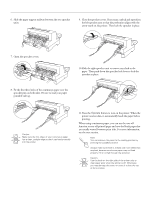
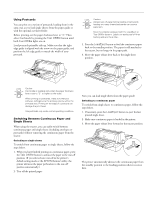
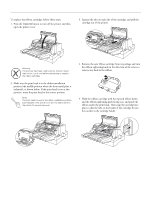
EPSON LQ-670 Removing continuous paper 1. After you finish printing, press the Tear Off/Bin button. The printer advances the paper to the tear-off position. Note: When the auto tear-off function is on, the printer advances the paper perforation to the tear-off position automatically. You can turn on the auto tear-off function by using the printer's defaultsetting mode or the EPSON Remote! utility. 2. Tear off the printed pages. 3. Press the Load/Eject button to feed the continuous paper backward out of the printer and into the standby position. 4. To completely remove continuous paper from the printer, open the sprocket covers. Remove the paper from the tractor unit, and then close the sprocket covers. Using Multi-part Forms Your printer can print on both single-sheet and continuous multi-part forms. It can use multi-part forms with up to five parts including the original. Caution: Use only carbonless multi-part forms. Before printing, set the paper thickness lever to the correct position for your multi-part forms You can load single-sheet multi-part forms from the paper guide or with the optional cut-sheet feeder. You can load continuous multi-part forms in the same way as you load ordinary continuous paper. For instructions, see "Using Continuous Paper" earlier. Caution: When printing on multi-part forms, make sure that your software settings keep the printing entirely within the printable area of the forms. Printing on the edge of a multi-part form can damage the print head. Load single-sheet multi-part forms glued at the side of the form only from the paper guide, not from the optional cut-sheet feeder. Using Labels When selecting labels for printing, always choose labels mounted on continuous backing sheets with sprocket holes for use with a tractor. Do not use labels on shiny single-sheet backing, because the backing sheet tends to slip and may not feed properly. You load labels in the same way as you load continuous paper, except that you set the paper thickness lever to "2." For instructions on loading continuous paper, see "Using Continuous Paper" earlier. Caution: When printing on labels, make sure that your software settings keep the printing entirely within the printable area. Printing on the edge of a label can damage the print head. Because labels are especially sensitive to temperature and humidity, use them only under normal operating conditions. Do not leave labels loaded in the printer between print jobs; they tend to curl and may come off their backing and jam the printer when you resume printing. Never feed labels backward with the Load/Eject or Tear Off/Bin buttons. Labels can easily peel off their backing and jam the printer. To remove labels from the paper path after you finish printing, first tear off the labels at a point before the paper slot. Then use the LF/FF button to advance the remaining labels out of the printer. Using Envelopes You can print on a variety of envelopes, loading them in the same way as you load single sheets: from the paper guide or with the optional cut-sheet feeder. Before printing, set the paper thickness lever to the correct position for your envelopes. Load envelopes face up, long edge first. Make sure that the right edge guide is aligned with the arrow on the paper guide, and position the left edge guide to match the width of your envelope. Caution: When printing on envelopes, make sure that your software settings keep the printing entirely within the printable area. Printing on the edge of an envelope can damage the print head. Use envelopes only under normal operating conditions. 16 - EPSON LQ-670 3/97
-
 1
1 -
2
-
3
-
4
-
5
-
6
-
7
-
8
-
9
-
10
-
 11
11 -
 12
12 -
 13
13 -
 14
14 -
 15
15 -
 16
16 -
 17
17 -
 18
18 -
 19
19 -
 20
20 -
 21
21 -
22
 |
 |
