Epson PowerLite 1770W Operation Guide - EasyMP Network Projection - Page 18
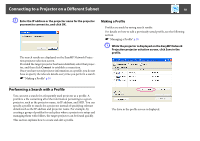
Performing a Search with a Profile
 |
View all Epson PowerLite 1770W manuals
Add to My Manuals
Save this manual to your list of manuals |
Page 18 highlights
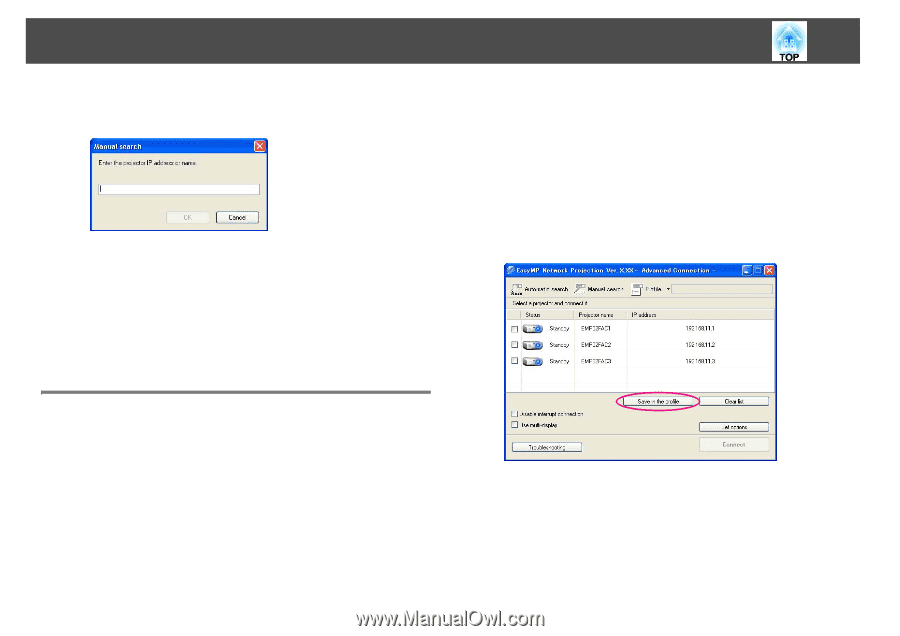
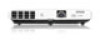
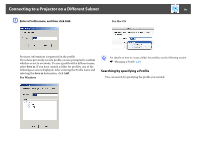
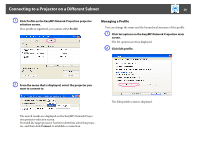
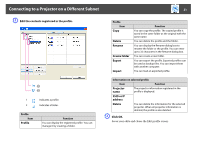
Connecting to a Projector on a Different Subnet 18 B Enter the IP address or the projector name for the projector you want to connect to, and click OK. The search results are displayed on the EasyMP Network Projection projector selection screen. Provided the target projector has been identified, select that projector, and then click Connect to establish a connection. Once you have saved projector information as a profile, you do not have to specify the relevant details every time you perform a search. s "Making a Profile" p.18 Making a Profile Profiles are made by saving search results. For details on how to edit a previously saved profile, see the following section. s "Managing a Profile" p.20 A While the projector is displayed on the EasyMP Network Projection projector selection screen, click Save in the profile. Performing a Search with a Profile You can save a search for a frequently used projector as a profile. A profile is a file containing all of the information pertaining to a given projector, such as the projector name, its IP address, and SSID. You can specify a profile to search for a projector instead of specifying relevant details such as the IP address and projector name. For example, by creating a group of profiles for each place where a projector is setup and managing them with folders, the target projector can be found quickly. This section explains how to create and edit a profile. The Save in the profile screen is displayed.
-
 1
1 -
2
-
3
-
4
-
5
-
6
-
7
-
8
-
9
-
10
-
11
-
12
-
 13
13 -
 14
14 -
 15
15 -
 16
16 -
 17
17 -
 18
18 -
 19
19 -
 20
20 -
 21
21 -
 22
22 -
 23
23 -
24
-
25
-
26
-
27
-
28
-
29
-
30
-
31
-
32
-
33
-
34
-
35
-
36
-
37
-
38
-
39
-
40
-
41
-
42
-
43
-
44
-
45
-
46
-
47
-
48
-
49
-
50
 |
 |