Epson Stylus Scan 2000 Product Information Guide - Page 5
Control Panel, Installing an Ink Cartridge for the First Time - ink cartridges
 |
View all Epson Stylus Scan 2000 manuals
Add to My Manuals
Save this manual to your list of manuals |
Page 5 highlights
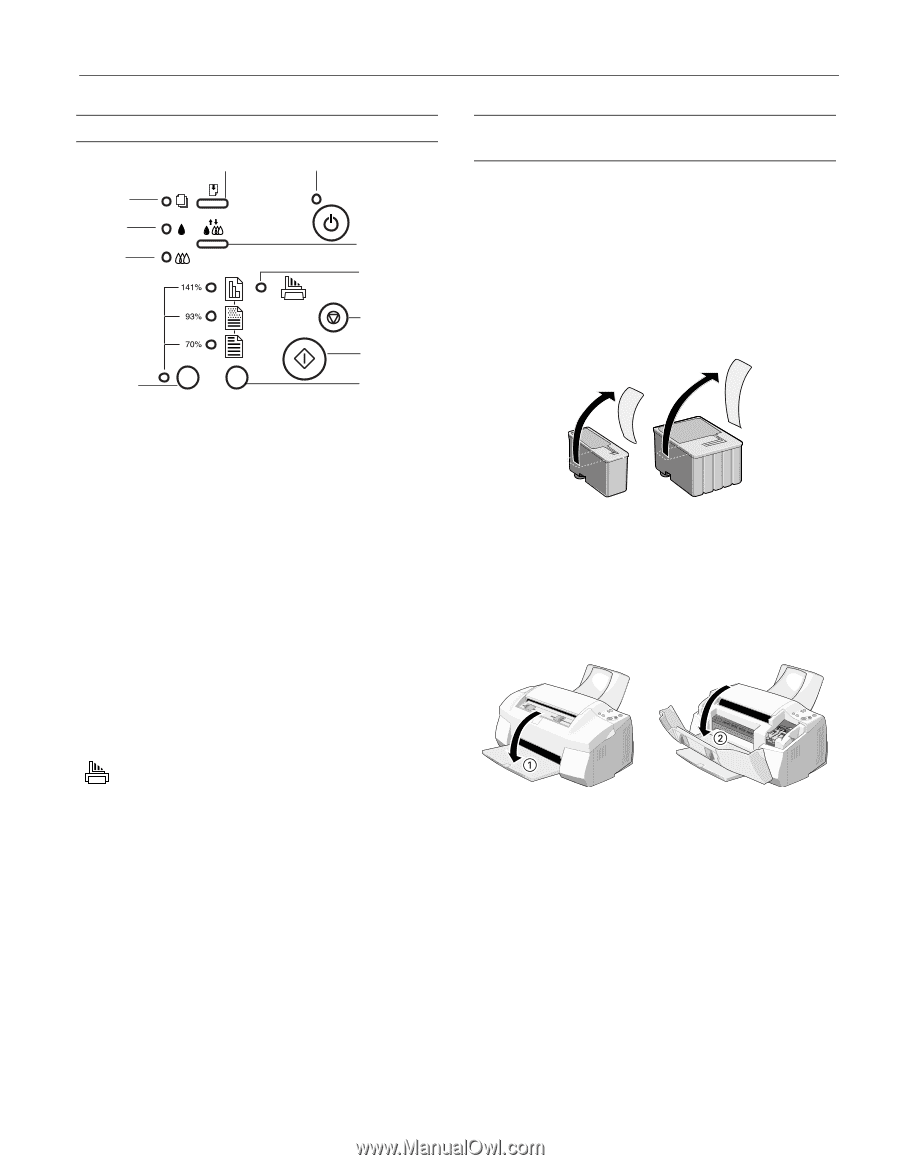
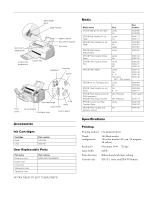
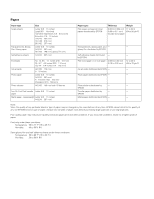
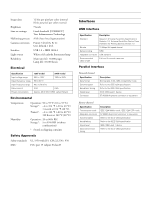
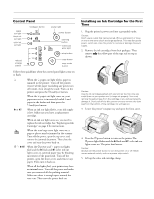
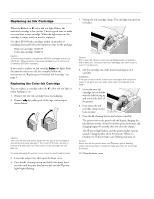
EPSON Stylus Scan 2000 Control Panel paper out light black ink out light color ink out light load/eject button power light power button cleaning button scan/copy error light stop button reduce/ enlarge button copy button copy mode button Follow these guidelines when the control panel lights come on or flash: S When the S paper out light flashes, paper is jammed in the printer. Turn off the printer, remove all the paper (including any pieces torn off inside), then reload the stack. Turn on the printer and press the E load/eject button. When the S paper out light comes on, your paper ran out or is incorrectly loaded. Load paper in the feeder and then press the E load/eject button. B or A When an ink out light flashes, your ink supply is low. Make sure you have a replacement cartridge. When an ink out light comes on, you need to replace the ink cartridge. See "Replacing an Ink Cartridge" on page 8 for instructions. When the scan/copy error light comes on, a page or photo may be jammed in the scanner. Turn off the power, open the top cover, and remove the jammed document. Then close the cover and turn the power back on. P S B A When the P power and S paper out lights flash and the B black and A color ink out lights come on, jammed paper may be blocking movement of the print head. Turn off the printer, open the front cover, and remove any paper. Then turn it back on. When all the lights flash, your printer may have an internal error. Turn off the power and make sure you removed all the packing material. Make sure there is enough space around the rear vent. Then turn the power back on. Installing an Ink Cartridge for the First Time 1. Plug the printer's power cord into a grounded outlet. Caution: Don't use an outlet that can be turned off by a wall switch or timer, or one on the same circuit as a large appliance. This may disrupt the power, which can erase the printer's memory or damage its power supply. 2. Remove the ink cartridges from their packages. Then remove only the yellow part of the tape seal on top as shown. black cartridge color cartridge Caution: Use the ink cartridges packed with your printer the first time you install them or your printer won't charge ink properly. You must remove the yellow tape from the cartridge or you will permanently damage it. Don't pull off the blue portion or try to remove the clear seal from the bottom of the cartridge; ink will leak out. 3. Lower the printer's output tray and open the front cover. 4. Press the Ppower button to turn on the printer.The Ppower light flashes and the B black and A color ink out lights come on. The print head moves. Caution: Always use the power button to turn the printer on or off. Never use an external switch, such as a power strip switch. 5. Lift up the color ink cartridge clamp. 9/99 EPSON Stylus Scan 2000 - 5
-
 1
1 -
 2
2 -
 3
3 -
 4
4 -
 5
5 -
 6
6 -
 7
7 -
 8
8 -
 9
9 -
 10
10 -
 11
11 -
12
 |
 |