Epson Stylus Scan 2000 Product Information Guide - Page 6
Loading Paper, Testing the Printer, User's Guide - cartridge
 |
View all Epson Stylus Scan 2000 manuals
Add to My Manuals
Save this manual to your list of manuals |
Page 6 highlights
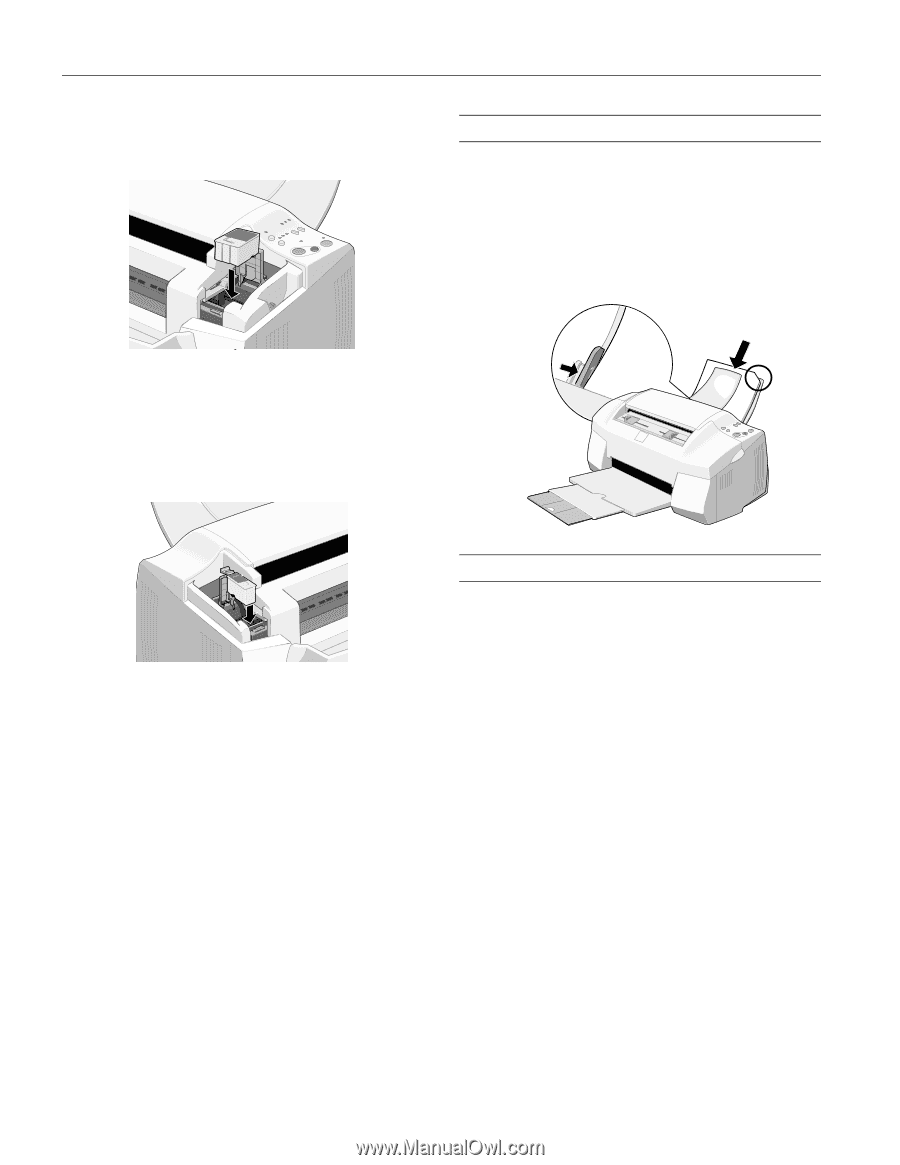
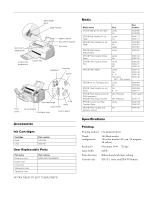
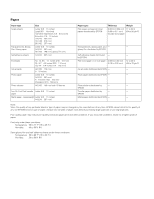
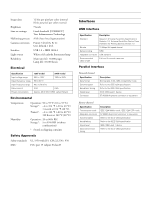
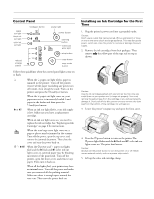
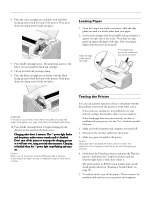
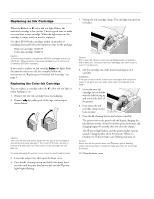
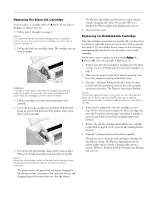
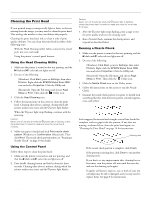
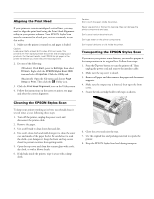
EPSON Stylus Scan 2000 6. Place the color cartridge into its holder with the labels facing up and toward the back of the printer. Then press down the clamp until it locks into place. 7. Press the R cleaning button. The print head moves to the left so you can install the black ink cartridge. 8. Lift up the black ink cartridge clamp. 9. Place the black cartridge into its holder with the labels facing up and toward the back of the printer. Then press down the clamp until it locks into place. Loading Paper 1. Open the output tray and its extensions. Slide the edge guide out until it is a little wider than your paper. 2. Load a stack of paper with the printable side up and place it against the right side of the feeder. Then slide the edge guide up against the paper's left edge. Don't load paper higher than the arrow on the guide. Slide the edge guide against the paper. If the paper has a corner cut, make sure you load it as shown WARNING: If ink gets on your hands, wash them thoroughly with soap and water. If ink gets in your eyes, flush them immediately with water. 10. Press the R cleaning button to begin charging the ink delivery system and close the front cover. Charging takes about 2 minutes. The P power light flashes and the printer makes various sounds until it's finished. Don't turn off the printer or interrupt the charging process or it will start over, using more ink than necessary. Charging is finished when the P power light stops flashing and stays on. Caution: Never turn off the printer while the P power light is flashing, unless the printer hasn't moved or made any noise for more than 5 minutes. Testing the Printer You can run a printer operation check to determine whether the problem comes from the printer or some other source. t If the results are satisfactory, the problem lies in your software settings, the interface cable, or your computer. t If the check page does not print correctly, you have a problem with your printer. See the User's Guide for possible solutions. 1. Make sure both the printer and computer are turned off. 2. Disconnect the interface cable from the printer. 3. Make sure paper is loaded in the printer. Caution: Load paper that's at least 8.27 inches (210 mm) wide. This prevents ink from spraying inside the printer and smudging your printouts. 4. Hold down the E load/eject button and press the P power button. Hold down the E load/eject button until the P power light starts to flash, then release it. The printer prints its ROM version number and a nozzle check pattern (shown in "Running a Nozzle Check" on page 10). 5. To end the check, turn off the printer. Then reconnect the interface cable and turn on your printer and computer. 6 - EPSON Stylus Scan 2000 9/99
-
 1
1 -
 2
2 -
 3
3 -
 4
4 -
 5
5 -
 6
6 -
 7
7 -
 8
8 -
 9
9 -
 10
10 -
 11
11 -
 12
12
 |
 |