Epson V11H248020 User's Guide - Page 30
Wall and Projection Screen Recommendations, Viewing on a Wall, Viewing on a Projection Screen
 |
UPC - 010343860308
View all Epson V11H248020 manuals
Add to My Manuals
Save this manual to your list of manuals |
Page 30 highlights
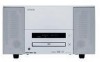
8. If the image flickers, you may need to synchronize the signal, especially if you have connected different computers to MovieMate in the past. Press the auto setup button on the remote control to correct this problem. 9. To enlarge or reduce the aspect ratio of the picture, press the button on the remote control to select Normal, Wide, or Zoom (if available for the video source you're using). Note: After you disconnect your external equipment, make sure you close MovieMate's port compartment covers. Wall and Projection Screen Recommendations To optimize viewing of MovieMate images on a wall in your home or on an optional projection screen, follow the recommendations in this section. Viewing on a Wall You can easily view MovieMate's high quality images on any flat white wall in your home. There is no cost or setup involved, and you can project and resize the image up to any size that fits on your wall. To enhance the image quality even further, you may want to paint the wall with projection paint that is specially designed for optimum reflectivity and contrast in your viewing environment. Viewing on a Projection Screen If you don't have a suitable wall in your home or want a professional quality viewing experience, you can use a projection screen. These screens have optical coatings with special reflective properties that enhance brightness, contrast, and sharpness as well as providing a frame around the image. Projection screens are available in many shapes, sizes, mounting styles, colors, and surface qualities, as described below. 30 Using MovieMate With Other Equipment
-
 1
1 -
2
-
3
-
4
-
5
-
6
-
7
-
8
-
9
-
10
-
11
-
12
-
13
-
14
-
15
-
16
-
17
-
18
-
19
-
20
-
21
-
22
-
23
-
24
-
 25
25 -
 26
26 -
 27
27 -
 28
28 -
 29
29 -
 30
30 -
 31
31 -
 32
32 -
 33
33 -
 34
34 -
 35
35 -
36
-
37
-
38
-
39
-
40
-
41
-
42
-
43
-
44
-
45
-
46
-
47
-
48
-
49
-
50
-
51
-
52
-
53
-
54
-
55
-
56
-
57
-
58
-
59
-
60
-
61
-
62
-
63
-
64
-
65
-
66
-
67
-
68
-
69
-
70
-
71
-
72
-
73
-
74
-
75
-
76
-
77
-
78
-
79
-
80
 |
 |
