Epson WorkForce 520 Quick Guide - Page 12
Follow the on-screen instructions to finish selecting network settings.
 |
View all Epson WorkForce 520 manuals
Add to My Manuals
Save this manual to your list of manuals |
Page 12 highlights
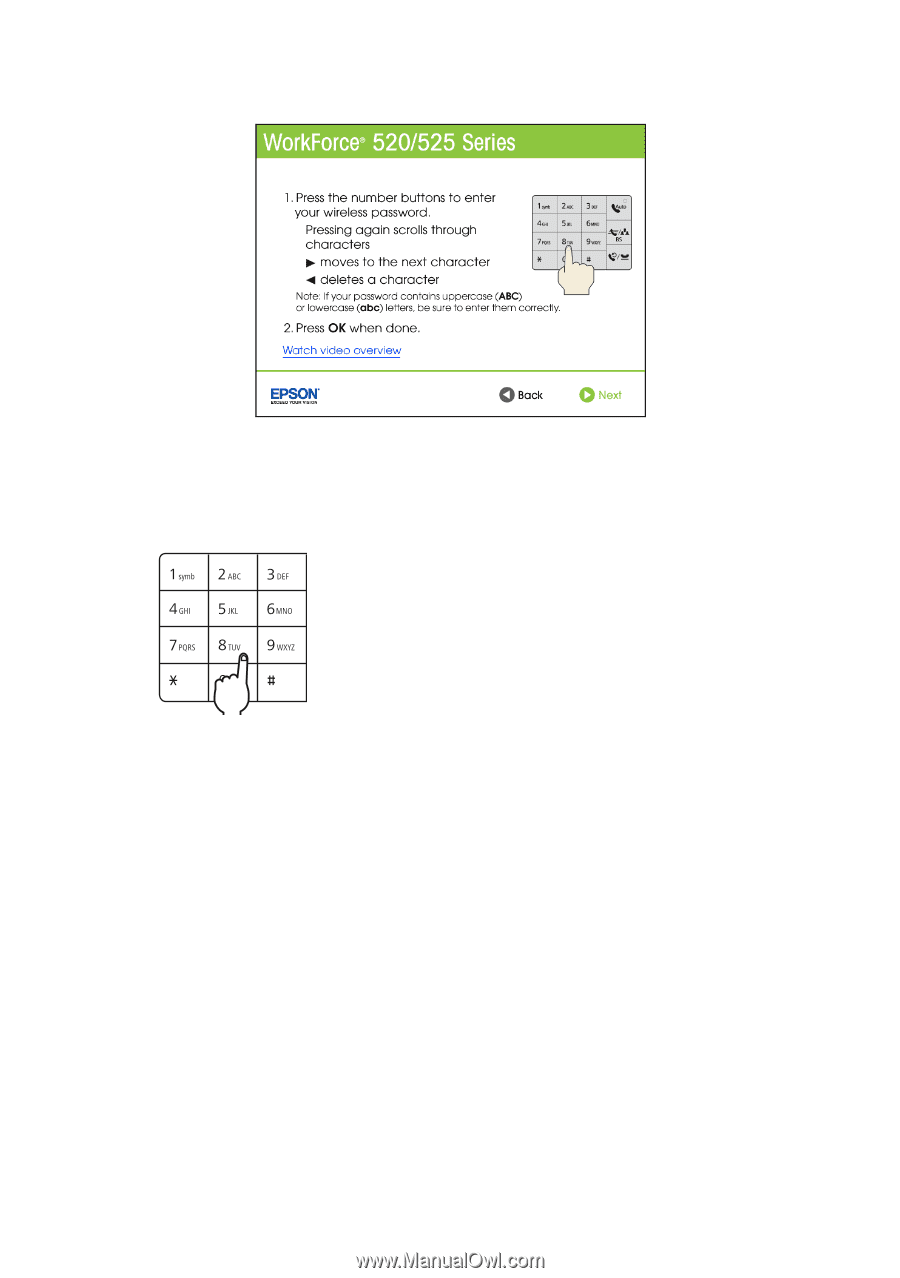
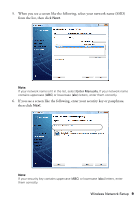
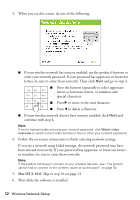
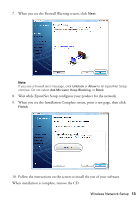
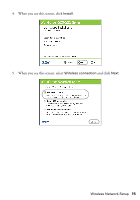
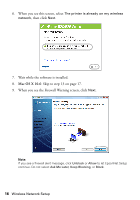
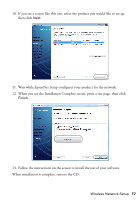
3. When you see this screen, do one of the following: ■ If your wireless network has security enabled, use the product's buttons to enter your network password. If your password has uppercase or lowercase letters, be sure to enter them correctly. Then click Next and go to step 4. ■ Press the buttons repeatedly to select uppercase letters or lowercase letters, or numbers and special characters. ■ Press r to move to the next character. ■ Press l to delete a character. ■ If your wireless network doesn't have security enabled, click Next and continue with step 4. Note: If you're having trouble entering your network password, click Watch video overview to watch a short video tutorial on how to enter your network password. 4. Follow the on-screen instructions to finish selecting network settings. If you see a network setup failed message, the network password may have been entered incorrectly. If your password has uppercase or lowercase letters, or numbers, be sure to enter them correctly. Note: If the product still doesn't connect to your wireless network, see "The product cannot find or connect to the wireless router or access point" on page 50. 5. Mac OS X 10.6: Skip to step 10 on page 13. 6. Wait while the software is installed. 12 Wireless Network Setup
-
 1
1 -
2
-
3
-
4
-
5
-
6
-
 7
7 -
 8
8 -
 9
9 -
 10
10 -
 11
11 -
 12
12 -
 13
13 -
 14
14 -
 15
15 -
 16
16 -
 17
17 -
18
-
19
-
20
-
21
-
22
-
23
-
24
-
25
-
26
-
27
-
28
-
29
-
30
-
31
-
32
-
33
-
34
-
35
-
36
-
37
-
38
-
39
-
40
-
41
-
42
-
43
-
44
-
45
-
46
-
47
-
48
-
49
-
50
-
51
-
52
-
53
-
54
-
55
-
56
-
57
-
58
-
59
-
60
-
61
-
62
-
63
-
64
 |
 |