Epson WorkForce 520 Quick Guide - Page 14
Setting Up Additional Computers, Entering Your SSID Manually - not printing
 |
View all Epson WorkForce 520 manuals
Add to My Manuals
Save this manual to your list of manuals |
Page 14 highlights
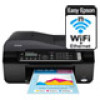
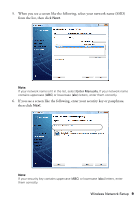
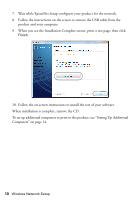
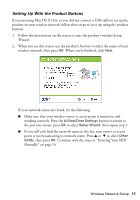
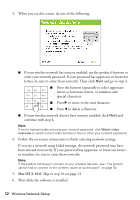
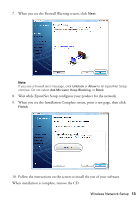
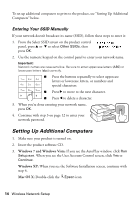
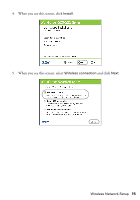
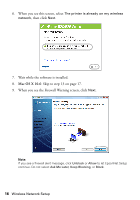
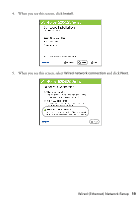
To set up additional computers to print to the product, see "Setting Up Additional Computers" below. Entering Your SSID Manually If your network doesn't broadcast its name (SSID), follow these steps to enter it: 1. From the Select SSID screen on the product control panel, press u or d to select Other SSIDs, then press OK. 2. Use the numeric keypad on the control panel to enter your network name. Important: Network names are case-sensitive. Be sure to enter uppercase letters (ABC) or lowercase letters (abc) correctly. ■ Press the buttons repeatedly to select uppercase letters or lowercase letters, or numbers and special characters. ■ Press r to move to the next character. ■ Press l to delete a character. 3. When you're done entering your network name, press OK. 4. Continue with step 3 on page 12 to enter your network password. Setting Up Additional Computers 1. Make sure your product is turned on. 2. Insert the product software CD. 3. Windows 7 and Windows Vista: If you see the AutoPlay window, click Run Setup.exe. When you see the User Account Control screen, click Yes or Continue. Windows XP: When you see the Software Installation screen, continue with step 4. Mac OS X: Double-click the Epson icon. 14 Wireless Network Setup
-
 1
1 -
2
-
3
-
4
-
5
-
6
-
7
-
8
-
 9
9 -
 10
10 -
 11
11 -
 12
12 -
 13
13 -
 14
14 -
 15
15 -
 16
16 -
 17
17 -
 18
18 -
 19
19 -
20
-
21
-
22
-
23
-
24
-
25
-
26
-
27
-
28
-
29
-
30
-
31
-
32
-
33
-
34
-
35
-
36
-
37
-
38
-
39
-
40
-
41
-
42
-
43
-
44
-
45
-
46
-
47
-
48
-
49
-
50
-
51
-
52
-
53
-
54
-
55
-
56
-
57
-
58
-
59
-
60
-
61
-
62
-
63
-
64
 |
 |