Epson WorkForce 600 Network Installation Guide - Page 30
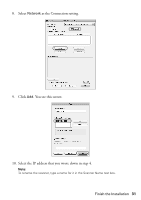
This screen appears twice. Click, both times it appears. - scan
 |
View all Epson WorkForce 600 manuals
Add to My Manuals
Save this manual to your list of manuals |
Page 30 highlights
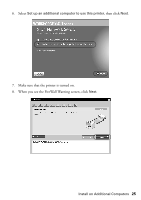
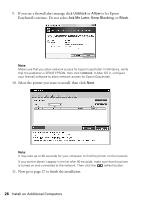
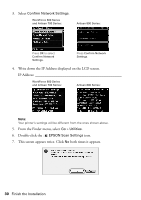
3. Select Confirm Network Settings. WorkForce 600 Series and Artisan 700 Series: Artisan 800 Series: Press OK to select Confirm Network Settings. Press Confirm Network Settings. 4. Write down the IP Address displayed on the LCD screen. IP Address WorkForce 600 Series and Artisan 700 Series: Artisan 800 Series: Note: Your printer's settings will be different from the ones shown above. 5. From the Finder menu, select Go > Utilities. 6. Double-click the EPSON Scan Settings icon. 7. This screen appears twice. Click No both times it appears. 30 Finish the Installation
-
 1
1 -
2
-
3
-
4
-
5
-
6
-
7
-
8
-
9
-
10
-
11
-
12
-
13
-
14
-
15
-
16
-
17
-
18
-
19
-
20
-
21
-
22
-
23
-
24
-
 25
25 -
 26
26 -
 27
27 -
 28
28 -
 29
29 -
 30
30 -
 31
31 -
 32
32 -
 33
33 -
 34
34 -
 35
35 -
36
-
37
-
38
-
39
-
40
 |
 |

30
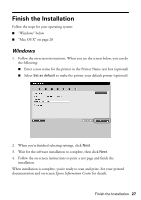
Finish the Installation
3.
Select
Confirm Network Settings
.
4.
Write down the IP Address displayed on the LCD screen.
IP Address: _______________________________________________
Note:
Your printer’s settings will be different from the ones shown above.
5.
From the Finder menu, select
Go
>
Utilities
.
6.
Double-click the
EPSON Scan Settings
icon.
7.
This screen appears twice. Click
No
both times it appears.
Press
OK
to select
Confirm Network
Settings
.
Press
Confirm Network
Settings
.
WorkForce 600 Series
and Artisan 700 Series:
Artisan 800 Series:
WorkForce 600 Series
and Artisan 700 Series:
Artisan 800 Series: