Fluke TiR1 FE Ti10-25-Tir-1 Users Manual - Page 21
Changing the SD Card, Setting the Backlight, General Specifications, Backlight, Full-Bright
 |
View all Fluke TiR1 manuals
Add to My Manuals
Save this manual to your list of manuals |
Page 21 highlights
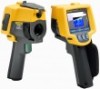
Thermal Imagers Changing the SD Card Changing the SD Card To eject an SD card from the Imager, press in on the exposed edge of the SD card and then release. The card should pop partially out after releasing it. Carefully pull the card out of the slot. Note The SD Card can be inserted and removed while the Imager is in operation. To insert an SD card into the Imager, carefully slip the card into the slot with the card's label facing toward the LCD display. Push the card in until it catches. Setting the Backlight The backlight can be set to Auto-sensing or Full-Bright. To set the backlight: 1. Press a until Backlight appears over c. 2. Press the softkey labeled Backlight. 3. Press the softkey labeled Auto or Full-Bright. Note To extend battery life, Auto-Sensing automatically adjusts backlight brightness based on ambient light levels. General Specifications Temperature Operating 10 °C to 50 °C (14 °F to 122 °F) Storage 20 °C to +50 °C (-4 °F to 122 °F) without batteries Relative Humidity 10 to 90 % non-condensing Display 640 x 480 color LCD, approx. 2" X 3" (Landscape orientation) with Backlight (selectable Bright or Auto) Controls and Adjustments User selectable temperature scale (°C/°F) Language selection Time/Date set Emissivity selection (Ti25 and TiR1 only) User selectable Hot Spot and Cold Spot on the image (TiR1 and Ti25 only) 15
-
 1
1 -
2
-
3
-
4
-
5
-
6
-
7
-
8
-
9
-
10
-
11
-
12
-
13
-
14
-
15
-
 16
16 -
 17
17 -
 18
18 -
 19
19 -
 20
20 -
 21
21 -
 22
22 -
 23
23 -
 24
24
 |
 |
