Garmin Nuvi 775T Owner's Manual - Page 63
Mounting on Your Dashboard, Removing the nüvi and Mount, Caring for Your nüvi, the windshield
 |
UPC - 753759077709
View all Garmin Nuvi 775T manuals
Add to My Manuals
Save this manual to your list of manuals |
Page 63 highlights
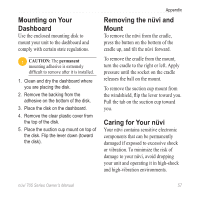
Mounting on Your Dashboard Use the enclosed mounting disk to mount your unit to the dashboard and comply with certain state regulations. Caution: The permanent mounting adhesive is extremely difficult to remove after it is installed. 1. Clean and dry the dashboard where you are placing the disk. 2. Remove the backing from the adhesive on the bottom of the disk. 3. Place the disk on the dashboard. 4. Remove the clear plastic cover from the top of the disk. 5. Place the suction cup mount on top of the disk. Flip the lever down (toward the disk). Appendix Removing the nüvi and Mount To remove the nüvi from the cradle, press the button on the bottom of the cradle up, and tilt the nüvi forward. To remove the cradle from the mount, turn the cradle to the right or left. Apply pressure until the socket on the cradle releases the ball on the mount. To remove the suction cup mount from the windshield, flip the lever toward you. Pull the tab on the suction cup toward you. Caring for Your nüvi Your nüvi contains sensitive electronic components that can be permanently damaged if exposed to excessive shock or vibration. To minimize the risk of damage to your nüvi, avoid dropping your unit and operating it in high-shock and high-vibration environments. nüvi 705 Series Owner's Manual 57
-
 1
1 -
2
-
3
-
4
-
5
-
6
-
7
-
8
-
9
-
10
-
11
-
12
-
13
-
14
-
15
-
16
-
17
-
18
-
19
-
20
-
21
-
22
-
23
-
24
-
25
-
26
-
27
-
28
-
29
-
30
-
31
-
32
-
33
-
34
-
35
-
36
-
37
-
38
-
39
-
40
-
41
-
42
-
43
-
44
-
45
-
46
-
47
-
48
-
49
-
50
-
51
-
52
-
53
-
54
-
55
-
56
-
57
-
 58
58 -
 59
59 -
 60
60 -
 61
61 -
 62
62 -
 63
63 -
 64
64 -
 65
65 -
 66
66 -
 67
67 -
 68
68 -
69
-
70
-
71
-
72
-
73
-
74
-
75
-
76
 |
 |