Garmin Oregon 750 Owner s Manual Web - Page 7
Connecting to a Wireless Network, Pairing Your Smartphone, Viewing Widgets, Connect IQ Features, - instructions
 |
View all Garmin Oregon 750 manuals
Add to My Manuals
Save this manual to your list of manuals |
Page 7 highlights
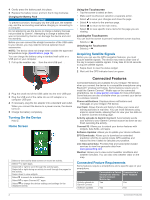
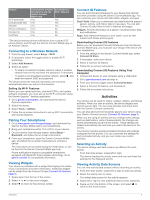
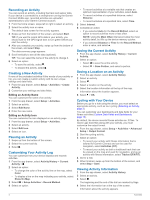
Feature EPO downloads Live geocache data Weather Phone notifications Connect IQ LiveTrack Connected to a Paired Smartphone with the Garmin Connect Mobile App Yes Yes Yes Yes* Yes Yes Connected to a Wi‑Fi® Network Yes Yes Yes No No No *The device receives phone notifications from a paired iOS® phone directly, and through the Garmin Connect Mobile app on an Android™ phone. Connecting to a Wireless Network 1 From the app drawer, select Setup > Wi-Fi. 2 If necessary, select the toggle switch to enable Wi‑Fi technology. 3 Select Add Network. 4 Select an option: • To select a broadcast wireless network, select a wireless network from the list and enter the password, if necessary. • To select a non-broadcast wireless network, select , and enter the network SSID and password. The device stores the network information and connects automatically when you return to this location. Setting Up Wi‑Fi Features Before you can upload activities, download EPOs, and update software wirelessly, you must set up the Wi‑Fi connection using the Garmin Express™ desktop application. 1 Go to garmin.com/express, and download the Garmin Express application. 2 Select the device. 3 Select Tools > Utilities. 4 Follow the on-screen instructions to set up Wi‑Fi connectivity with Garmin Express. Pairing Your Smartphone 1 Go to www.garmin.com/intosports/apps, and download the Garmin Connect Mobile app to your smartphone. 2 Bring your smartphone within 10 m (33 ft.) of your device. 3 On your device, from the app drawer, select Setup > Bluetooth, and follow the on-screen instructions. 4 From your smartphone, open the Garmin Connect Mobile app, and follow the on-screen instructions to connect a device. The instructions are provided during the initial setup, or can be found in the Garmin Connect Mobile app help. Phone notifications require a compatible smartphone equipped with Bluetooth Smart wireless technology. Go to garmin.com/ble for compatibility information. Viewing Widgets Your device is preloaded with a widget that displays the status of your connections and other information. Additional widgets can be added from the Connect IQ app (Connect IQ Features, page 3). 1 Swipe down from the top of the screen. 2 Select or to view more widgets. 3 Select to return to the previous screen. Connect IQ Features You can add Connect IQ features to your device from Garmin and other providers using the Garmin Connect Mobile app. You can customize your device with data fields, widgets, and apps. Data Fields: Allow you to download new data fields that present sensor, activity, and history data in new ways. You can add Connect IQ data fields to built-in features and pages. Widgets: Provide information at a glance, including sensor data and notifications. Apps: Add interactive features to your watch, such as new outdoor and fitness activity types. Downloading Connect IQ Features Before you can download Connect IQ features from the Garmin Connect Mobile app, you must pair your Oregon 700 device with your smartphone. 1 From the settings in the Garmin Connect Mobile app, select Connect IQ Store. 2 If necessary, select your device. 3 Select a Connect IQ feature. 4 Follow the on-screen instructions. Downloading Connect IQ Features Using Your Computer 1 Connect the device to your computer using a USB cable. 2 Go to garminconnect.com and sign in. 3 From your devices widget, select Connect IQ Store. 4 Select a Connect IQ feature, and download it. 5 Follow the on-screen instructions. Activities Your device can be used for indoor, outdoor, athletic, and fitness activities. When you start an activity, the device displays and records sensor data. You can save activities and share them with the Garmin Connect community. You can also add Connect IQ activity apps to your device using your Garmin Connect account (Connect IQ Features, page 3). When you are using an activity and you change some settings, such as data fields or units of measurement, the changes are saved automatically as part of the activity. These settings are loaded automatically the next time you switch the device to this activity. Your device includes several preloaded activities with settings configured for that activity. You can customize the settings for each preloaded activity, and you can create new custom activities. Selecting an Activity The device settings and data screens are different for each activity. From the home screen, swipe left or right. The device displays the activity name and icon and loads the settings for the displayed activity. Viewing Activity Data Screens You can view activity data screens without recording an activity. 1 From the home screen, swipe left or right to select an activity. 2 Select the activity icon or name. The default data screen for the activity appears. 3 Swipe left or right to view additional data screens (optional). 4 Swipe up from the bottom of the screen, and select to return to the home screen. Activities 3
-
 1
1 -
 2
2 -
 3
3 -
 4
4 -
 5
5 -
 6
6 -
 7
7 -
 8
8 -
 9
9 -
 10
10 -
 11
11 -
 12
12 -
13
-
14
-
15
-
16
-
17
-
18
-
19
-
20
-
21
-
22
-
23
-
24
 |
 |
