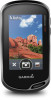
Garmin Oregon 750 Owner s Manual Web - Page 8
Customizing Your Activity Log
 |
View all Garmin Oregon 750 manuals
Add to My Manuals
Save this manual to your list of manuals |
Page 8 highlights
Recording an Activity You can record an activity, including the track and sensor data. If your device is connected to a smartphone running the Garmin Connect Mobile app, recorded activities are uploaded automatically to your Garmin Connect account. 1 From the home screen, swipe left or right to select an activity. 2 Select the activity icon or name. The default data screen for the activity appears. 3 Swipe up from the bottom of the screen, and select Start. TIP: If you want to record GPS data in your activity, you should wait for the GPS signal bars to turn green before you start the activity. 4 After you complete your activity, swipe up from the bottom of the screen, and select Stop. The data summary page appears. 5 Scroll vertically to see all the data (optional). TIP: You can select the name of the activity to change it. 6 Select an option: • To save the activity, select . • To discard the activity, select . Creating a New Activity If none of the preloaded activities fit the needs of your activity or trip, you can create a custom activity with its own unique settings and data fields. 1 From the app drawer, select Setup > Activities > Create Activity. 2 Customize your settings and data fields. Editing an Activity Name You can customize the name of an activity. 1 From the app drawer, select Setup > Activities. 2 Select an activity. 3 Select Edit Name. 4 Enter the new name. Editing an Activity Icon You can customize the icon displayed on an activity page. 1 From the app drawer, select Setup > Activities. 2 Select an activity. 3 Select Edit Icon. 4 Select an icon. Pausing an Activity 1 Swipe up from the bottom of the screen. 2 Select the current activity. 3 Select . Customizing Your Activity Log You can customize how your device displays and records activities. 1 From the app drawer, select Activity History > Current Activity > . 2 Select an option: • To change the color of the activity line on the map, select Color. • To display a line on the map indicating your activity, select Show On Map. 3 Select > Setup Activities > Record Method. 4 Select an option: • To record activities at a variable rate that creates an optimum representation of your activities, select Auto. • To record activities at a specified distance, select Distance. • To record activities at a specified time, select Time. 5 Select Interval. 6 Complete an action: • If you selected Auto for the Record Method, select an option to record activities more or less often. NOTE: Using the Most Often interval provides the most activity detail, but fills up the device memory quicker. • If you selected Distance or Time for the Record Method, enter a value, and select . Saving the Current Activity 1 From the app drawer, select Activity History > Current Activity. 2 Select an option: • Select to save the entire activity. • Select > Save Portion, and select a portion. Saving a Location on an Activity 1 From the app drawer, select Activity History. 2 Select an activity. 3 Select . 4 Select a location on the activity. 5 Select the location information at the top of the map. Information about the location appears. 6 Select > OK. Cycling with Your Device Before you go for a ride using the device, you must select an appropriate activity, such as tour cycling (Selecting an Activity, page 3). You can customize your dashboards and data fields for your fitness activities (Custom Data Fields and Dashboards, page 12). By default, the device records fitness activities as .fit files. To record .gpx track files along with your activity, you must customize the output format. 1 From the app drawer, select Setup > Activities > Advanced Setup > Output Format. 2 Start the cycling activity. 3 Select an option: • To record your activity with fitness information that is tailored for Garmin Connect and can be used for navigation, select Activities (FIT). • To record your activity as both a traditional track that can be viewed on the map and used for navigation, and as an activity with fitness information, select Tracks (GPX/FIT). 4 Go for a ride. 5 When finished, swipe up from the bottom of the screen, and select Stop > Save. Viewing Activity Information 1 From the app drawer, select Activity History. 2 Select an activity. 3 Select . The beginning and the end of the trail are marked by flags. 4 Select the information bar at the top of the screen. Information about the activity appears. 4 Activities
-
 1
1 -
2
-
 3
3 -
 4
4 -
 5
5 -
 6
6 -
 7
7 -
 8
8 -
 9
9 -
 10
10 -
 11
11 -
 12
12 -
 13
13 -
14
-
15
-
16
-
17
-
18
-
19
-
20
-
21
-
22
-
23
-
24
 |
 |
