Gateway ML6227q 8511725 - Gateway Service Guide - Page 38
keys-down, Important
 |
View all Gateway ML6227q manuals
Add to My Manuals
Save this manual to your list of manuals |
Page 38 highlights
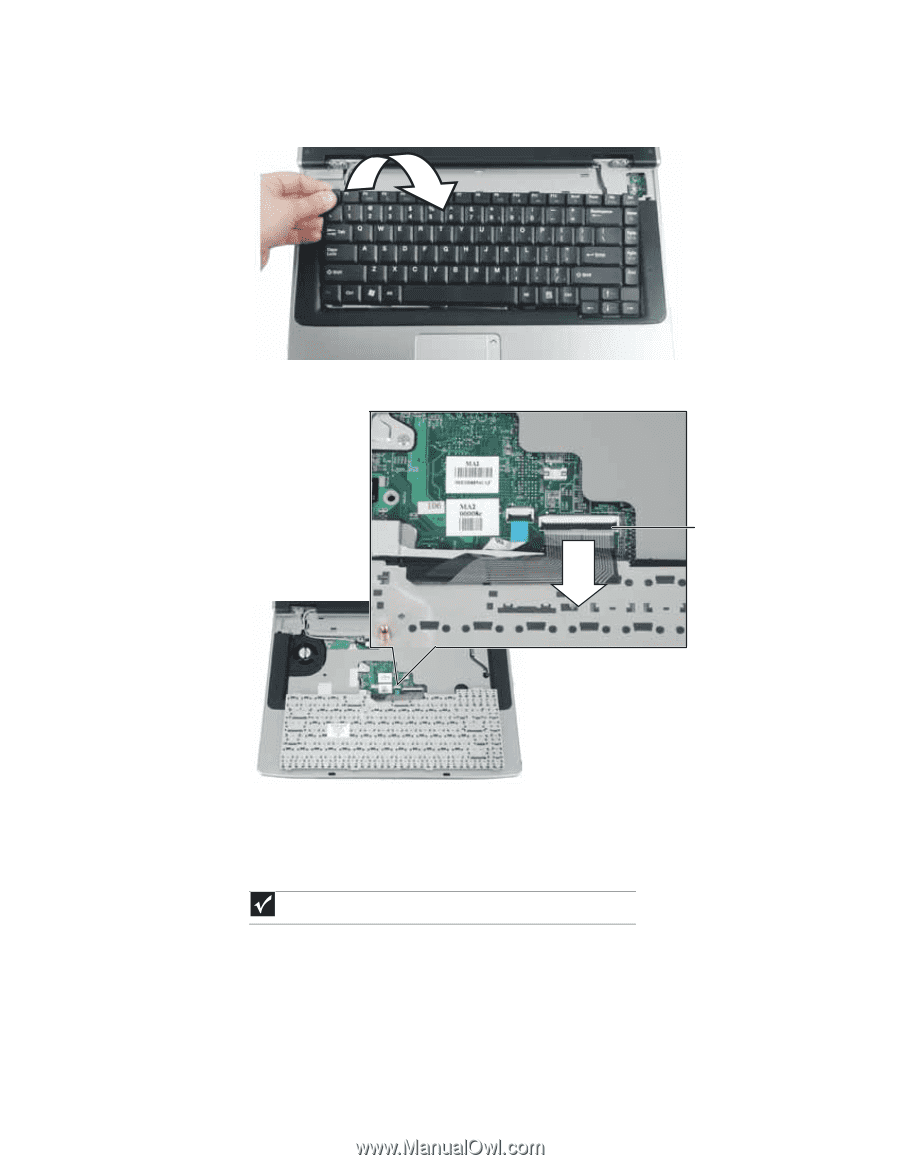
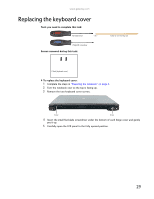
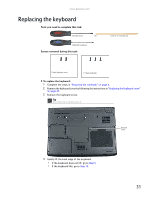
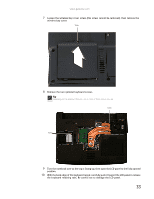
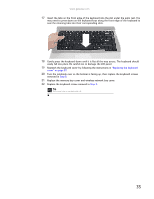
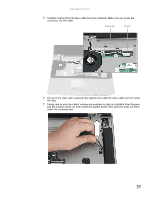
Replacing Notebook Components 11 Carefully rotate the keyboard toward you so it lies keys-down on top of the notebook. Be careful not to damage the LCD panel. 12 Lift the black keyboard connector clip, then remove the cable. Be careful not to touch or damage any other components. Keyboard connector clip 13 Lift the old keyboard away from the notebook. The keyboard is now completely detached from the notebook. 14 Place the new keyboard keys-down on the notebook with the space bar away from you. 15 Make sure the black keyboard connector clip is fully raised, insert the cable into the connector, then lower the black connector clip to lock the cable in place. Important The keyboard cable is correctly oriented if the cable is not twisted. 16 Rotate the keyboard toward the LCD panel until the keyboard is almost face-up. 34
-
 1
1 -
2
-
3
-
4
-
5
-
6
-
7
-
8
-
9
-
10
-
11
-
12
-
13
-
14
-
15
-
16
-
17
-
18
-
19
-
20
-
21
-
22
-
23
-
24
-
25
-
26
-
27
-
28
-
29
-
30
-
31
-
32
-
 33
33 -
 34
34 -
 35
35 -
 36
36 -
 37
37 -
 38
38 -
 39
39 -
 40
40 -
 41
41 -
 42
42 -
 43
43 -
44
-
45
-
46
-
47
-
48
-
49
-
50
-
51
-
52
-
53
-
54
-
55
-
56
-
57
-
58
-
59
-
60
-
61
-
62
-
63
-
64
-
65
-
66
-
67
-
68
-
69
-
70
-
71
-
72
-
73
-
74
-
75
-
76
-
77
-
78
 |
 |