GE GFDS140GDWW Owners Manual - Page 14
Reassemble Door Assembly, Move Strike Bracket, Reinstall Door Assembly
 |
View all GE GFDS140GDWW manuals
Add to My Manuals
Save this manual to your list of manuals |
Page 14 highlights
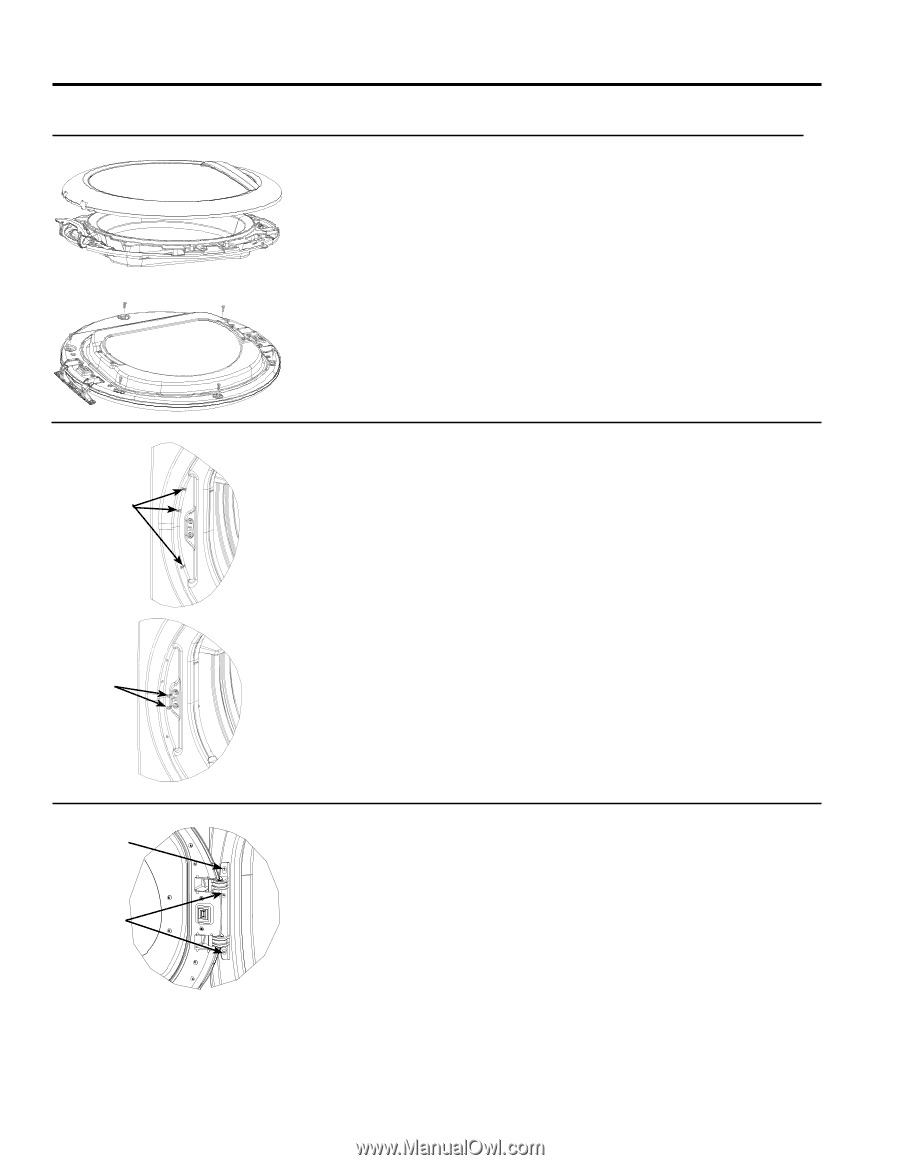
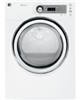
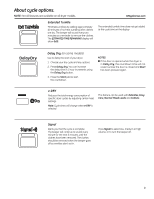
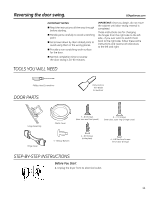
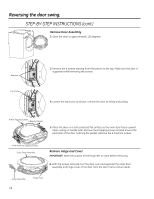
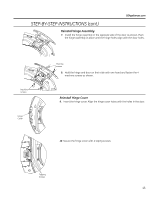
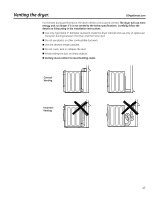
Reversing the door swing. Outer Door Inner Door STEP-BY-STEP INSTRUCTIONS (cont.) Reassemble Door Assembly IMPORTANT: Make sure there is no dirt or any other foreign material in between the window panes. 11. Place the plastic outer door onto the inner door. Make sure that the handle part of the outer door is opposite the hinge as shown. 12. Turn the door over and fasten the outer door to the inner door using the 6 tapping screws. Beauty Buttons Move Strike Bracket 13. Using a putty knife or any other flat tool, remove the 5 beauty buttons located on the dryer where the door will be installed and install them on the opposite side. Tapping Screws Partially Inserted Screw Tighten All Screws 14 14. Switch the strike bracket and its cover to the opposite side by removing the screws. Reinstall both on the opposite side. Reinstall Door Assembly 15. The door is now ready to be installed on the dryer. To ease this step, the hinge has keyholes that allow a partially fastened screw to be used as a hook. Partially fasten a screw to the uppermost screw hole. Hook the door on the partially fastened screw. Fasten the hinge by installing the other 4 screws and tightening the partially fastened screw above.
-
 1
1 -
2
-
3
-
4
-
5
-
6
-
7
-
8
-
 9
9 -
 10
10 -
 11
11 -
 12
12 -
 13
13 -
 14
14 -
 15
15 -
 16
16 -
 17
17 -
 18
18 -
 19
19 -
20
-
21
-
22
-
23
-
24
-
25
-
26
-
27
-
28
-
29
-
30
-
31
-
32
-
33
-
34
-
35
-
36
-
37
-
38
-
39
-
40
-
41
-
42
-
43
-
44
-
45
-
46
-
47
-
48
-
49
-
50
-
51
-
52
-
53
-
54
-
55
-
56
-
57
-
58
-
59
-
60
 |
 |