GE PS968SPSS Use and Care Manual
GE PS968SPSS - Profile - 30" Electric Range Manual
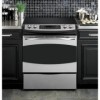 |
UPC - 084691197546
View all GE PS968SPSS manuals
Add to My Manuals
Save this manual to your list of manuals |
GE PS968SPSS manual content summary:
- GE PS968SPSS | Use and Care Manual - Page 1
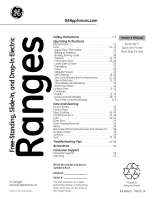
Free-Standing, Slide-In, and Drop-In Electric Ranges In Canada: www.GEAppliances.ca Printed in the United States GEAppliances.com Safety Instructions 2-5 Operating Instructions Kitchen Timer 21 Oven 14-35 Adjust Oven Thermostat 22 Baking or Roasting 17 Broiling, Broiling Guide 18 Controls - GE PS968SPSS | Use and Care Manual - Page 2
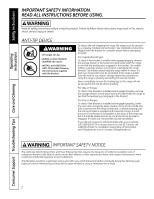
Safety Instructions Operating Instructions Consumer Support Troubleshooting Tips Care and Cleaning IMPORTANT SAFETY INFORMATION. READ ALL INSTRUCTIONS BEFORE USING. WARNING Read all safety instructions before using the product. Failure to follow these instructions may result in fire, electric - GE PS968SPSS | Use and Care Manual - Page 3
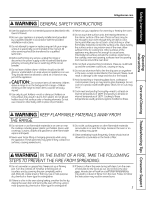
Care and Cleaning Troubleshooting Tips Consumer Support GEAppliances.com WARNING GENERAL SAFETY INSTRUCTIONS s Use this appliance for its intended purpose as described in this Owner's Manual. s Be sure your appliance is properly installed and grounded by a qualified installer in accordance with - GE PS968SPSS | Use and Care Manual - Page 4
using an oven mitt and a scraper. See the Cleaning the glass cooktop section for detailed instructions. s Read and follow all instructions and warnings on the cleaning cream label. Consumer Support Troubleshooting Tips Care and Cleaning WARNING COIL COOKTOP SAFETY INSTRUCTIONS (some models) s Do - GE PS968SPSS | Use and Care Manual - Page 5
Care and Cleaning Troubleshooting Tips Consumer Support GEAppliances.com WARNING OVEN SAFETY INSTRUCTIONS s Stand away from the range when opening the oven door. Hot air or steam which escapes can cause burns to hands, face and/or eyes. s Keep the oven vent unobstructed. s Keep the oven free from - GE PS968SPSS | Use and Care Manual - Page 6
instructions can result in fire, serious injury or death. NOTE: Throughout this manual, features and appearance may vary from your model heating of new parts and insulating materials and will disappear in a short time. NOTE: On models with light- Support Troubleshooting Tips Care and Cleaning 6 - GE PS968SPSS | Use and Care Manual - Page 7
Consumer Support Selecting types of cookware for glass cooktop models. (on non-induction models) GEAppliances.com The following information will help you choose cookware which will give good performance on glass cooktops. See insert for cookware to use with induction cooktops. Stainless Steel - GE PS968SPSS | Use and Care Manual - Page 8
Safety Instructions Operating Instructions Consumer Support Troubleshooting Tips Care and Cleaning Using the surface units-Touch pad-controlled models. The power level with a fraction indicates the additional half-step setting. You may hear clicking sounds indicating the control is maintaining - GE PS968SPSS | Use and Care Manual - Page 9
Safety Instructions Operating Instructions Care and Cleaning Troubleshooting Tips Consumer Support GEAppliances.com WARNING FOOD POISON HAZARD: Bacteria may grow in food at temperatures below 140°F. • Always start with hot food. Do not use warm settings - GE PS968SPSS | Use and Care Manual - Page 10
Instructions Operating Instructions Using the surface units-Knob-controlled models. Throughout this manual, features and appearance may vary from your model some models. Models with a Triple Surface Unit only. Consumer Support Troubleshooting Tips Care and Cleaning On some models. 10 Models - GE PS968SPSS | Use and Care Manual - Page 11
Instructions Throughout this manual, features and appearance may vary from your model. Models with a Bridge Burner only: Using the Bridge Burner (on some models Instructions Care and Cleaning Troubleshooting Tips Consumer Support of Agriculture Extension Service. Flat-bottomed canners - GE PS968SPSS | Use and Care Manual - Page 12
Instructions Operating Instructions Using the griddle. CAUTION BURN HAZARD: Griddle surfaces may be hot enough to cause burns during and after use. Place and remove the griddle when it is cool and all surface units are off. Use oven on some models) To use levels range guide Support Troubleshooting - GE PS968SPSS | Use and Care Manual - Page 13
Safety Instructions Operating Instructions Care and Cleaning Troubleshooting Tips Consumer Support GEAppliances.com Preparing Quality Steak, cooking in the oven. The range control will beep and turn off when the steak reaches the desired internal temperature. NOTES: s After searing, your steak - GE PS968SPSS | Use and Care Manual - Page 14
Safety Instructions Using the oven controls. Throughout this manual, features and appearance may vary from your model. See the control panel below that matches your model. Operating Instructions Consumer Support Troubleshooting Tips Care and Cleaning BROIL HI/LO Pad Touch the BROIL HI/LO pad - GE PS968SPSS | Use and Care Manual - Page 15
Instructions Operating Instructions GEAppliances.com START Pad Must be touched to start any cooking or cleaning function. OVEN LIGHT Pad Touch to turn the oven the number pads, touch 1 for Low, 2 for Medium or 3 some models, press START. On some models - Troubleshooting Tips Consumer Support 15 - GE PS968SPSS | Use and Care Manual - Page 16
Instructions Operating Instructions Using the oven. To avoid possible burns, place the racks in the desired position before you turn on the oven. The number of rack positions may vary by model. Before you begin... The racks have stops, so that when placed correctly on the supports is low and - GE PS968SPSS | Use and Care Manual - Page 17
fan (on some models) while the oven is preheating. The fan will stop after the oven is preheated and the display shows your set temperature. This is normal. To change the oven temperature during the , and then remove the food from the oven. Care and Cleaning Troubleshooting Tips Consumer Support 17 - GE PS968SPSS | Use and Care Manual - Page 18
food should be 3″ to 6″ from broil element) D (food should be 6″ to 7″ from broil element) *Use rack position A for the smaller, 2-rack-position oven. Handle and turn very carefully. To prevent curling of meat, slash fat at 1″ intervals. Consumer Support Troubleshooting Tips Care and Cleaning 18 - GE PS968SPSS | Use and Care Manual - Page 19
off automatically, food left in the oven will continue cooking after the oven turns off. Care and Cleaning Troubleshooting Tips Consumer Support How to Set a Delayed Start and Automatic Stop The oven will turn on at the time of day you set, cook for a specific length of time and then turn off - GE PS968SPSS | Use and Care Manual - Page 20
Instructions Operating Instructions Using the probe. (on some models) For many foods, especially roasts and poultry, internal food temperature is the best Consumer Support Troubleshooting Tips Care and Cleaning How to Set the Oven For Baking/Roasting When Using the Probe (on some models) Insert - GE PS968SPSS | Use and Care Manual - Page 21
ON pad (depending on model) and then touching the number pads to enter the new time you want. To Cancel the Kitchen Timer Touch the KITCHEN TIMER ON/OFF or TIMER ON pad (depending on model) twice or touch TIMER OFF. (on some models) Care and Cleaning Troubleshooting Tips Consumer Support 21 - GE PS968SPSS | Use and Care Manual - Page 22
+ (on some models) + BAKE BROIL HI/LO BAKE 12345 67890 START (on some models) To Adjust the day display. Use your oven as you would normally. Consumer Support Troubleshooting Tips Care and Cleaning The contain at least 80% fat by weight. Low-fat spreads, on the other hand, contain less - GE PS968SPSS | Use and Care Manual - Page 23
Safety Instructions Operating Instructions Care and Cleaning Troubleshooting Tips Consumer Support Using the convection oven. (on some models) Convection Cook (on some models) The convection oven comes with one convection cook mode and can be used for 1-Rack Convection Baking or Multi-Rack - GE PS968SPSS | Use and Care Manual - Page 24
the grid is used to prevent grease spatters. Operating Instructions Consumer Support Troubleshooting Tips Care and Cleaning (on some models) OR CONVECTION BAKE OR CONVECTION ROAST 12345 67890 START CLEAR OFF (on some models) How to Set the Oven for Convection Baking or Roasting Touch the - GE PS968SPSS | Use and Care Manual - Page 25
Instructions Using the timed features for convection cooking. (on some models) Room temperature promotes the growth of harmful bacteria. Be sure that the oven light is off because heat from the bulb will speed harmful bacteria Instructions Care and Cleaning Troubleshooting Tips Consumer Support 25 - GE PS968SPSS | Use and Care Manual - Page 26
Instructions Operating Instructions Consumer Support Troubleshooting Tips Care and Cleaning Using the convection oven. (on some models) For best results when roasting large turkeys and roasts, we recommend using the probe included in the convection oven. To change the oven generally require 30-45 - GE PS968SPSS | Use and Care Manual - Page 27
the oven is in Slow Cook, the range will shut off. Operating Instructions Care and Cleaning Troubleshooting Tips Consumer Support Slow Cook Guide Food quantity of food to the size pan. Fill the pan about 3/4 full for best results. Too large a pot allows the steam to escape, causing foods to dry - GE PS968SPSS | Use and Care Manual - Page 28
Safety Instructions Operating Instructions Consumer Support Troubleshooting Tips Care and Cleaning Using the slow cook, pizza, warming and proofing features. How to Set the Upper Oven For Warming The WARM feature keeps cooked foods hot. This feature is not designed to reheat cold food. NOTE: - GE PS968SPSS | Use and Care Manual - Page 29
racks (on some models) can be self-cleaned, but they will darken, lose their luster and become hard to slide. s If your oven is equipped with gray porcelain-coated oven racks, they may be left in the oven during the self-clean cycle. Soil on the front frame of the range and outside the gasket on - GE PS968SPSS | Use and Care Manual - Page 30
ash in the oven. Wipe it up with a damp cloth after the oven cools. If white spots remain, remove them with a soap-filled steel wool pad and to slide, apply a small amount of cooking oil to a paper towel and wipe the edges of the oven racks with the paper towel. Consumer Support Troubleshooting Tips - GE PS968SPSS | Use and Care Manual - Page 31
Instructions OperaIntOisnptgreurIacnttsiitonrngusctions Care and Cleaning Troubleshooting Tips Consumer Support Special features of your oven same time. The display will show C (Celsius). Touch the START pad. (on some models) + BAKE BROIL HI/LO KITCHEN TIMER ON/OFF START Tones at the End of - GE PS968SPSS | Use and Care Manual - Page 32
Instructions Special features of your oven control. Tone Volume (on some models) This feature allows you to adjust the tone volumes to a more acceptable volume. There are three possible volume levels. Touch the upper oven shown. Operating Instructions Consumer Support Troubleshooting Tips Care and - GE PS968SPSS | Use and Care Manual - Page 33
is still set in Sabbath. Remove the cooked food. Care and Cleaning Troubleshooting Tips Consumer Support How to Exit the Sabbath Feature Touch the CLEAR/OFF pad. If the oven is cooking, wait for a random delay period of approximately 30 seconds to 1 minute, until only is in the display. Touch and - GE PS968SPSS | Use and Care Manual - Page 34
warming drawer. (on some models) Operating Instructions Consumer Support Troubleshooting Tips Care and Cleaning WARNING on the display and "Set" begins to blink. On the number pads, touch 1 for Low, 2 for Medium or 3 for High. The display "1" changes corresponding to the number pad selected - GE PS968SPSS | Use and Care Manual - Page 35
Safety Instructions Operating Instructions Care and Cleaning Troubleshooting Tips Consumer Support Using the lower oven drawer. (on some models) GEAppliances.com The lower oven drawer may be used to bake foods using the same times and temperatures as a standard oven. Foods ideal for baking in - GE PS968SPSS | Use and Care Manual - Page 36
of the grain. Follow the cleaner instructions for cleaning the stainless steel surface. To inquire about purchasing stainless steel appliance cleaner or polish or to find the location of a dealer nearest you, please call our toll-free number: National Parts Center 1.800.626.2002 GEAppliances.com - GE PS968SPSS | Use and Care Manual - Page 37
Instructions Operating Instructions Care and Cleaning Troubleshooting Tips Consumer Support The gasket is designed with a gap at the bottom to allow for proper air circulation. Do not rub or clean the door gasket-it has an extremely low scrubber for best results. -Off Oven Door (on some models) The - GE PS968SPSS | Use and Care Manual - Page 38
and become hard to slide. It will be necessary to grease all oven rack side edges with a light coating of vegetable oil after cleaning them by hand or in the oven. This will help maintain the ease of sliding the racks in and out of the oven. Consumer Support Troubleshooting Tips Care and Cleaning - GE PS968SPSS | Use and Care Manual - Page 39
the left rear surface unit. Never block this vent. This area could become hot during oven use. Operating Instructions Care and Cleaning Troubleshooting Tips Consumer Support Rail Stop guide Oven Vent (on some models) The oven vent is above the left side of the door. This area could become hot - GE PS968SPSS | Use and Care Manual - Page 40
a wet cloth. This should be done when the oven is completely cool. Reconnect electrical power to the oven. Consumer Support Troubleshooting Tips Care and Cleaning Glass cover (on some models) Wire cover holder 40 Oven Light Replacement (on some models) Be sure to let the light cover and bulb - GE PS968SPSS | Use and Care Manual - Page 41
Operating Instructions GEAppliances.com WARNING SHOCK OR BURN HAZARD: Before replacing oven light bulb, disconnect the electrical power to the range at the main fuse or circuit breaker panel. Failure to do so may result in electric shock or burn. Oven Light Replacement (on some models) Be - GE PS968SPSS | Use and Care Manual - Page 42
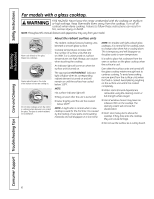
Instructions Operating Instructions Consumer Support Troubleshooting Tips Care and Cleaning Cleaning the glass cooktop. (on some models) Scraper and all recommended supplies are available through our Parts Center. See instructions under "To Order Parts" section on next page. NOTE: Do not use - GE PS968SPSS | Use and Care Manual - Page 43
Instructions GEAppliances.com Metal Marks and Scratches Be careful not to slide Instructions Care and Cleaning Troubleshooting Tips Consumer Support surface units. Remove hot pans. Wearing an oven mitt: a. Use a single-edge razor blade this case, service will be necessary. To Order Parts To order - GE PS968SPSS | Use and Care Manual - Page 44
Before You Call For Service... Troubleshooting Tips Save time and money! Review the charts on the following pages first and you may not need to call for service. Operating Instructions Consumer Support Troubleshooting Tips Care and Cleaning Problem Possible Causes What To Do Surface - GE PS968SPSS | Use and Care Manual - Page 45
Safety Instructions Operating Instructions Care and Cleaning Troubleshooting Tips Consumer Support GEAppliances.com Problem Food does not bake or roast properly Food does not broil properly Oven temperature too hot or too cold Storage drawer is crooked Storage drawer won't close Oven door is - GE PS968SPSS | Use and Care Manual - Page 46
Before You Call For Service... Troubleshooting Tips Operating Instructions Consumer Support Troubleshooting Tips Care and Cleaning Problem Clock and timer do not work Possible Causes What To Do Plug on range is not completely • Make sure electrical plug is plugged into a live, properly - GE PS968SPSS | Use and Care Manual - Page 47
GEAppliances.com Operating Instructions Care and Cleaning Troubleshooting Tips Consumer Support Problem Range Locked or LOC On appears in the oven display or LC appears in the surface display Control signals after entering cooking time or start time Display goes blank Display flashes - GE PS968SPSS | Use and Care Manual - Page 48
Safety Instructions Operating Instructions Before You Call For Service... Troubleshooting Tips Problem Oven racks are difficult to slide Possible Causes The shiny, silver-colored racks operation. After the beep, restart the griddle. Consumer Support Troubleshooting Tips Care and Cleaning 48 - GE PS968SPSS | Use and Care Manual - Page 49
Notes. GEAppliances.com Safety Instructions Operating Instructions Care and Cleaning Troubleshooting Tips Consumer Support 49 - GE PS968SPSS | Use and Care Manual - Page 50
800.661.1616 (Canada) (during normal business hours). Have your model number ready. Operating Instructions Consumer Support Troubleshooting Tips Care and Cleaning Grates Surface Burner Heads and Caps Surface Elements and Drip Pans Knobs or Oven Racks Oven Elements Light Bulbs Experience - GE PS968SPSS | Use and Care Manual - Page 51
Safety Instructions OperaIntOisnptgreurIacnttsiitonrngusctions Care and Cleaning Troubleshooting Tips Consumer Support GE Electric Range Warranty. GEAppliances.com All warranty service provided by our Factory Service Centers, or an authorized Customer Care® technician. To schedule service, visit - GE PS968SPSS | Use and Care Manual - Page 52
Support. GE Appliances Website GEAppliances.com Have a question or need assistance with your appliance? Try the GE Appliances Website 24 hours a day, any day of the year! For greater convenience and faster service, you can now download Owner's Manuals, order parts or even schedule service - GE PS968SPSS | Use and Care Manual - Page 53
termostato del horno 22 Asado, Guía de asado 18 Auto-limpieza 29, 30 Cajón calentador 34 Cajón del horno inferior 35 Características de cocci 44-48 Accesorios 50 Apoyo al cliente Apoyo al cliente 52 Garantía 51 Manual del Propietario Control Quick Set V, Quick Set VI y Next Step Escriba los - GE PS968SPSS | Use and Care Manual - Page 54
cocina. Siga presionando hasta que el soporte anti-volcaduras se accione y el movimiento se detenga. Un pequeño movimiento resulta aceptable en la parte trasera de la parte superior de la cocina, pero debe ser estable y no inclinarse una vez que se enganche el soporte anti-volcaduras. Si no lo hace - GE PS968SPSS | Use and Care Manual - Page 55
GENERALES DE SEGURIDAD s Use este aparato sólo con el objetivo para el que fue creado, como se describe en este Manual papel de aluminio para revestir las bandejas colectoras o ninguna parte del horno, con excepción de lo descripto en este manual. Un uso inadecuado puede provocar daños a la cocina - GE PS968SPSS | Use and Care Manual - Page 56
Seguridad INFORMACIÓN IMPORTANTE DE SEGURIDAD. LEA TODAS LAS INSTRUCCIONES ANTES DE SU USO. ADVERTENCIA INSTRUCCIONES DE SEGURIDAD DE LA ESTUFA s Nunca deje las unidades de superficie sin atención en configuraciones de calor media o alta. Los alimentos que hierven y se derraman pueden provocar - GE PS968SPSS | Use and Care Manual - Page 57
SafetSyegInusrtidruacdtions OperaOtinpgerIancsitórnuctions Cuidado y limpieza GEAppliances.com ADVERTENCIA INSTRUCCIONES DE SEGURIDAD DEL HORNO s Manténgase alejado de la cocina cuando abra la puerta del horno. El aire y el vapor calientes que salen de la cocina pueden provocar quemaduras en - GE PS968SPSS | Use and Care Manual - Page 58
terminado de cocinar. No seguir estas instrucciones puede provocar un incendio, una lesión grave o la muerte. NOTA: A lo largo de este manual, las características y apariencia pueden ser diferentes a las de su modelo. COCCIÓN EN SUPERFICIE Nunca cocine directamente sobre el vidrio. Siempre utilice - GE PS968SPSS | Use and Care Manual - Page 59
SafetSyegInusrtidruacdtions OperaOtinpgerIancsitórnuctions Cuidado y limpieza Elección de los tipos de recipientes de cocción para modelos de estufa de vidrio. (modelos sin inducción) GEAppliances.com La siguiente información lo ayudará a elegir los recipientes de cocción que brindan un buen - GE PS968SPSS | Use and Care Manual - Page 60
Seguridad Cómo usar las unidades de superficie- Modelos controlados por botones de toque. El nivel de energía con una fracción indica la configuración adicional de medio paso. Usted puede oír chasquidos que indican que el control está manteniendo su configuración deseada. Configuraciones de cocci - GE PS968SPSS | Use and Care Manual - Page 61
por los alimentos. WARMING ZONE SELECT ON OFF Cómo usar la zona de calentamiento (en algunos modelos) La ZONA DE CALENTAMIENTO se encuentra en la parte trasera central de la superficie de vidrio. Para utilizar la ZONA DE CALENTAMIENTO: Presione la tecla WARMING ZONE ON/OFF (zona de calentamiento - GE PS968SPSS | Use and Care Manual - Page 62
Seguridad Operación Cómo usar las unidades de superficie- Modelos controlados por perillas. A lo largo de este manual, las características y apariencia pueden ser diferentes a las de su modelo. Cómo utilizarlo Presione la perilla hacia adentro y gírela en la dirección de la configuración - GE PS968SPSS | Use and Care Manual - Page 63
Seguridad Operación Cuidado y limpieza GEAppliances.com A lo largo de este manual, las características y apariencia pueden ser diferentes a las de su modelo. Modelos con un solo quemador puente: Cómo usar el quemador puente (en algunos modelos) - GE PS968SPSS | Use and Care Manual - Page 64
Cómo usar la plancha. Seguridad Operación PRECAUCIÓN PELIGRO DE QUEMADURAS: Las superficies de la plancha pueden estar lo suficientemente calientes como para provocar quemaduras durante y después del uso. Coloque y quite la plancha cuando esté fría y todas las unidades de superficie estén - GE PS968SPSS | Use and Care Manual - Page 65
Seguridad Operación GEAppliances.com Cómo preparar un filete de calidad, tan fácil como 1, 2, 3: Prepare 1. Lleve el filete a temperatura ambiente. NOTA: Siempre utilice prácticas seguras en el manejo de la carne. 2. Condimente ambos lados a su gusto y recubra con aceite de oliva o similar. 3. - GE PS968SPSS | Use and Care Manual - Page 66
Seguridad Cómo usar los controles del horno. A lo largo de este manual, las características y apariencia pueden ser diferentes a las de su modelo. Busque el panel de control que corresponde a su modelo. Operación Cuidado y limpieza Solución de - GE PS968SPSS | Use and Care Manual - Page 67
horno, con excepción del reloj y el temporizador. Botón START (iniciar) Debe presionarse para iniciar cualquier función de cocción o de limpieza. Botón OVEN LIGHT (luz del horno) Toque este botón para apagar o encender las luces del horno. Botones TIMER ON/OFF (temporizador encendido/apagado)/Bot - GE PS968SPSS | Use and Care Manual - Page 68
Seguridad Operación Cómo usar el horno. Para evitar posibles quemaduras, coloque las bandejas en la posición deseada antes de encender el horno. La cantidad de posiciones de la bandeja puede variar en relación al modelo. Antes de comenzar... Las bandejas tienen topes, de modo que cuando se las - GE PS968SPSS | Use and Care Manual - Page 69
los recipientes de modo que no queden directamente uno encima del otro. Deje aproximadamente 11⁄2″ (3,8 cm) entre recipientes y desde el frente, parte trasera y lados de las paredes del horno. Cómo configurar el horno para horneado o rostizado Presione el botón BAKE (hornear). Presione las - GE PS968SPSS | Use and Care Manual - Page 70
que al cocinarla a sólo 140°F (60°C) algunos organismos que provocan intoxicación alimentaria pueden sobrevivir". (Fuente: Safe Food Book. Your Kitchen Guide. USDA Rev. Junio 1985.) Guía de asado Precaliente la asadera durante 2 minutos para mejorar el desempeño. Alimento Carne de res Pollo Nivel - GE PS968SPSS | Use and Care Manual - Page 71
Cómo utilizar las características de horneado y rostizado con temporizador. (en algunos modelos) GEAppliances.com Seguridad Operación NOTA: Los alimentos que se echan a perder con facilidad-como leche, huevos, pescado, rellenos, carne de ave y cerdo-no deben dejarse reposar por más de 1 hora - GE PS968SPSS | Use and Care Manual - Page 72
pinzas para tirar del cable cuando lo quite. s No guarde la sonda dentro del horno. Para asados sin hueso, introduzca la sonda dentro de la parte más carnosa. Para jamón o cordero con hueso, introduzca la sonda en el centro del músculo grande más bajo. s Para no romper la sonda, verifique que los - GE PS968SPSS | Use and Care Manual - Page 73
Seguridad Operación Cómo usar el temporizador de cocina. GEAppliances.com Cómo configurar el temporizador de cocina (en algunos modelos) (en algunos modelos) El temporizador de cocina utiliza horas y minutos. El temporizador de cocina no controla las operaciones del horno. La configuración más - GE PS968SPSS | Use and Care Manual - Page 74
Seguridad Operación ¡Ajuste el termostato del horno usted mismo! Es posible que su nuevo horno cocine de manera diferente a la que usted se encuentra acostumbrado. Utilícelo durante algunas semanas para familiarizarse con sus funciones. Si luego de este período considera que la temperatura del - GE PS968SPSS | Use and Care Manual - Page 75
Seguridad Cómo usar el horno de convección. (en algunos modelos) Cocción por convección (en algunos modelos) El horno de convección viene con un modo de cocción por convección y puede utilizarse para horneado por convección de 1 bandeja u horneado por convección con bandejas múltiples. - GE PS968SPSS | Use and Care Manual - Page 76
Seguridad Operación Cómo usar el horno de convección. (en algunos modelos) Rejilla Asadera Rostizado por convección (en algunos modelos) s Bueno para grandes cortes de carne tierna, sin cubrir. El ventilador de convección hace circular el aire caliente en forma pareja sobre y alrededor de los - GE PS968SPSS | Use and Care Manual - Page 77
Seguridad Cuando hornee galletas, obtendrá mejores resultados si usa una plancha plana para galletas en lugar de un recipiente de lados bajos. GEAppliances.com Recipientes para cocción por convección Antes de utilizar el horno de convección, verifique que sus elementos de cocción dejen espacio - GE PS968SPSS | Use and Care Manual - Page 78
bandeja del horno en la posición que centra los alimentos entre la parte superior e inferior del horno. Introduzca la sonda en la carne. 170°-180°F (77°-82°C) 170°F (77°C) *Las aves rellenas generalmente requieren 30-45 minutos de tiempo adicionales de rostizado. Cubra las patas y la pechuga con - GE PS968SPSS | Use and Care Manual - Page 79
Seguridad Cómo usar las características de cocción lenta, pizza, calentamiento y leudado. GEAppliances.com ADVERTENCIA RIESGO DE INTOXICACIÓN ALIMENTARIA: Por debajo de los 140°F (60°C) puede producirse crecimiento de bacterias en los alimentos. • Siempre empiece con alimentos calientes. No - GE PS968SPSS | Use and Care Manual - Page 80
Seguridad Operación Cuidado y limpieza Cómo usar las características de cocción lenta, pizza, calentamiento y leudado. (cont.) Cómo configurar el horno superior para pizza Ajuste la posición de la bandeja para el tipo de recipiente para pizza que se está usando (ver tabla). Presione el botón - GE PS968SPSS | Use and Care Manual - Page 81
Seguridad Operación Cómo usar los hornos auto-limpiantes superior e inferior. GEAppliances.com Limpie con un paño los desechos rebeldes acumulados en el piso del horno. Antes de un ciclo de limpieza ADVERTENCIA PELIGRO DE INCENDIO: Limpie la grasa y la suciedad rebelde del piso del horno antes - GE PS968SPSS | Use and Care Manual - Page 82
esponjilla de lana de acero embebida en jabón y enjuague bien con una mezcla de vinagre y agua. En general, estos depósitos son restos de sal que no pueden eliminarse durante el ciclo de limpieza. Si el horno extremos de las bandejas. Cuidado y limpieza Solución de problemas Apoyo al cliente 30 - GE PS968SPSS | Use and Care Manual - Page 83
SafetSyegInusrtidruacdtions OperaOtinpgerIancsitórnuctions Cuidado y limpieza Características especiales de los controles del horno. GEAppliances.com Los nuevos controles con botones de toque cuentan con características adicionales. Las siguientes son las características y la manera en que usted - GE PS968SPSS | Use and Care Manual - Page 84
Características especiales de los controles del horno. Seguridad Operación Cuidado y limpieza + BAKE BROIL HI/LO COOKING TIME START 32 Volumen del tono (en algunos modelos) Esta característica permite regular el volumen de los tonos para lograr un volumen más aceptable. Existen tres niveles - GE PS968SPSS | Use and Care Manual - Page 85
No hay una temperatura predeterminada. Presione el botón START (iniciar) en el horno correspondiente. Después de un período aleatorio de aproximadamente 30 segundos a 1 minuto, aparecerá en la pantalla indicando que el horno está horneando/rostizando. Si no aparece en la pantalla, comience de nuevo - GE PS968SPSS | Use and Care Manual - Page 86
Cómo usar el cajón calentador. (en algunos modelos) Seguridad Operación Cuidado y limpieza ADVERTENCIA RIESGO DE INTOXICACIÓN ALIMENTARIA: Por debajo de los 140°F (60°C) puede producirse crecimiento de bacterias en los alimentos. • Siempre empiece con alimentos calientes. No utilice - GE PS968SPSS | Use and Care Manual - Page 87
Seguridad Operación Cuidado y limpieza Cómo usar el cajón del horno inferior. (en algunos modelos) GEAppliances.com El cajón del horno inferior puede usarse para hornear alimentos utilizando los mismos tiempos y temperaturas de un horno común. Los alimentos ideales para hornear en el cajón del - GE PS968SPSS | Use and Care Manual - Page 88
mo usar el reloj, el temporizador y el bloqueo de controles de este manual. Limpie los derrames con un paño húmedo. También puede utilizar un Las superficies pintadas incluyen los lados de la cocina y la puerta, la parte superior del panel de control y el frente del cajón. Límpielas con jab - GE PS968SPSS | Use and Care Manual - Page 89
lugar, se la debe reemplazar. Cómo limpiar la puerta del horno Para limpiar la parte interna de la puerta: s Debido a que el área que se encuentra dentro colocar la puerta: Tome con firmeza ambos lados de la puerta de la parte superior. Con la puerta Extremo Brazo de la en el mismo inferior de - GE PS968SPSS | Use and Care Manual - Page 90
Seguridad Operación Cuidado y limpieza de la cocina. Marco del horno Marco de la puerta Botones de liberación Presione hacia adentro Puerta del horno superior desmontable (en algunos modelos) Para quitar la puerta: Para volver a colocar la puerta: Abra la puerta por completo. Levante la traba - GE PS968SPSS | Use and Care Manual - Page 91
. Limpie el piso del horno con agua tibia jabonosa. Cuando vuelva a colocar el piso del horno, asegúrese de deslizarlo bien hasta la parte trasera del horno. IMPORTANTE: Siempre vuelva a colocar el piso desmontable antes del próximo uso. Ventilación del horno en estufas de vidrio radiantes - GE PS968SPSS | Use and Care Manual - Page 92
Seguridad Operación Cuidado y limpieza de la cocina. ADVERTENCIA PELIGRO DE DESCARGA ELÉCTRICA O QUEMADURAS: Antes de reemplazar la bombilla del horno, desconecte la alimentación de energía al horno desde el panel principal de fusibles o del interruptor de circuitos. No hacerlo puede provocar una - GE PS968SPSS | Use and Care Manual - Page 93
Seguridad Operación GEAppliances.com ADVERTENCIA PELIGRO DE DESCARGA ELÉCTRICA O QUEMADURAS: Antes de reemplazar la bombilla del horno, desconecte la alimentación de energía al horno desde el panel principal de fusibles o del interruptor de circuitos. No hacerlo puede provocar una descarga elé - GE PS968SPSS | Use and Care Manual - Page 94
Seguridad Operación Cuidado y limpieza Cómo limpiar la estufa de vidrio. (en algunos modelos) Limpie la estufa después de cada derrame. Utilice el limpiador de estufas cerámicas CERAMA BRYTE®. Limpieza normal de uso diario SÓLO utilice el limpiador de estufas cerámicas CERAMA BRYTE® en la - GE PS968SPSS | Use and Care Manual - Page 95
Seguridad Operación Cuidado y limpieza GEAppliances.com Marcas de metal y rayones Tenga cuidado de no deslizar ollas y sartenes a través de su estufa. Dejará marcas de metal sobre la superficie de la estufa. Estas marcas pueden quitarse utilizando limpiador de estufas cerámicas CERAMA BRYTE® con - GE PS968SPSS | Use and Care Manual - Page 96
recipientes • Para evitar rayones, use los procedimientos de limpieza con bases ásperas o hay recomendados. Verifique que las bases de los recipientes partículas gruesas (sal o arena) estén limpias antes del uso, y utilice recipientes con bases entre el recipiente y la superficie lisas. de la - GE PS968SPSS | Use and Care Manual - Page 97
cajón esté bien colocado si se lo quita. El cajón de almacenamiento no cierra El cable de energía puede estar obstruyendo el cajón en la parte trasera inferior de la cocina. El soporte de cajón trasero se encuentra sobre el riel de la guía. • Cambie la ubicación del cajón y del cable - GE PS968SPSS | Use and Care Manual - Page 98
enfriar el horno. "F-" y un número o letra destellan en la pantalla Hay un código de error de función. • Desenchufe el horno por lo menos 30 segundos y luego vuelva a enchufarlo. Si el código de error de función se repite, llame al servicio técnico. 46 Solución de problemas Apoyo al cliente - GE PS968SPSS | Use and Care Manual - Page 99
GEAppliances.com Seguridad Operación Cuidado y limpieza Problema Aparece "Range Locked" (cocina bloqueada o "LOC On" (bloqueo se utiliza el horno es normal sentir un olor proveniente del aislante que recubre la parte interna del horno. • Esto es temporal. Un ventilador de convección • Esto es - GE PS968SPSS | Use and Care Manual - Page 100
Seguridad Operación Antes de llamar al servicio técnico... Consejos para identificación y solución de problemas Problema Resulta difícil deslizar las bandejas del horno Causas posibles Las bandejas color plata brillantes se limpiaron en un ciclo de auto-limpieza. Qué hacer • Aplique una pequeña - GE PS968SPSS | Use and Care Manual - Page 101
Notas. GEAppliances.com Seguridad Operación Cuidado y limpieza Solución de problemas Apoyo al cliente 49 - GE PS968SPSS | Use and Care Manual - Page 102
algo más? REAR FRONT OVEN FRONT REAR Usted la bandeja para asar dentro de los 30 días de haber adquirido su producto de cocina GE. N° de pieza Dimensiones Pequeña WB48X10055 Estado __________ Código Postal Teléfono Correo electrónico Check ______ Giro postal ______ Para consultar - GE PS968SPSS | Use and Care Manual - Page 103
técnico cubierto por la garantía. Por el período de: GE otorgará: Un año Desde la fecha de compra original Cualquier pieza de acuerdo con las instrucciones del Manual del Propietario. s Reemplazo de estatal o al Fiscal General de su estado. Garante: General Electric Company. Louisville, KY 40225 - GE PS968SPSS | Use and Care Manual - Page 104
GE Appliances, 24 horas al día, cualquier día del año! Para mayor conveniencia y servicio más rápido, ya puede descargar los Manuales horas normales de oficina. GE Consumer Home Services estará aún ahí cuando íbanos a: General Manager, Customer Relations GE Appliances, Appliance Park Louisville,
-
 1
1 -
 2
2 -
 3
3 -
 4
4 -
 5
5 -
 6
6 -
 7
7 -
8
-
9
-
10
-
11
-
12
-
13
-
14
-
15
-
16
-
17
-
18
-
19
-
20
-
21
-
22
-
23
-
24
-
25
-
26
-
27
-
28
-
29
-
30
-
31
-
32
-
33
-
34
-
35
-
36
-
37
-
38
-
39
-
40
-
41
-
42
-
43
-
44
-
45
-
46
-
47
-
48
-
49
-
50
-
51
-
52
-
53
-
54
-
55
-
56
-
57
-
58
-
59
-
60
-
61
-
62
-
63
-
64
-
65
-
66
-
67
-
68
-
69
-
70
-
71
-
72
-
73
-
74
-
75
-
76
-
77
-
78
-
79
-
80
-
81
-
82
-
83
-
84
-
85
-
86
-
87
-
88
-
89
-
90
-
91
-
92
-
93
-
94
-
95
-
96
-
97
-
98
-
99
-
100
-
101
-
102
-
103
-
104
 |
 |

49-80602
08-09 JR
GEAppliances.com
Write the model and serial
numbers here:
Model # ________________
Serial #
________________
You can find them on a label
behind the drawer or behind the
lower oven door on the front of
the range frame.
Quick Set V,
Quick Set VI and
Next Step Control
Owner’s Manual
Ranges
Safety Instructions
............................
2–5
Operating Instructions
Kitchen Timer
..........................................
21
Oven
...............................................
14–35
Adjust Oven Thermostat
..............................
22
Baking or Roasting
....................................
17
Broiling, Broiling Guide
................................
18
Controls
...........................................
14, 15
Convection Oven
..................................
23–26
Lower Oven Drawer
...................................
35
Preheating
............................................
17
Probe
.................................................
20
Sabbath Feature
......................................
33
Self-Cleaning
......................................
29, 30
Slow Cook, Warming and Proofing Features
...........
27, 28
Special Features
...................................
31, 32
Timed Baking and Roasting
...........................
19
Warming Drawer
.....................................
34
Surface Units
........................................
6–13
Cookware
..............................................
7
Griddle
............................................
12, 13
Knob-Controlled Models
...........................
10, 11
Touch Pad-Controlled Models
........................
8, 9
Care and Cleaning
Control Knobs
.........................................
36
Control Panel
..........................................
36
Glass Cooktop
.....................................
42, 43
Lift-Off Oven Door
.................................
37, 38
Light
...............................................
40, 41
Oven Floor
.............................................
39
Oven Heating Elements
................................
41
Racks
..................................................
38
Removable Warming Drawer/Lower Oven Drawer Pan
.....
39
Storage Drawer
........................................
39
Surfaces
...............................................
36
Vent
................................................
37, 39
Troubleshooting Tips
.........................
44–48
Accessories
.........................................
50
Consumer Support
Consumer Support
....................................
52
Warranty
..............................................
51
Printed on
Recycled Paper
Free-Standing, Slide-In, and Drop-In Electric
In Canada:
www.GEAppliances.ca
Printed in the United States