Gigabyte GA-K8N Pro Sil3512 SATARAID O.S. Installation Manual - Page 9
Siibase, Siiraid
 |
View all Gigabyte GA-K8N Pro manuals
Add to My Manuals
Save this manual to your list of manuals |
Page 9 highlights
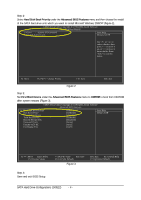
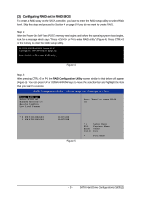
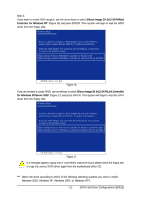
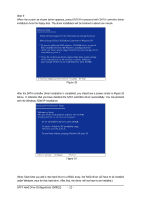
Step 3: Double-click MENU.exe. An MS-DOS prompt screen similar to Figure 12 will appear. Figure 12 Step 4: Insert an empty floppy disk. If you do not want to create RAID array, press 3 to select the SiIBASE item. If you want to create RAID array(s), press 4 to select the SiIRAID item. Then it will take about one minute to copy the SATA driver from the motherboard driver CD to the floppy disk. Step 5: Press 0 to exit when the procedure is completed (Figure 13). You have copied the SATA driver successfully. Figure 13 - 9 - SATA Hard Drive Configurations (Sil3512)
-
 1
1 -
2
-
3
-
 4
4 -
 5
5 -
 6
6 -
 7
7 -
 8
8 -
 9
9 -
 10
10 -
 11
11 -
 12
12
 |
 |

SATA Hard Drive Configurations (Sil3512)
- 9 -
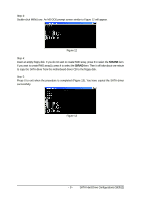
Figure 13
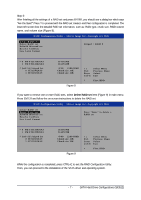
Figure 12
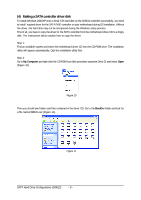
Step 4:
Insert an empty floppy disk. If you do not want to create RAID array, press 3 to select the
SiIBASE
item.
If you want to create RAID array(s), press 4 to select the
SiIRAID
item. Then it will take about one minute
to copy the SATA driver from the motherboard driver CD to the floppy disk.
Step 5:
Press 0 to exit when the procedure is completed (Figure 13). You have copied the SATA driver
successfully.
Step 3:
Double-click MENU
.exe
. An MS-DOS prompt screen similar to Figure 12 will appear.