Hayward TriStar XL HCP3000 Series Variable Speed Pump - Owners Manual - Page 25
Troubleshooting
 |
View all Hayward TriStar XL manuals
Add to My Manuals
Save this manual to your list of manuals |
Page 25 highlights
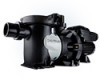
No. Part Number Description Qty. No. Part Number Description Qty. 1 HCXP3000UNKIT Union Connector Kit (Includes 2 Nuts, Connectors & Gaskets) 1 17 HCXP369V70 Pump Housing O-Ring 1 2 HCXP3000UG Union Gasket 1 18 HCXP3000E Seal Plate 1 3 HCXP3000H Strainer Housing with Drain Plug 1 19 SPX3200Z211 Housing Insert/Seal Plate Spacer Kit 1 4 HCXP3000DLS Strainer Cover Kit (Includes Strainer Cover, Lock Ring & O-Ring) 1 20 SPX3200Z3 Housing Bolt 1 5 SPX4000S Strainer Cover O-Ring 1 21 SPX3200Z34PAK4 Motor Bolt (4 Pack) 1 6 HCXP3000M Strainer Basket 1 22 SPX4000FG Drain Plug with O-Ring 1 7 HCXP3000Z3 Strainer Housing Flange Bolt/Washer 1 23 HCXP3000F Pump Housing Base 1 8 HCXP343V70 Strainer Housing Flange O-Ring 1 24 HCXP3001G Motor Support Base 1 9 HCXP3000A Pump Housing with Drain Plug 1 25 SPX1600Z5SSPAK7 Base Screws (7 Pack) 1 10 HCXP338V60 Diffuser O-Ring 1 26A HCXP3000N250 Right and Left Side Plate Set, Platinum Color 1 11 SPX2700z3SSPAK4 Diffuser Screws (4 Pack) 1 26B HCXP3000N251 Right and Left Side Plate Set, Blue Color 1 12 HCXP3000B Diffuser 1 27 SPX3200LCD Digital Control Interface Assembly 1 13 SPX3200Z1 Impeller Screw 1 28 SPX3400DR4 Motor Drive Display Cover 1 14 HCXP3000R Impeller Ring 1 - HCXP3020Z1VSPE Power End Assembly (Includes #10-18, 2 ea. #19-20, #21, #27 & Motor Assy) 1 15 HCXP3020C Impeller with Impeller Screw 1 - SPX3400DRKIT Wall Mount Kit 1 16 SPX4000SAV Shaft Seal Assembly 1 - SPX3200DRCC Comm Cable Kit 1 Troubleshooting General Problems • Motor Will NOT Start: 1. Make sure the terminal board connections agree with the wiring diagram on the pump data plate label. 2. Be sure the pump is wired for the available field supply voltage. 3. Check for and correct any improper or loose wiring connections; open switches or relays; tripped circuit breakers, or blown fuses. 4. Manually check the rotation of the motor shaft for free movement and lack of obstruction. Correct if necessary. • Motor Shuts OFF: 1. Check for low voltage or power drop at the motor (frequently caused by undersized wiring). Contact a qualified professional to verify the electrical connections. • Motor Hums, But Does NOT Start: 1. Impeller jammed with debris. Have a qualified repair professional open the pump and remove the debris. • Pump Won't Prime: 1. Empty pump/strainer housing. Make sure the pump/strainer housing is filled with water and the cover oring is clean. Ensure the o-ring is properly seated in the cover o-ring groove. Ensure the o-ring sealing surface is lubricated with "Jack's 327" and that the strainer cover is locked firmly in position. Lubricant will help to create a tighter seal. 2. Loose connections on the suction side. Tighten the pipe/union connections. NOTE: Any self-priming pump will not prime if there are suction air leaks. Leaks will result in bubbles emanating from the return fittings on the pool wall. 3. Leaking O-ring or packing glands on valves. Tighten, repair, or replace the valves. 4. Strainer basket or skimmer basket loaded with debris. Remove the strainer housing cover or the skimmer cover. Clean the basket, and refill the strainer housing with water. Tighten the cover. 5. Suction side clogged. Contact a qualified repair professional. You should have 5" - 6" of vacuum at the strainer cover (your pool dealer can confirm this with a vacuum gauge). You may be able to check by removing the skimmer basket and holding an object over the bottom port with the skimmer full and the pump running. If no suction is felt, check for line blockage. a. If the pump develops a vacuum, check for a blocked suction line or a dirty strainer basket. An air leak in the suction piping may be the cause. b. If the pump does not develop a vacuum and the pump has sufficient "priming water": 24 USE ONLY HAYWARD GENUINE REPLACEMENT PARTS
-
 1
1 -
2
-
3
-
4
-
5
-
6
-
7
-
8
-
9
-
10
-
11
-
12
-
13
-
14
-
15
-
16
-
17
-
18
-
19
-
 20
20 -
 21
21 -
 22
22 -
 23
23 -
 24
24 -
 25
25 -
 26
26 -
 27
27 -
 28
28
 |
 |
