HP 10622 Best practices for HP 10000 Series and HP 10000 G2 Series Racks - Page 43
running from front to back, and then the installation is complete.
 |
View all HP 10622 manuals
Add to My Manuals
Save this manual to your list of manuals |
Page 43 highlights
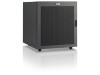
13.Place the corrugated cap on the top of the assembly. Figure 32. Placing the box cap 14.Secure the corrugated cap and corrugated sides to the pallet using two applications of banding running from front to back, and then the installation is complete. Figure 33. Installed shock pallet 41
-
 1
1 -
2
-
3
-
4
-
5
-
6
-
7
-
8
-
9
-
10
-
11
-
12
-
13
-
14
-
15
-
16
-
17
-
18
-
19
-
20
-
21
-
22
-
23
-
24
-
25
-
26
-
27
-
28
-
29
-
30
-
31
-
32
-
33
-
34
-
35
-
36
-
37
-
 38
38 -
 39
39 -
 40
40 -
 41
41 -
 42
42 -
 43
43 -
 44
44 -
 45
45 -
 46
46 -
 47
47 -
 48
48
 |
 |

41
13.
Place the corrugated cap on the top of the assembly.
Figure 32.
Placing the box cap
14.
Secure the corrugated cap and corrugated sides to the pallet using two applications of banding
running from front to back, and then the installation is complete.
Figure 33.
Installed shock pallet