HP 2000sa HP StorageWorks 2312sa and 2324sa Modular Smart Array user guide (48 - Page 46
Changing the system date and time, Tips for using the help window
 |
View all HP 2000sa manuals
Add to My Manuals
Save this manual to your list of manuals |
Page 46 highlights
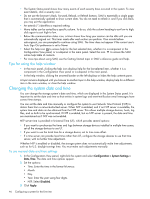
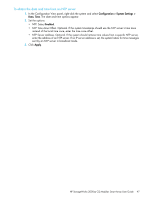
• The System Status panel shows how many events of each severity have occurred in the system. To view event details, click a severity icon. • Do not use the browser's Back, Forward, Reload, or Refresh buttons. SMU is essentially a single page that is automatically updated to show current data. You do not need to refresh it, and if you click Back, you may exit the application. • An asterisk (*) identifies a required setting. • Many tables can be sorted by a specific column. To do so, click the column heading to sort low to high; click again to sort high to low. • Below the communication status icon, a timer shows how long your session can be idle until you are automatically signed out. This timer resets after each action you perform. One minute before auto-signout, you are prompted to continue using SMU. The timer does not appear if the current user's Auto Sign Out preference is set to Never. • Select the help icon to access help for the last selected item, whether it is a component in the Configuration View panel, or a subpanel in the main panel. Select the icon to access the SMU online help table of contents. • For more tips about using SMU, see the Getting Started topic in SMU's reference guide and help. Tips for using the help window • In the main panel, clicking the help icon displays help for the last-selected item, whether it is a component in the Configuration View panel or a subpanel in the main panel. • In the help window, clicking the arrowed border on the left displays or hides the help contents pane. A topic remains displayed until you browse to another topic in the help window, display help for a different item in the main window, or close the help window. Changing the system date and time You can change the storage system's date and time, which are displayed in the System Status panel. It is important to set the date and time so that entries in system logs and event-notification email messages have correct time stamps. You can set the date and time manually or configure the system to use Network Time Protocol (NTP) to obtain them from a network-attached server. When NTP is enabled, and if an NTP server is available, the system time and date can be obtained from the NTP server. This allows multiple storage devices, hosts, log files, and so forth to be synchronized. If NTP is enabled, but no NTP server is present, the date and time are maintained as if NTP was not enabled. NTP server time is provided in Universal Time (UT), which provides several options: • If you want to synchronize the times and logs between storage devices installed in multiple time zones, set all the storage devices to use UT. • If you want to use the local time for a storage device, set its time zone offset. • If a time server can provide local time rather than UT, configure the storage devices to use that time server, with no further time adjustment. Whether NTP is enabled or disabled, the storage system does not automatically make time adjustments, such as for U.S. daylight savings time. You must make such adjustments manually. To use manual date and time settings 1. In the Configuration View panel, right-click the system and select Configuration > System Settings > Date, Time. The date and time options appear. 2. Set the options: • Time. Enter the time in the format hh:mm:ss. • Month. • Day. • Year. Enter the year using four digits. • NTP. Select Disabled. 3. Click Apply. 46 Configuring a system for the first time
-
 1
1 -
2
-
3
-
4
-
5
-
6
-
7
-
8
-
9
-
10
-
11
-
12
-
13
-
14
-
15
-
16
-
17
-
18
-
19
-
20
-
21
-
22
-
23
-
24
-
25
-
26
-
27
-
28
-
29
-
30
-
31
-
32
-
33
-
34
-
35
-
36
-
37
-
38
-
39
-
40
-
 41
41 -
 42
42 -
 43
43 -
 44
44 -
 45
45 -
 46
46 -
 47
47 -
 48
48 -
 49
49 -
 50
50 -
 51
51 -
52
-
53
-
54
-
55
-
56
-
57
-
58
-
59
-
60
-
61
-
62
-
63
-
64
-
65
-
66
-
67
-
68
-
69
-
70
-
71
-
72
-
73
-
74
-
75
-
76
 |
 |
