HP 2500 HP Color LaserJet 1500 and 2500 Imaging Drum - Installation Guide - Page 5
Bereitschafts-LED auf. Das Einsetzen der
 |
View all HP 2500 manuals
Add to My Manuals
Save this manual to your list of manuals |
Page 5 highlights
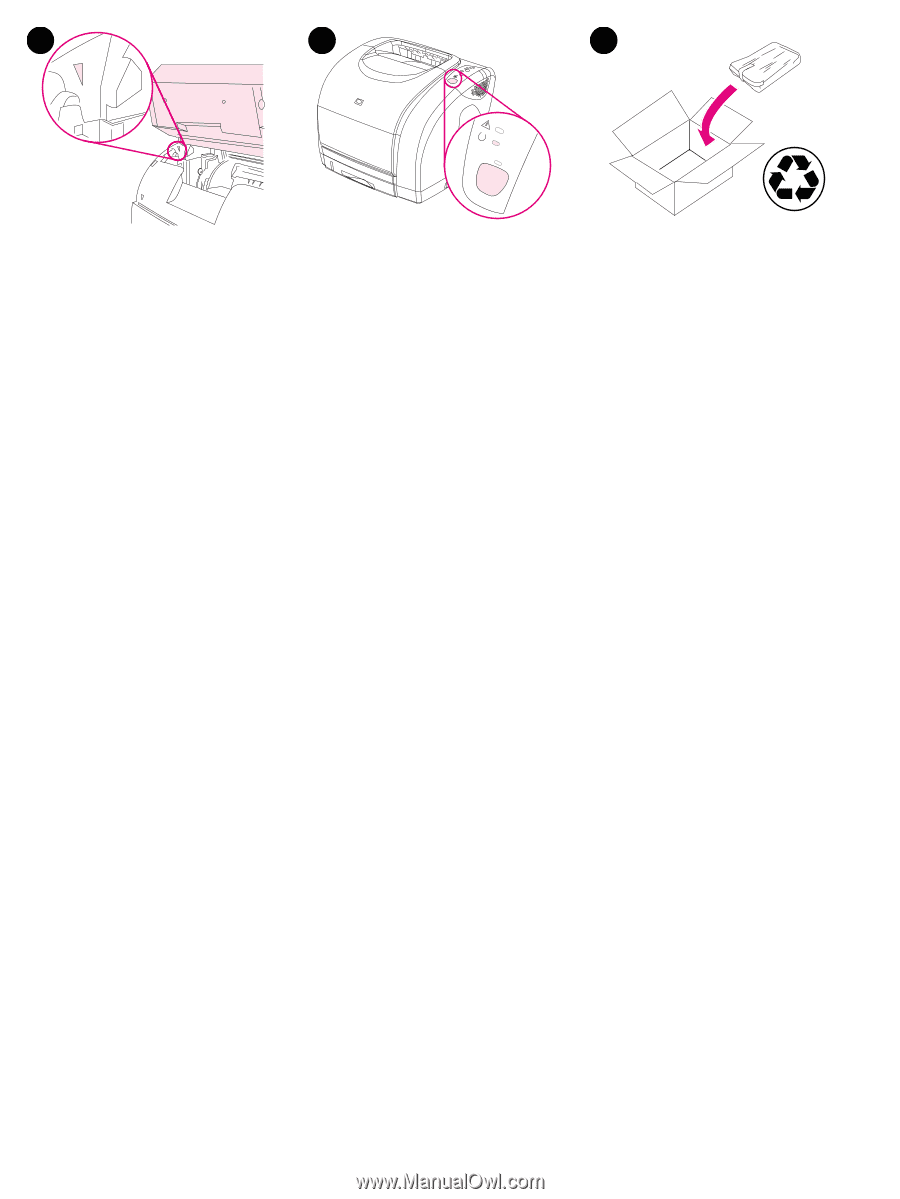
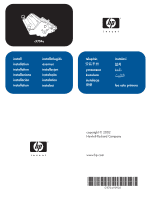
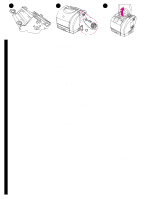
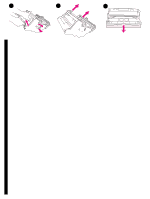
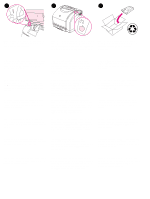
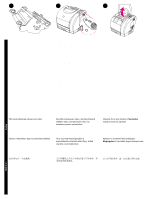
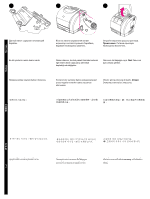
10 11 12 Align the white roller with the arrows inside the printer. Lower the imaging drum into the printer and press it firmly into place. Close the top cover and press GO on the control panel. After a few seconds, the Ready light will turn on. Installation is complete. For additional help, go to http://www.hp.com/support/clj2500. Place the used imaging drum in the box in which the new imaging drum arrived. See the enclosed recycling guide for recycling instructions. Alignez le rouleau blanc avec les flèches dans l'imprimante. Abaissez le tambour d'imagerie dans l'imprimante et appuyez fermement dessus pour l'enclencher. Fermez le capot et appuyez sur la touche REPRISE du panneau de commande. Après quelques secondes, le voyant Prêt s'allume. L'installation est maintenant terminée. Pour obtenir de l'aide, accédez au site http://www.hp.com/support/clj2500. Mettez le tambour d'imagerie usagé dans l'emballage du nouveau tambour. Suivez les instructions du guide de recyclage inclus dans l'emballage. Richten Sie die weiße Walze an den Pfeilsymbolen im Inneren des Drucker aus. Setzen Sie die Bildtrommel von oben in den Drucker ein, und drücken Sie sie fest in ihre Position. Allineare il rullo bianco alle frecce all'interno della stampante. Abbassare il tamburo fotosensibile nella stampante e premerlo per bloccarlo in posizione. Schließen Sie die obere Abdeckung, und drücken Sie auf dem Bedienfeld START. Nach einigen Sekunden leuchtet wieder die Bereitschafts-LED auf. Das Einsetzen der Bildtrommel ist abgeschlossen. Weitere Informationen finden Sie unter http://www.hp.com/support/clj2500. Chiudere il coperchio superiore e premere il tasto CONTINUA sul pannello di controllo. Dopo qualche secondo, l'indicatore luminoso Pronta si accende. L'installazione è completata. Per ulteriori informazioni, visitare il sito http://www.hp.com/support/clj2500. Legen Sie die verbrauchte Bildtrommel in die Verpackung der neuen. Hinweise zum Recycling finden Sie in der beiliegenden Recycling-Anleitung. Inserire il tamburo fotosensibile usato nella confezione di spedizione del nuovo tamburo. Consultare le informazioni sul riciclaggio accluse. Alinee el rodillo blanco con las flechas del interior de la impresora. Introduzca el tambor de imágenes en la impresora y encájelo bien en su sitio. Cierre la cubierta superior y presione IR en el panel de control. Pasados algunos segundos, se encenderá la luz Preparada. La instalación ha finalizado. Si desea más ayuda, visite la dirección http://www.hp.com/support/clj2500. Coloque el tambor de imágenes usado en la caja del nuevo. Consulte las instrucciones de reciclaje que encontrará en la guía sobre reciclaje adjunta. Den hvide rulle placeres ud for pilene inden i printeren. Billedtromlen sænkes ned i printeren og trykkes på plads med et fast tryk. Luk topdækslet og tryk på START på kontrolpanelet. Efter få sekunder lyser Klar-indikatoren. Installationen er fuldført. Gå til http://www.hp.com/support/clj2500 for at få yderligere hjælp. Placer den brugte billedtromle i den kasse, som den nye billedtromle blev leveret i. Se den vedlagte genbrugsvejledning for at få yderligere vejledning i genbrug. Lijn de witte rollen uit ten opzichte van de pijlen in de printer. Laat de drumcassette in de printer zakken en druk deze vast. Sluit de bovenkap en druk op START op het bedieningspaneel. Na enige seconden gaat het Klaar-lampje branden. De installatie is voltooid. Bezoek http://www.hp.com/support/clj2500 wanneer u aanvullende hulp nodig hebt. Plaats de gebruikte drumcassette in de doos waarin de nieuwe drumcassette is geleverd. Zie de bijgaande recyclinghandleiding voor instructies voor het recyclen. 4
-
 1
1 -
 2
2 -
 3
3 -
 4
4 -
 5
5 -
 6
6 -
 7
7 -
 8
8 -
 9
9 -
 10
10 -
 11
11 -
12
-
13
-
14
-
15
-
16
 |
 |