HP 6100 HP 4x00/6x00/8x00 Enterprise Virtual Array User Guide (5697-0733, Marc - Page 18
Enterprise Virtual Array startup, EVA8000/8100 storage system connections
 |
View all HP 6100 manuals
Add to My Manuals
Save this manual to your list of manuals |
Page 18 highlights
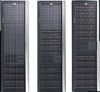
2 Enterprise Virtual Array startup This chapter describes the procedures to install and configure the Enterprise Virtual Array. When these procedures are complete, you can begin using your storage system. NOTE: Installation of the Enterprise Virtual Array should be done only by an HP authorized service representative. The information in this chapter provides an overview of the steps involved in the installation and configuration of the storage system. This chapter consists of: EVA8000/8100 storage system connections Figure 2 (page 18) shows how the storage system is connected to other components of the storage solution. • The HSV210-A and HSV210-B controllers connect via four host ports (FP1, FP2, FP3, and FP4) to the Fibre Channel fabrics. The hosts that will access the storage system are connected to the same fabrics. • The HP Command View EVA management server also connects to the fabric. • The controllers connect through two loop pairs to the drive enclosures. Each loop pair consists of two independent loops, each capable of managing all the disks should one loop fail. Four FC loop switches are used to connect the controllers to the disk enclosures. Figure 2 EVA8000/8100 configuration 1 Network interconnection 2 Management server 3 Non-host 4 Host X 5 Host Z 18 Enterprise Virtual Array startup 8 Controller A 9 Controller B 10 Cache mirror ports 11 FC loop switch 12 Drive enclosure 1
-
 1
1 -
2
-
3
-
4
-
5
-
6
-
7
-
8
-
9
-
10
-
11
-
12
-
 13
13 -
 14
14 -
 15
15 -
 16
16 -
 17
17 -
 18
18 -
 19
19 -
 20
20 -
 21
21 -
 22
22 -
 23
23 -
24
-
25
-
26
-
27
-
28
-
29
-
30
-
31
-
32
-
33
-
34
-
35
-
36
-
37
-
38
-
39
-
40
-
41
-
42
-
43
-
44
-
45
-
46
-
47
-
48
-
49
-
50
-
51
-
52
-
53
-
54
-
55
-
56
-
57
-
58
-
59
-
60
-
61
-
62
-
63
-
64
-
65
-
66
-
67
-
68
-
69
-
70
-
71
-
72
-
73
-
74
-
75
-
76
-
77
-
78
-
79
-
80
-
81
-
82
-
83
-
84
-
85
-
86
-
87
-
88
-
89
-
90
-
91
-
92
-
93
-
94
-
95
-
96
-
97
-
98
-
99
-
100
-
101
-
102
-
103
-
104
-
105
-
106
-
107
-
108
-
109
-
110
-
111
-
112
-
113
-
114
-
115
-
116
-
117
-
118
-
119
-
120
-
121
-
122
-
123
-
124
-
125
-
126
-
127
-
128
-
129
-
130
-
131
-
132
-
133
-
134
-
135
-
136
-
137
-
138
-
139
-
140
-
141
-
142
-
143
-
144
-
145
-
146
-
147
-
148
-
149
-
150
-
151
-
152
-
153
-
154
-
155
-
156
-
157
-
158
-
159
-
160
-
161
-
162
-
163
-
164
-
165
-
166
-
167
-
168
-
169
-
170
-
171
-
172
-
173
-
174
-
175
-
176
-
177
-
178
-
179
-
180
-
181
-
182
-
183
-
184
-
185
 |
 |
