HP 6400/8400 HP Enterprise Virtual Array Updating Product Software Guide (XCS - Page 11
Checking the array hardware, The Hardware Folder Properties window opens
 |
View all HP 6400/8400 manuals
Add to My Manuals
Save this manual to your list of manuals |
Page 11 highlights
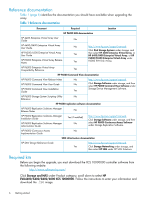
2. Click Help in the Session pane. The full version number is displayed at the top of the online help window (Figure 2 (page 11)). If the version is earlier than the minimum supported version, it must be upgraded. Figure 2 HP P6000 Command View online help TIP: The full version number is also shown at the bottom of the login screen. Checking the array hardware Estimated time to complete: 15-20 minutes When to perform: 1-2 weeks before the upgrade, and then daily until the upgrade is complete. NOTE: If you are running HP P6000 Command View 9.3 or later, HP P6000 Command View will complete this check automatically when you upgrade the controller software. Before upgrading your Enterprise Virtual Array, check the operation of the array hardware and replace any failed components to ensure that the array will be operating properly when the upgrade is performed. 1. Open HP P6000 Command View and click the icon of the array you want to upgrade. 2. Check for hardware errors. a. Examine the Hardware folder in the navigation pane to see if there are any hardware caution or warning conditions. If there are any hardware caution or warning conditions, click the Hardware folder to expand it. The Hardware Folder Properties window opens (Figure 3 (page 11)). The Operational State field indicates if there is a hardware problem. Figure 3 Hardware Folder Properties window b. Select the array in the navigation pane and click Refresh to update the cache. Checking the array hardware 11
-
 1
1 -
2
-
3
-
4
-
5
-
 6
6 -
 7
7 -
 8
8 -
 9
9 -
 10
10 -
 11
11 -
 12
12 -
 13
13 -
 14
14 -
 15
15 -
 16
16 -
17
-
18
-
19
-
20
-
21
-
22
-
23
-
24
-
25
-
26
-
27
-
28
-
29
-
30
-
31
-
32
-
33
-
34
-
35
-
36
-
37
-
38
-
39
-
40
-
41
-
42
-
43
-
44
-
45
-
46
-
47
-
48
-
49
-
50
-
51
-
52
-
53
-
54
-
55
-
56
-
57
-
58
-
59
-
60
-
61
-
62
-
63
-
64
-
65
-
66
-
67
-
68
-
69
-
70
-
71
-
72
-
73
-
74
-
75
-
76
-
77
 |
 |
