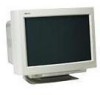
HP A7217A hp 24'' monitor - a7217a, user's guide - Page 15
Adjusting the convergence (CONV), Additional settings (OPTION), Degaussing the screen
 |
UPC - 808736305884
View all HP A7217A manuals
Add to My Manuals
Save this manual to your list of manuals |
Page 15 highlights
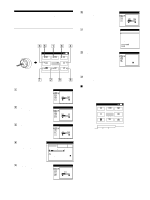
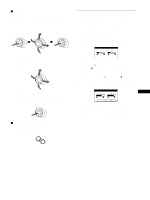
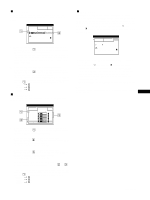
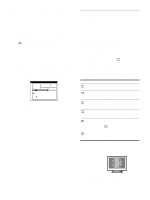
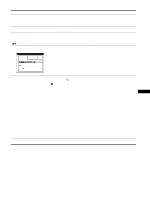
Adjusting the convergence (CONV) The CONV settings allow you to adjust the quality of the picture by controlling the convergence. The convergence refers to the alignment of the red, green, and blue color signals. If you see red or blue shadows around letters or lines, adjust the convergence. These settings are stored in memory for all input signals. 1 Press the joystick. The main MENU appears on the screen. 2 Move the joystick to highlight CONV and press the joystick again. The CONVERGENCE menu appears on the screen. 3 First move the joystick up or down to select the desired adjustment item. Then move the joystick left or right to make the adjustment. Select TOP V CONVER TOP BOT V CONVER BOTTOM To horizontally shift red or blue shadows vertically shift red or blue shadows vertically shift red or blue shadows at the top of the screen vertically shift red or blue shadows at the bottom of the screen Additional settings (OPTION) You can manually degauss (demagnetize) the monitor, change the menu position, and lock the controls. 1 Press the joystick. The main MENU appears on the screen. 2 Move the joystick to highlight OPTION and press the joystick again. The OPTION menu appears on the screen. 3 Move the joystick up or down to select the desired adjustment item. Adjust the selected item according to the following instructions. x Degaussing the screen The monitor is automatically demagnetized (degaussed) when the power is turned on. To manually degauss the monitor, first move the joystick up or down to select (DEGAUSS). Then move the joystick to the right. The screen is degaussed for about 3 seconds. If a second degauss cycle is needed, allow a minimum interval of 20 minutes for the best result. x Changing the menu's position Change the menu's position if it is blocking an image on the GB screen. To change the menu's on-screen position, first move the joystick up or down to select (OSD H POSITION) for horizontal adjustment, or (OSD V POSITION) for vertical adjustment. Then move the joystick left or right to shift the on-screen menu. x Locking the controls To protect adjustment data by locking the controls, first move the joystick up or down to select (CONTROL LOCK). Then move the joystick to the right, to select ON. Only the ! (power) switch, EXIT, and (CONTROL LOCK) of the OPTION menu will operate. If any other items are selected, the mark appears on the screen. To cancel the control lock Repeat the procedure above and set (CONTROL LOCK) to OFF. 15
-
 1
1 -
2
-
3
-
4
-
5
-
6
-
7
-
8
-
9
-
 10
10 -
 11
11 -
 12
12 -
 13
13 -
 14
14 -
 15
15 -
 16
16 -
 17
17 -
 18
18 -
 19
19 -
 20
20 -
21
-
22
-
23
-
24
-
25
-
26
-
27
-
28
-
29
-
30
-
31
-
32
-
33
-
34
-
35
-
36
-
37
-
38
-
39
-
40
-
41
-
42
-
43
-
44
-
45
-
46
-
47
-
48
-
49
-
50
-
51
-
52
-
53
-
54
-
55
-
56
-
57
-
58
-
59
-
60
-
61
-
62
-
63
-
64
-
65
-
66
-
67
-
68
-
69
-
70
-
71
-
72
-
73
-
74
-
75
-
76
-
77
-
78
-
79
-
80
-
81
-
82
-
83
-
84
-
85
-
86
-
87
-
88
-
89
-
90
-
91
-
92
-
93
-
94
-
95
-
96
-
97
-
98
-
99
-
100
-
101
-
102
-
103
-
104
-
105
-
106
-
107
-
108
-
109
-
110
-
111
-
112
-
113
-
114
-
115
-
116
-
117
-
118
-
119
-
120
-
121
-
122
-
123
-
124
-
125
-
126
-
127
-
128
-
129
-
130
-
131
-
132
 |
 |
