HP BL260c HP ProLiant BL260c Generation 5 Server Blade User Guide - Page 47
Installing an operating system (Embedded SATA RAID), Installing HP Storage Manager
 |
UPC - 883585668663
View all HP BL260c manuals
Add to My Manuals
Save this manual to your list of manuals |
Page 47 highlights
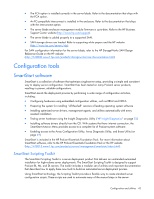
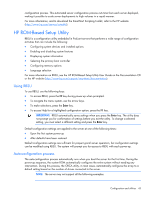
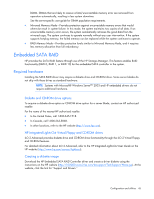
Installing an operating system (Embedded SATA RAID) Embedded SATA RAID is only supported with certain operating systems. For more information about supported operating systems, see the HP website (http://www.hp.com/go/supportos). To install an OS, download the HP embedded SATA RAID Controller driver and create a driver diskette with the software and instructions from the HP website (http://www.hp.com/support). SmartStart does not support assisted installation of an OS on server blades configured with SATA RAID. After inserting the SmartStart CD in the CD-ROM drive, a warning may indicate that the primary controller is not supported by this version of the SmartStart software. Installing HP Storage Manager The HP Storage Manager utility enables administrators to create and manage arrays without rebooting the server blade to access the BIOS utility. For more information on embedded SATA RAID, see the HP Storage Manager HostRAID User Guide located on the Documentation CD. Option ROM Configuration for Arrays Before installing an operating system, you can use the ORCA utility to create the first logical drive, assign RAID levels, and establish online spare configurations. The utility also provides support for the following functions: • Reconfiguring one or more logical drives • Viewing the current logical drive configuration • Deleting a logical drive configuration • Setting the controller to be the boot controller If you do not use the utility, ORCA will default to the standard configuration. For more information regarding array controller configuration, refer to the controller user guide. For more information regarding the default configurations that ORCA uses, refer to the HP ROM-Based Setup Utility User Guide on the Documentation CD. Re-entering the server serial number and product ID After you replace the system board, you must re-enter the server serial number and the product ID. 1. During the server startup sequence, press the F9 key to access RBSU. 2. Select the System Options menu. 3. Select Serial Number. The following warning is displayed: WARNING! WARNING! WARNING! The serial number is loaded into the system during the manufacturing process and should NOT be modified. This option should only be used by qualified service personnel. This value should always match the serial number sticker located on the chassis. 4. Press the Enter key to clear the warning. 5. Enter the serial number and press the Enter key. Configuration and utilities 47
-
 1
1 -
2
-
3
-
4
-
5
-
6
-
7
-
8
-
9
-
10
-
11
-
12
-
13
-
14
-
15
-
16
-
17
-
18
-
19
-
20
-
21
-
22
-
23
-
24
-
25
-
26
-
27
-
28
-
29
-
30
-
31
-
32
-
33
-
34
-
35
-
36
-
37
-
38
-
39
-
40
-
41
-
 42
42 -
 43
43 -
 44
44 -
 45
45 -
 46
46 -
 47
47 -
 48
48 -
 49
49 -
 50
50 -
 51
51 -
 52
52 -
53
-
54
-
55
-
56
-
57
-
58
-
59
-
60
-
61
-
62
-
63
-
64
-
65
-
66
-
67
-
68
-
69
-
70
-
71
-
72
-
73
-
74
-
75
-
76
-
77
-
78
-
79
-
80
-
81
-
82
-
83
-
84
-
85
-
86
-
87
-
88
-
89
-
90
-
91
-
92
-
93
-
94
-
95
-
96
 |
 |