HP DesignJet T730 User guide - Page 137
The paper is cut when the print has been completed, The cutter does not cut well
 |
View all HP DesignJet T730 manuals
Add to My Manuals
Save this manual to your list of manuals |
Page 137 highlights
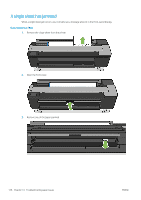
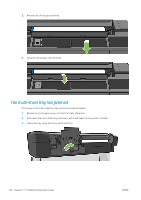
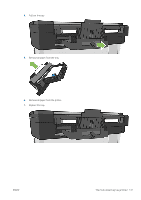
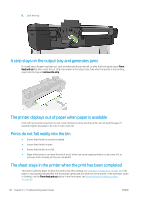
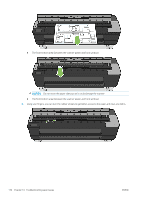
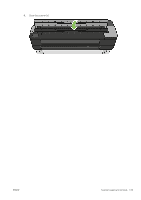
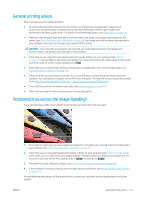
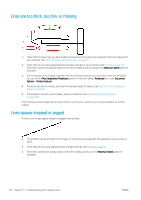
The paper is cut when the print has been completed By default the printer cuts the paper after the drying time has been completed, see Change the drying time on page 39. You can disable the cutter, see Turn the automatic cutter on and off on page 40. The cutter does not cut well By default, the printer is set to cut the paper automatically after the drying time has been completed. If the cutter is turned on but not cutting correctly, check that the cutter rail is clean and clear of any obstacles, and check that there are no pieces of paper in the cutter groove. The roll is loose on the spindle The roll may need to be replaced or reloaded. Check if the roll core is the correct size. Scanner does not load original If you have difficulty loading the original when scanning, try the following: 1. Check that the scanner is on. 2. Wait until the scanner has started up completely and is idle. 3. Check for messages on the front panel. 4. If you completed the above steps, check that the original meets the scanner specifications. 5. Make sure you are loading the original far enough into the scanner so that it can be detected. 6. Make sure the leading edge of the original is flat and the leading edge is even when loading it. If not, trim the leading edge so that the paper enters the scanner smoothly. 7. Try using a different paper type to exclude that the problem is caused by a scanner hardware issue. Scanner paper jam removal When a paper jam occurs, a message normally appears on the front-panel display. To clear a scanner paper jam: 1. Open the scanner lid. 2. Pull the paper out from one of the following paths: ● The top rear area at the back ENWW The paper is cut when the print has been completed 133
-
 1
1 -
2
-
3
-
4
-
5
-
6
-
7
-
8
-
9
-
10
-
11
-
12
-
13
-
14
-
15
-
16
-
17
-
18
-
19
-
20
-
21
-
22
-
23
-
24
-
25
-
26
-
27
-
28
-
29
-
30
-
31
-
32
-
33
-
34
-
35
-
36
-
37
-
38
-
39
-
40
-
41
-
42
-
43
-
44
-
45
-
46
-
47
-
48
-
49
-
50
-
51
-
52
-
53
-
54
-
55
-
56
-
57
-
58
-
59
-
60
-
61
-
62
-
63
-
64
-
65
-
66
-
67
-
68
-
69
-
70
-
71
-
72
-
73
-
74
-
75
-
76
-
77
-
78
-
79
-
80
-
81
-
82
-
83
-
84
-
85
-
86
-
87
-
88
-
89
-
90
-
91
-
92
-
93
-
94
-
95
-
96
-
97
-
98
-
99
-
100
-
101
-
102
-
103
-
104
-
105
-
106
-
107
-
108
-
109
-
110
-
111
-
112
-
113
-
114
-
115
-
116
-
117
-
118
-
119
-
120
-
121
-
122
-
123
-
124
-
125
-
126
-
127
-
128
-
129
-
130
-
131
-
 132
132 -
 133
133 -
 134
134 -
 135
135 -
 136
136 -
 137
137 -
 138
138 -
 139
139 -
 140
140 -
 141
141 -
 142
142 -
143
-
144
-
145
-
146
-
147
-
148
-
149
-
150
-
151
-
152
-
153
-
154
-
155
-
156
-
157
-
158
-
159
-
160
-
161
-
162
-
163
-
164
-
165
-
166
-
167
-
168
-
169
-
170
-
171
-
172
-
173
-
174
-
175
-
176
-
177
-
178
-
179
-
180
-
181
-
182
-
183
-
184
-
185
-
186
-
187
-
188
-
189
-
190
-
191
-
192
-
193
-
194
-
195
-
196
-
197
-
198
-
199
-
200
-
201
-
202
-
203
 |
 |
