HP Media Center m7200 Upgrading and Servicing Guide - Page 13
Adding an Additional, Hard Disk Drive - motherboard
 |
View all HP Media Center m7200 manuals
Add to My Manuals
Save this manual to your list of manuals |
Page 13 highlights
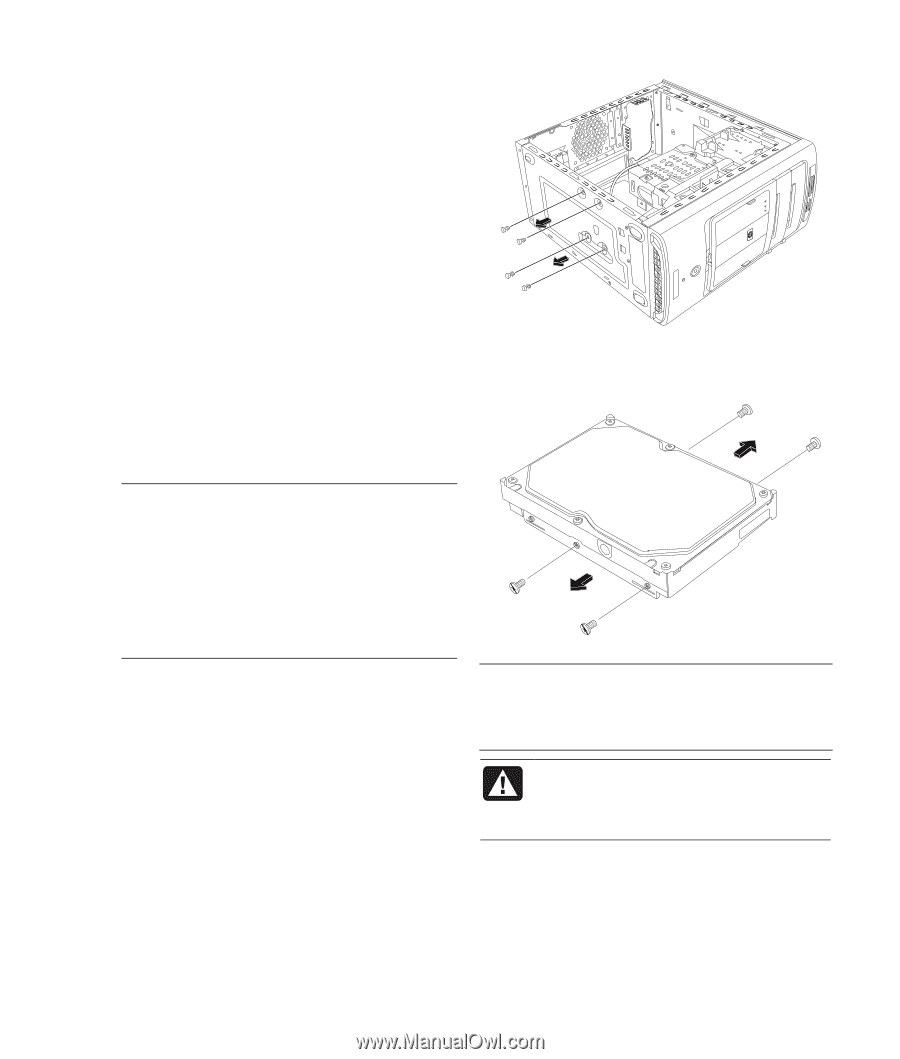
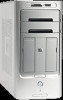
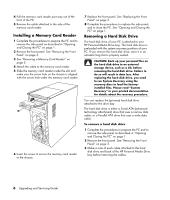
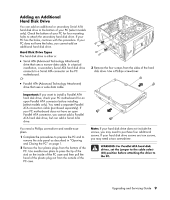
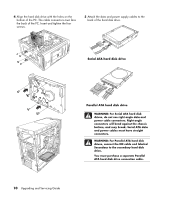
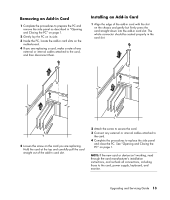
Adding an Additional Hard Disk Drive You can add an additional or secondary Serial ATA hard disk drive to the bottom of your PC (select models only). Check the bottom of your PC for four mounting holes to attach the secondary hard disk drive. If your PC has the holes, continue with this procedure. If your PC does not have the holes, you cannot add an additional hard disk drive. Hard Disk Drive Types The hard disk drive is either a: • Serial ATA (Advanced Technology Attachment) drive that uses a narrow data cable. In a typical installation, a secondary Serial ATA hard disk drive connects to a Serial ATA connector on the PC motherboard. Or • Parallel ATA (Advanced Technology Attachment) drive that uses a wide data cable. 3 Remove the four screws from the sides of the hard disk drive. Use a Phillips screwdriver. Important: If you want to install a Parallel ATA hard disk drive, check your PC motherboard for an open Parallel ATA connector before installing (select models only). You need a separate Parallel ATA connection cable (purchased separately). If your PC motherboard does not have an open Parallel ATA connector, you cannot add a Parallel ATA hard disk drive, but can add a Serial ATA drive. You need a Phillips screwdriver and needle-nose pliers. 1 Complete the procedures to prepare the PC and to remove the side panel as described in "Opening and Closing the PC" on page 1. 2 Remove the four plastic plugs from the bottom of the PC. Use needle-nose pliers to press the tip of the stud on the inside of the PC case and then pull the head of the plastic plug out from the outside of the PC case. Note: If your hard disk drive does not include the screws, you may need to purchase four additional screws. If your hard disk drive screws are torx screws, you may need a torx screwdriver. WARNING: For Parallel ATA hard disk drives, set the jumper to the cable select (CS) position before attaching the drive to the PC. Upgrading and Servicing Guide 9
-
 1
1 -
2
-
3
-
4
-
5
-
6
-
7
-
 8
8 -
 9
9 -
 10
10 -
 11
11 -
 12
12 -
 13
13 -
 14
14 -
 15
15 -
 16
16 -
 17
17 -
 18
18 -
19
-
20
 |
 |