HP Media Center m7200 Upgrading and Servicing Guide - Page 14
Serial ATA hard disk drive, Parallel ATA hard disk drive
 |
View all HP Media Center m7200 manuals
Add to My Manuals
Save this manual to your list of manuals |
Page 14 highlights
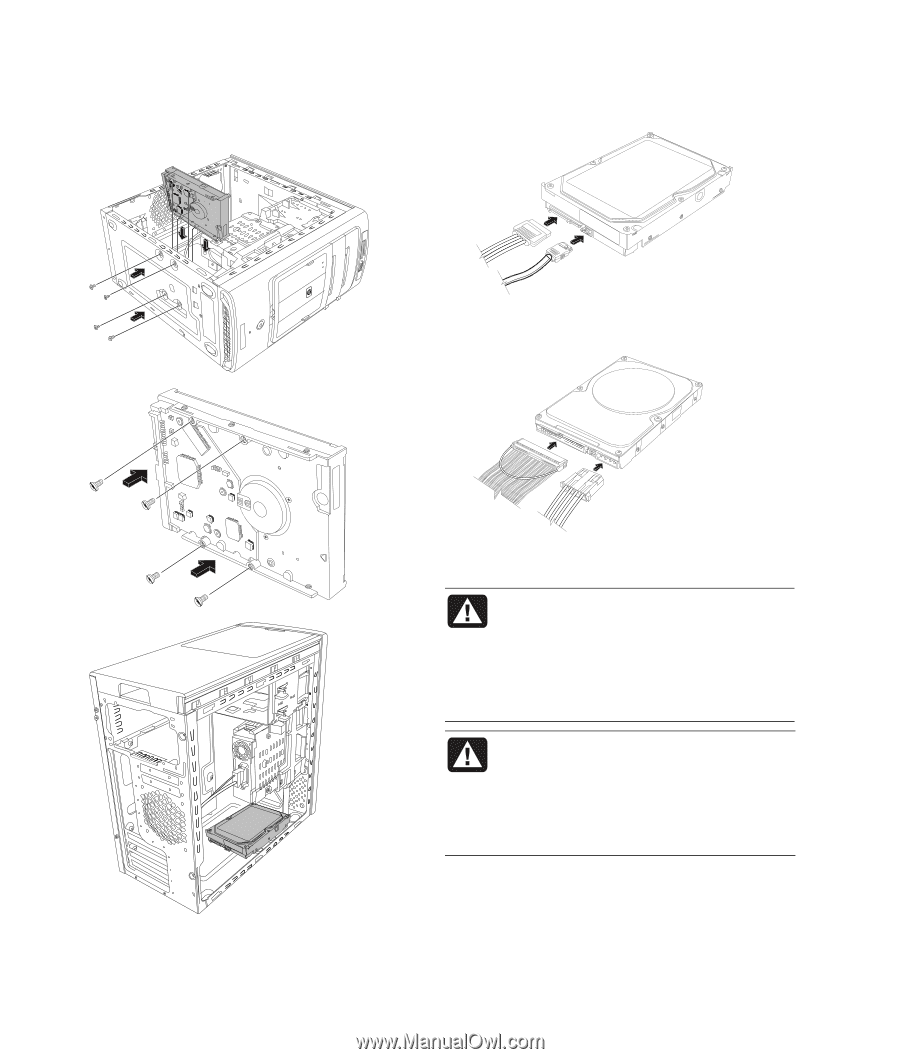
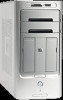
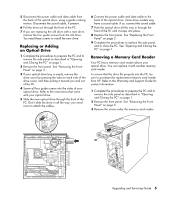
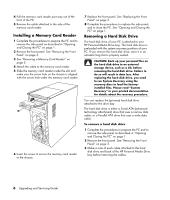
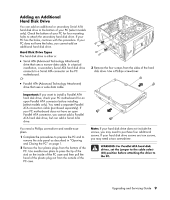
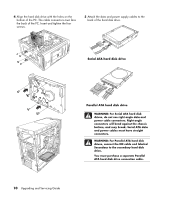
4 Align the hard disk drive with the holes on the bottom of the PC. The cable connectors must face the back of the PC. Insert and tighten the four screws. 5 Attach the data and power supply cables to the back of the hard disk drive. Serial ATA hard disk drive Parallel ATA hard disk drive WARNING: For Serial ATA hard disk drives, do not use right angle data and power cable connectors. Right angle connectors will bend against the chassis bottom, and may break. Serial ATA data and power cables must have straight connectors. WARNING: For Parallel ATA hard disk drives, connect the IDE cable end labeled Secondary to the secondary hard disk drive. You must purchase a separate Parallel ATA hard disk drive connection cable. 10 Upgrading and Servicing Guide
-
 1
1 -
2
-
3
-
4
-
5
-
6
-
7
-
8
-
 9
9 -
 10
10 -
 11
11 -
 12
12 -
 13
13 -
 14
14 -
 15
15 -
 16
16 -
 17
17 -
 18
18 -
 19
19 -
20
 |
 |