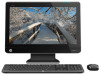
HP Omni 220-1155xt Wall Mounting Guide
HP Omni 220-1155xt Manual
 |
View all HP Omni 220-1155xt manuals
Add to My Manuals
Save this manual to your list of manuals |
HP Omni 220-1155xt manual content summary:
- HP Omni 220-1155xt | Wall Mounting Guide - Page 1
Wall-Mounting your HP computer User Guide - HP Omni 220-1155xt | Wall Mounting Guide - Page 2
services. Nothing herein should be construed as constituting an additional warranty. HP shall not be liable for technical or editorial errors or omissions contained herein. HP in the United States and/or other countries/ regions. HP supports lawful use of technology and does not endorse or encourage - HP Omni 220-1155xt | Wall Mounting Guide - Page 3
Table of contents 1 Preparing your HP computer for wall-mounting 1 What you need ...1 Safety information ...1 Before removing the stand ...2 Removing the computer stand ...2 2 Reinstalling the stand on your HP computer 9 What you need ...9 Safety information ...9 Before replacing the stand ...9 - HP Omni 220-1155xt | Wall Mounting Guide - Page 4
iv - HP Omni 220-1155xt | Wall Mounting Guide - Page 5
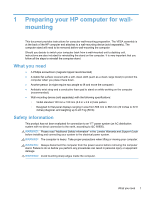
the back of the HP computer and attaches to a wall-mounting device (sold separately). The computer stand will need to be removed before wall-mounting the computer. Should you decide to switch your computer back from a wall-mounted unit to desktop unit, instructions are also included for reinstalling - HP Omni 220-1155xt | Wall Mounting Guide - Page 6
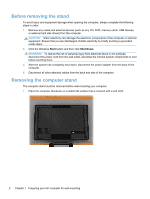
disk drives) from the computer. CAUTION: Static electricity can damage the electronic components of the computer or optional equipment. Ensure that of the computer. Removing the computer stand The computer stand must be removed before wall-mounting your computer. 1. Place the computer facedown on - HP Omni 220-1155xt | Wall Mounting Guide - Page 7
inserting your finger in the slot and lifting the cover off. 3. Loosen the two screws at the bottom that secure the back cover to the computer. Keep turning the screwdriver until you hear five clicks. This indicates that the screw is sufficiently loosened. NOTE: Some models may include a third screw - HP Omni 220-1155xt | Wall Mounting Guide - Page 8
4. Remove the back cover by lifting from the I/O area first, and then lifting all the way around the computer. 5. Remove the four screws (1, 2, 3, and 4) that secure the stand to the back of the computer. 4 Chapter 1 Preparing your HP computer for wall-mounting - HP Omni 220-1155xt | Wall Mounting Guide - Page 9
6. To remove the stand, lift it forward toward the top of the computer and then lift it off. 7. Remove the two screws securing the hinge cover to the stand. Save the screws. Removing the computer stand 5 - HP Omni 220-1155xt | Wall Mounting Guide - Page 10
8. Push the hinge cover down to remove it from the stand. 9. Push the hinge cover into place at the back of the computer. 6 Chapter 1 Preparing your HP computer for wall-mounting - HP Omni 220-1155xt | Wall Mounting Guide - Page 11
10. Install the screw to secure the hinge cover to the back of the computer. 11. Replace the back cover on the computer. Press the cover so it snaps into place, and ensure that there are no gaps between the computer and the cover. Removing the computer stand 7 - HP Omni 220-1155xt | Wall Mounting Guide - Page 12
you can convert your computer back to a desktop unit in the future. Follow all the steps in Reinstalling the stand on your HP computer on page 9. 13. Attach the wall-mounting hardware (purchased separately) according to the manufacturer's instructions to the back of the computer, using the 100 mm - HP Omni 220-1155xt | Wall Mounting Guide - Page 13
" in the Limited Warranty and Support Guide before installing and connecting your system to the electrical power system. WARNING! The computer is heavy. Take proper precautions when lifting or moving your computer. WARNING! Always disconnect the HP TouchSmart PC from the power source before removing - HP Omni 220-1155xt | Wall Mounting Guide - Page 14
remove it from the wall. 6. Following the manufacturer's instructions, remove the wall-mounting hardware from the VESA adapter plate on the computer. Replacing the computer stand Perform the following steps to replace the computer stand on your computer. 1. Loosen the two screws at the bottom that - HP Omni 220-1155xt | Wall Mounting Guide - Page 15
2. Remove the back cover by lifting from the I/O area first, and then lifting all the way around the computer. 3. Remove the screw that secures the hinge cover to the back of the computer and then remove the hinge cover. Replacing the computer stand 11 - HP Omni 220-1155xt | Wall Mounting Guide - Page 16
4. Replace the hinge cover on the stand by sliding it up into place, aligning the screw holes on the hinge cover with the screw holes on the stand. 5. Install the two screws to secure the hinge cover to the stand. 12 Chapter 2 Reinstalling the stand on your HP computer - HP Omni 220-1155xt | Wall Mounting Guide - Page 17
6. Place the stand on the back of the computer, inserting the two tabs at the top of the stand into the two slots on the computer. Align the four screw holes on the stand with the screw holes on the computer. 7. Insert the four screws to secure the stand to the back of the - HP Omni 220-1155xt | Wall Mounting Guide - Page 18
so it snaps into place, and ensure that there are no gaps between the computer and the cover. 9. Tighten the two screws at the bottom of the computer to secure the back cover to the back of the computer. If present, tighten the screw (1) at the center of the back cover. 14 Chapter - HP Omni 220-1155xt | Wall Mounting Guide - Page 19
10. Install the VESA cover on the back of the computer. 11. Place the computer in an upright position. 12. Connect the power cord. 13. Connect any cables that were previously disconnected. Replacing the computer stand 15
-
 1
1 -
 2
2 -
 3
3 -
 4
4 -
 5
5 -
 6
6 -
 7
7 -
8
-
9
-
10
-
11
-
12
-
13
-
14
-
15
-
16
-
17
-
18
-
19
 |
 |

Wall-Mounting your HP computer
User Guide