HP Omni 220-1155xt Wall Mounting Guide - Page 7
Some models may include a third screw 1 in the center of the back cover. If this, screw is present
 |
View all HP Omni 220-1155xt manuals
Add to My Manuals
Save this manual to your list of manuals |
Page 7 highlights
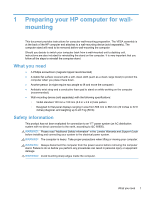
2. Remove the VESA cover at the back of the computer by inserting your finger in the slot and lifting the cover off. 3. Loosen the two screws at the bottom that secure the back cover to the computer. Keep turning the screwdriver until you hear five clicks. This indicates that the screw is sufficiently loosened. NOTE: Some models may include a third screw (1) in the center of the back cover. If this screw is present, loosen it also. Removing the computer stand 3
-
 1
1 -
 2
2 -
 3
3 -
 4
4 -
 5
5 -
 6
6 -
 7
7 -
 8
8 -
 9
9 -
 10
10 -
 11
11 -
 12
12 -
13
-
14
-
15
-
16
-
17
-
18
-
19
 |
 |

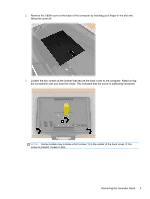
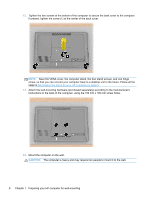
2.
Remove the VESA cover at the back of the computer by inserting your finger in the slot and
lifting the cover off.
3.
Loosen the two screws at the bottom that secure the back cover to the computer. Keep turning
the screwdriver until you hear five clicks. This indicates that the screw is sufficiently loosened.
NOTE:
Some models may include a third screw (1) in the center of the back cover. If this
screw is present, loosen it also.
Removing the computer stand
3