HP Omni 220-1155xt Wall Mounting Guide - Page 8
Preparing your HP computer for wall-mounting, Remove the back cover by lifting from the I/O area first
 |
View all HP Omni 220-1155xt manuals
Add to My Manuals
Save this manual to your list of manuals |
Page 8 highlights
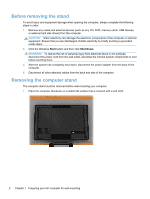
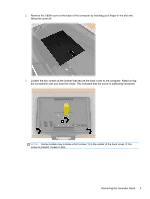
4. Remove the back cover by lifting from the I/O area first, and then lifting all the way around the computer. 5. Remove the four screws (1, 2, 3, and 4) that secure the stand to the back of the computer. 4 Chapter 1 Preparing your HP computer for wall-mounting
-
 1
1 -
2
-
 3
3 -
 4
4 -
 5
5 -
 6
6 -
 7
7 -
 8
8 -
 9
9 -
 10
10 -
 11
11 -
 12
12 -
 13
13 -
14
-
15
-
16
-
17
-
18
-
19
 |
 |
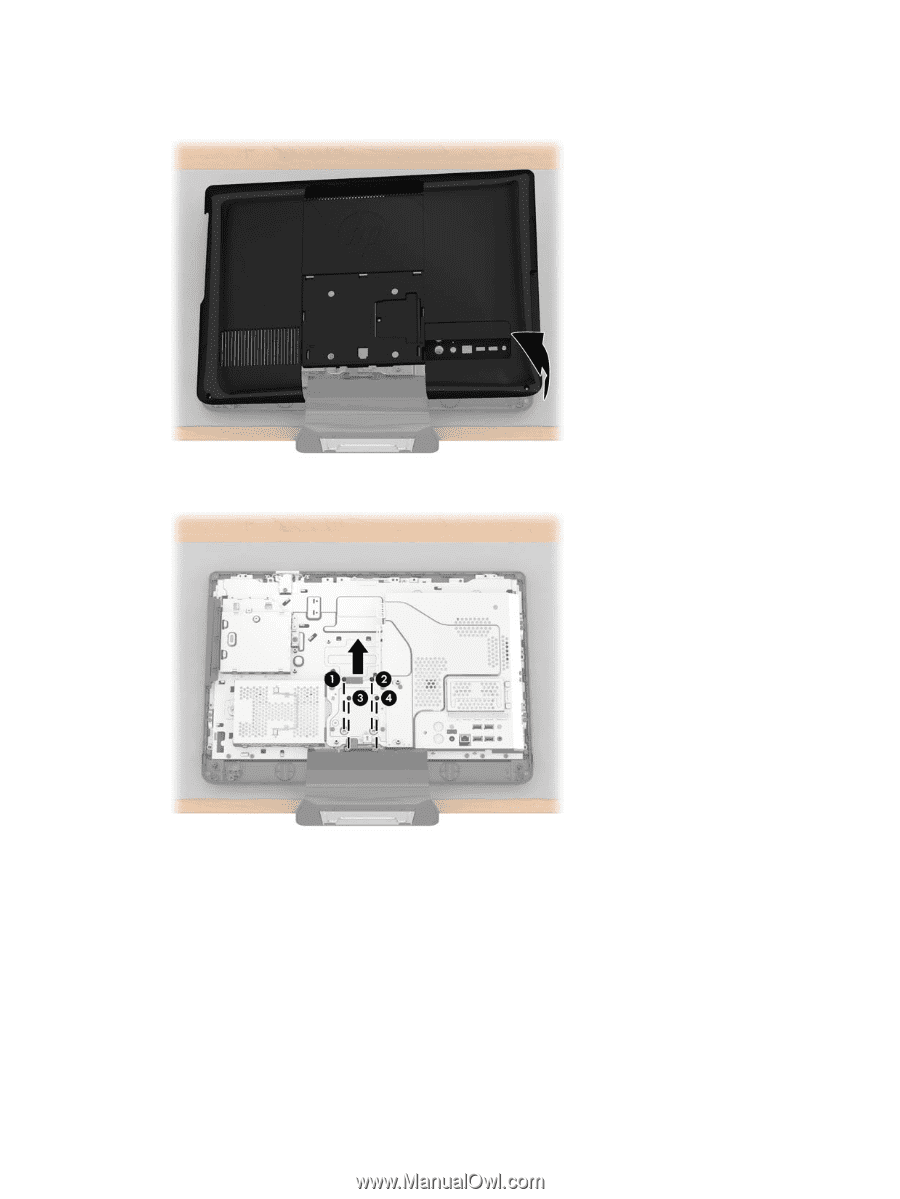
4.
Remove the back cover by lifting from the I/O area first, and then lifting all the way around the
computer.
5.
Remove the four screws (1, 2, 3, and 4) that secure the stand to the back of the computer.
4
Chapter 1
Preparing your HP computer for wall-mounting