HP Omni 220-1155xt Wall Mounting Guide - Page 5
Preparing your HP computer for wall-mounting, What you need, Safety information - desktop
 |
View all HP Omni 220-1155xt manuals
Add to My Manuals
Save this manual to your list of manuals |
Page 5 highlights
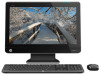
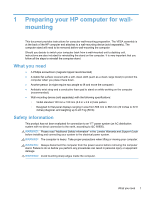
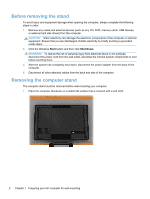
1 Preparing your HP computer for wallmounting This document provides instructions for computer wall-mounting preparation. The VESA assembly is at the back of the HP computer and attaches to a wall-mounting device (sold separately). The computer stand will need to be removed before wall-mounting the computer. Should you decide to switch your computer back from a wall-mounted unit to desktop unit, instructions are also included for reinstalling the stand on the computer. It is very important that you follow all the steps to reinstall the computer stand. What you need ● A Phillips screwdriver (magnetic-tipped recommended) ● A stable flat surface covered with a soft, clean cloth (such as a clean, large towel) to protect the computer when you place it face down. ● Another person (it might require two people to lift and move the computer) ● Antistatic wrist strap and a conductive foam pad to stand on while working on the computer (recommended) ● Wall-mounting device (sold separately) with the following specifications: ◦ VESA standard 100 mm x 100 mm (3.9 in x 3.9 in) hole pattern ◦ Designed for flat-panel displays ranging in size from 508 mm to 582 mm (20 inches to 22.9 inches) diagonal, and weighing up to 22.7 kg (50 lb) Safety information This product has not been evaluated for connection to an "IT" power system (an AC distribution system with no direct connection to the earth, according to IEC 60950). WARNING! Please read "Additional Safety Information" in the Limited Warranty and Support Guide before installing and connecting your system to the electrical power system. WARNING! The computer is heavy. Take proper precautions when lifting or moving your computer. WARNING! Always disconnect the computer from the power source before removing the computer stand. Failure to do so before you perform any procedures can result in personal injury or equipment damage. WARNING! Avoid touching sharp edges inside the computer. What you need 1
-
 1
1 -
 2
2 -
 3
3 -
 4
4 -
 5
5 -
 6
6 -
 7
7 -
 8
8 -
 9
9 -
 10
10 -
 11
11 -
12
-
13
-
14
-
15
-
16
-
17
-
18
-
19
 |
 |
